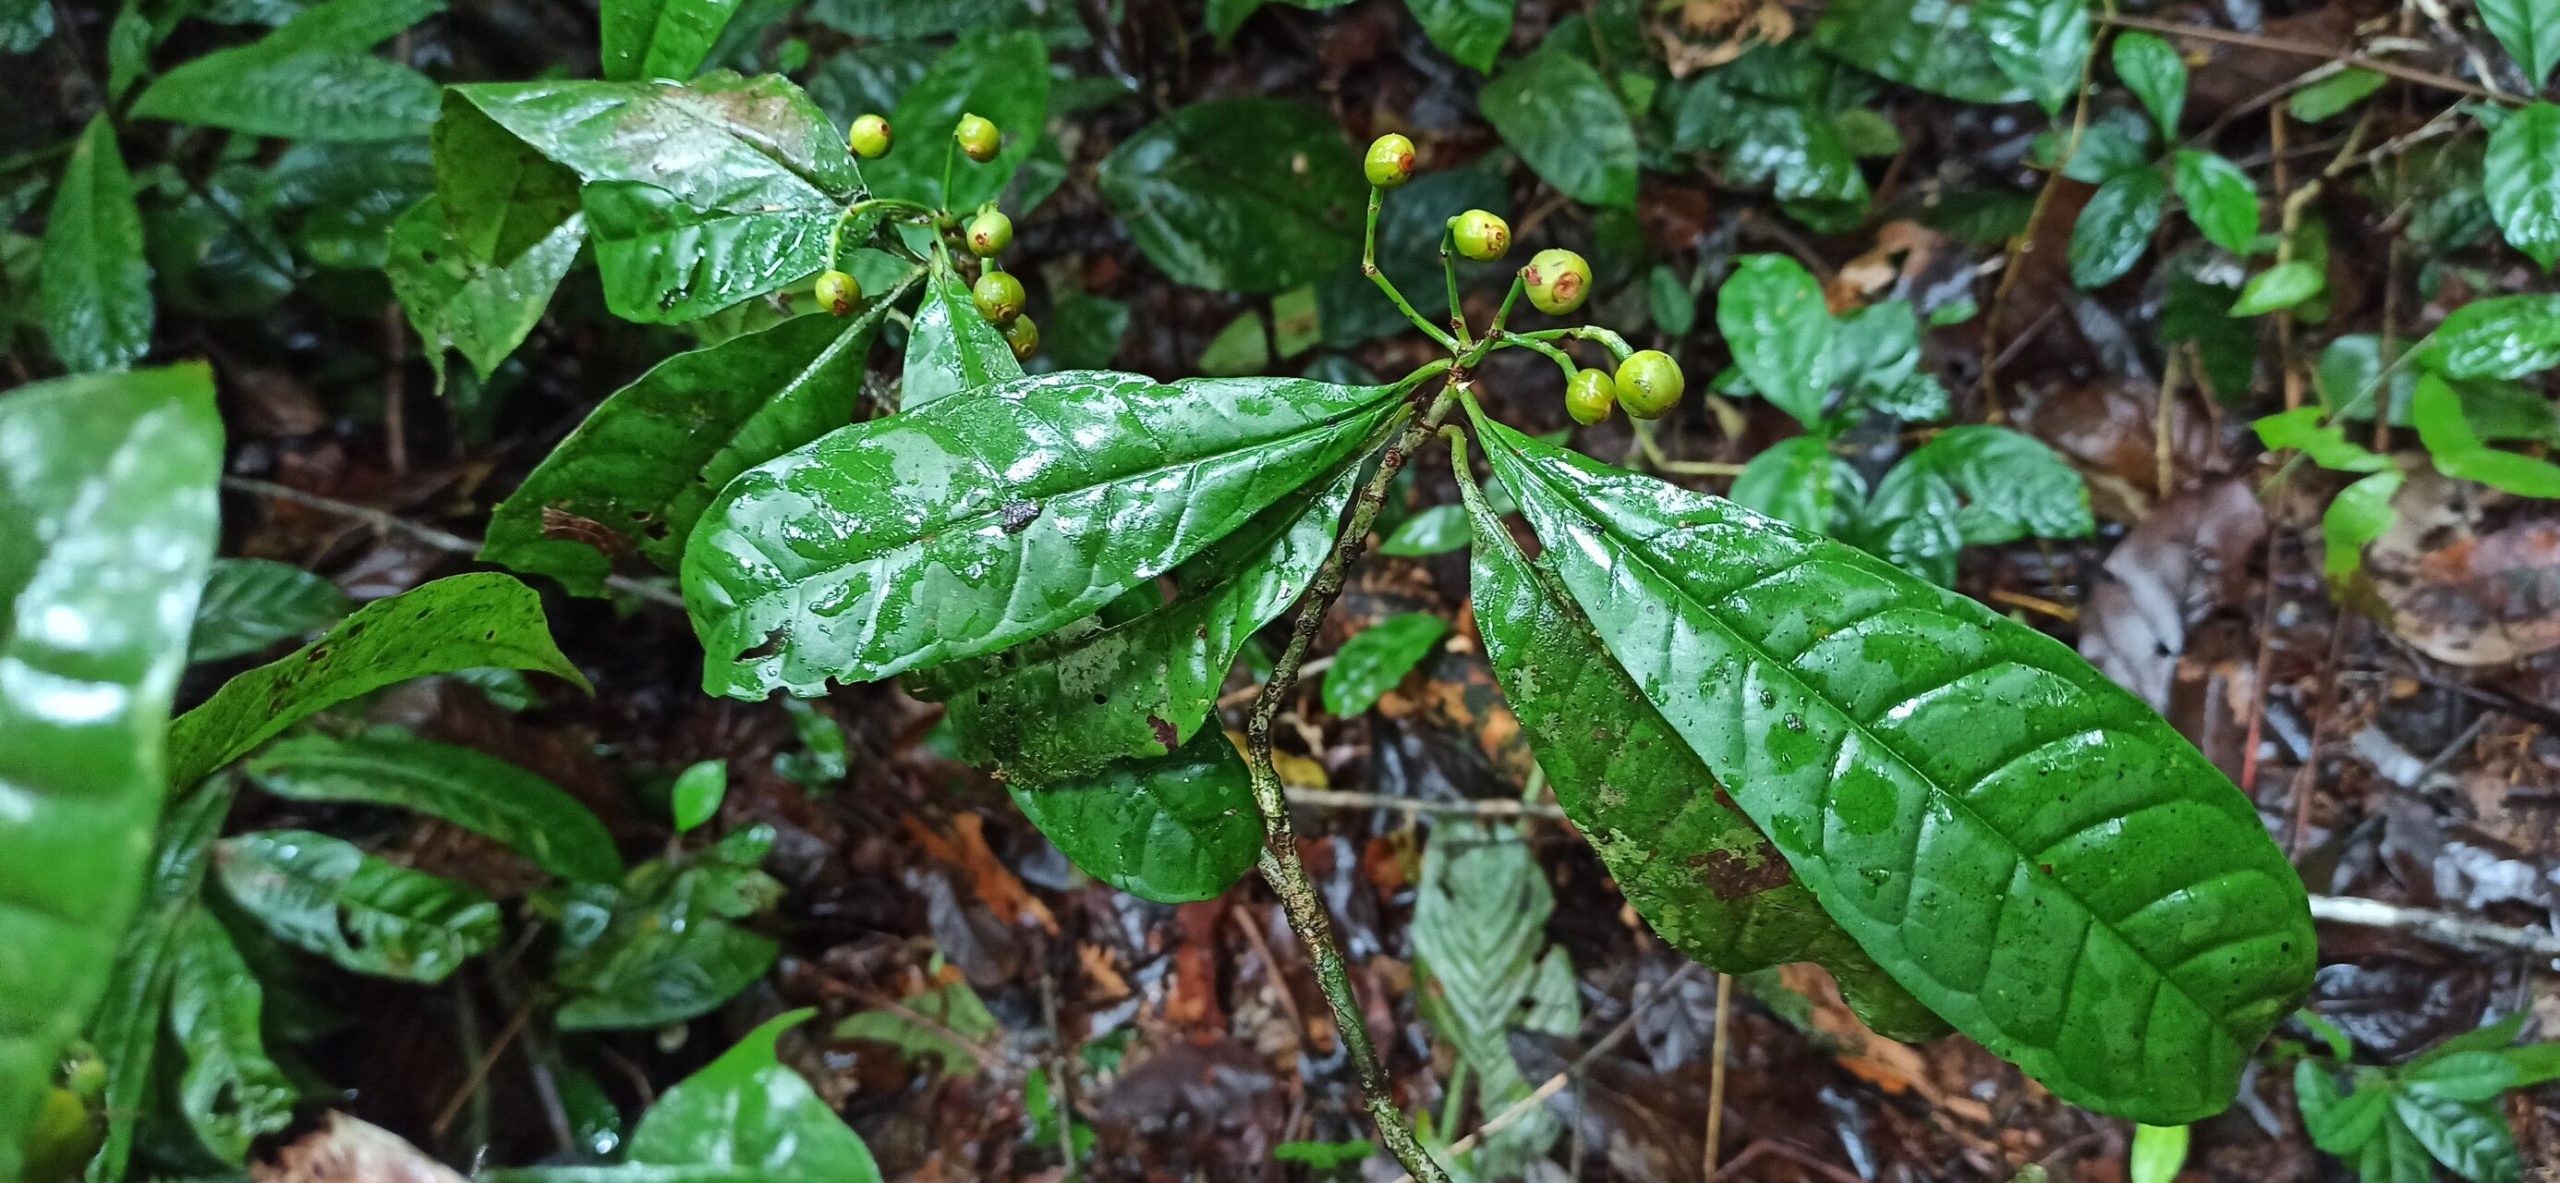
Hello fellow plant lovers! I’m so excited to talk to you today about a truly special plant: Psychotria breteleri. If you’ve ever seen this beauty, you know why it captured my heart. Its glossy, emerald leaves and potential for delicate blooms are simply captivating. And the best part? You can absolutely bring more of its magic into your own home by propagating it. While it might seem a little intricate at first glance, I promise, with a little guidance, you’ll find propagating these gems to be a deeply rewarding experience. For beginners, I’d say it’s a rewarding challenge, but definitely achievable!
The Best Time to Start
When it comes to giving your Psychotria breteleri the best shot at successful propagation, timing is everything. I’ve found the absolute sweet spot to be in late spring or early summer. This is when the plant is actively growing, buzzing with energy from longer daylight hours and warmer temperatures. You’ll want to take cuttings from healthy, non-flowering stems – they’re packed with the vital energy needed to root. Think of it as catching the plant at its peak vitality!
Supplies You’ll Need
Gathering your tools before you begin always makes the process so much smoother. Here’s what I keep on hand:
- Sharp, sterilised pruning shears or a clean knife: For precise cuts, which helps prevent disease.
- Rooting hormone (powder or gel): This is a game-changer for encouraging root development.
- Well-draining potting mix: A good blend of perlite, peat moss, and a bit of orchid bark usually works wonders. You want something that drains freely but still holds a touch of moisture.
- Small pots or containers: Clean, with drainage holes, of course!
- Plastic bag or propagation dome: To create a humid environment.
- Watering can with a fine spray nozzle: For gentle watering.
Propagation Methods: Stem Cuttings
This is my go-to method for Psychotria breteleri because it’s usually quite successful. Let’s dive in:
- Select a healthy stem: Look for a vibrant, green stem that is firm but not woody. Aim for pieces that are about 4-6 inches long.
- Make the cut: Using your sterilised shears, make a clean cut just below a leaf node. A leaf node is that little bump on the stem where a leaf grows from. This is where the magic of root formation often begins.
- Prepare the cutting: Gently remove the lower leaves. You usually want to leave just one or two at the very top, otherwise, those submerged leaves will rot.
- Apply rooting hormone: Dip the cut end of your stem into your rooting hormone. Tap off any excess. This step really gives your cutting a boost.
- Plant your cutting: Fill your small pots with your prepared potting mix. Make a small hole with your finger or a pencil and gently insert the cutting, ensuring the leaf nodes are covered by the soil. Firm the soil gently around the stem.
- Water gently: Give the soil a good, but gentle, watering. You want it moist, but not waterlogged.
- Create humidity: Cover the pot with a plastic bag or propagation dome. This creates a little greenhouse effect, keeping the humidity high, which cuttings absolutely adore. Make sure the leaves aren’t touching the plastic if possible – it can encourage rot. Place it in a bright spot, but out of direct sunlight.
The “Secret Sauce” (Pro Tips)
Now, here are a couple of things I’ve learned over the years that really make a difference.
- Bottom Heat is Your Friend: If you can, place your pots on a gentle heat mat. This extra warmth at the roots encourages them to start developing much faster. It’s like giving your little cuttings a warm hug!
- Don’t Disturb Too Soon: Resist the urge to yank on your cutting to see if it has roots! Patience is key here. I usually wait at least 4-6 weeks before gently tugging. If you feel resistance, that’s a good sign!
- The “Leaf Drop” Wake-Up Call: Sometimes, a cutting might look a little sad and droopy for a while. Don’t despair! If it’s still firm and not mushy, it might just be conserving energy. If the leaves start to fall off, that’s often a sign it’s focusing all its energy on root production.
Aftercare & Troubleshooting
Once you start to see a little new growth or feel that pleasant resistance when you very gently tug, congratulations! Your cutting is likely on its way to becoming a new plant.
Continue to keep the soil consistently moist but not soggy. You can gradually reduce the humidity by opening the plastic bag or propagation dome a little each day over a week or so, allowing the plant to acclimate to normal room humidity. Once it’s looking robust and has a good root system, you can transplant it into a slightly larger pot with fresh potting mix.
The most common issue you might encounter is rot. This usually happens if the soil is too wet or the humidity is too high for too long without good air circulation. If you see the stem turning mushy or black, it’s likely rot. Unfortunately, there isn’t much you can do once rot sets in, so prevention is key. Ensure your potting mix is excellent for drainage and don’t overwater!
A Little Encouraging Closing
Propagating plants is a journey, and it’s one filled with so much learning and reward. Don’t be discouraged if your first attempt isn’t perfect. Every cutting you try brings you closer to understanding these beautiful plants a little better. Be patient, enjoy the process of nurturing those tiny beginnings, and soon you’ll have a whole collection of your own Psychotria breteleri to share (or keep all to yourself!). Happy propagating!
Resource:
https://identify.plantnet.org/k-world-flora/species/Psychotria%20breteleri%20O.Lachenaud/data