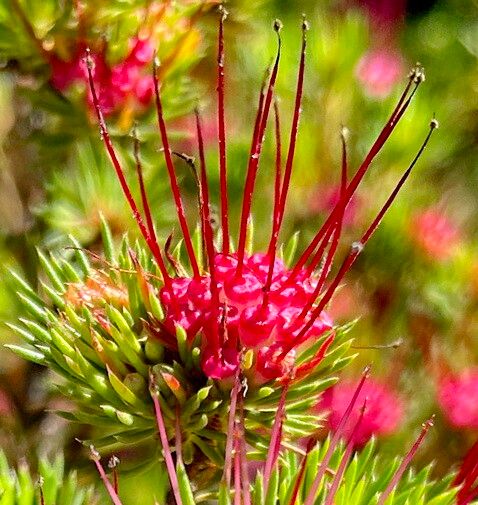
Hello there, fellow plant lovers! Today, I want to chat about a gem of a shrub that I absolutely adore: Darwinia fascicularis. If you haven’t met this beauty yet, imagine delicate, bell-shaped flowers, often in shades of red or pink, a cascade of foliage that just begs to be admired – it’s truly a stunner. Propagating it is one of those gardening joys that offers a real sense of accomplishment, almost like unlocking a little botanical secret.
Now, for those of you just dipping your toes into the world of propagation, I’ll be honest; Darwinia fascicularis can be a tad finicky. It’s not the absolute easiest plant for a complete beginner, but with a little care and attention, it’s absolutely achievable and incredibly rewarding. Think of it as a delightful challenge!
The Best Time to Start
When it comes to getting your Darwinia cuttings to root, timing is everything. The sweetest spot is usually late spring to early summer. This is when the plant is actively growing, but the new growth has started to firm up a bit – we call this semi-hardwood. This stage gives us the best chance of success. Avoid taking cuttings when the plant is in full flower or during times of extreme heat or cold.
Supplies You’ll Need
Before we get our hands dirty, let’s gather our tools. Having everything ready makes the process so much smoother.
- Sharp Pruning Shears or a Clean Knife: For making nice, clean cuts.
- Rooting Hormone: A powder or gel will really give your cuttings a boost.
- Seedling Trays or Small Pots: With good drainage holes, of course!
- Propagating Mix: I like to use a well-draining mix of perlite, coarse sand, and a bit of peat moss or coco coir. Think airy and not too rich.
- Labels: So you don’t forget what you planted where!
- Clear Plastic Bags or a Propagator: To create a humid environment.
- Watering Can with a Fine Rose: For gentle watering.
- A Dibber or Pencil: To make planting holes.
Propagation Methods: Stem Cuttings
For Darwinia fascicularis, stem cuttings are generally the most successful method. Here’s how I do it:
- Select Your Cuttings: Look for healthy, non-flowering shoots that are about 10-15 cm (4-6 inches) long. As I mentioned, aim for that semi-hardwood stage. You want the tip to be flexible but the bottom part to have a bit of stiffness to it.
- Take the Cuttings: Using your clean pruning shears or knife, make a sharp cut just below a leaf node (where a leaf attaches to the stem). This is where the plant is most likely to form roots.
- Prepare the Cuttings: Gently remove the leaves from the bottom half of the cutting. You want to strip it clean so there are no leaves that will sit in the soil or water, which can lead to rot. You can also lightly wound the bottom inch of the stem if you like – a tiny scratch with your knife can encourage rooting.
- Apply Rooting Hormone: Dip the cut end of the stem into your rooting hormone, tapping off any excess.
- Plant Your Cuttings: Fill your trays or pots with your propagating mix. Use your dibber or a pencil to make holes in the mix. Gently insert the hormone-coated end of each cutting into a hole, firming the mix around it without packing it too tightly. Ensure that no leaves are touching the surface of the soil.
- Water Gently: Give your cuttings a good, gentle watering to settle the soil.
- Create Humidity: Cover the tray or pots with a clear plastic bag or place them in a propagator. This traps moisture and creates that essential humid environment cuttings need to survive while they develop roots. Make sure the plastic doesn’t touch the leaves of the cuttings.
The “Secret Sauce” (Pro Tips)
Here are a couple of little tricks I’ve picked up over the years that can really make a difference:
- Bottom Heat is Your Friend: If you have access to a heat mat, placing your propagator on it can significantly speed up root development. The warmth encourages the plant to send out roots much more readily. Keep the temperature around 20-22°C (68-72°F).
- Cleanliness Prevents Pests (and Rot!): Before you start, make sure your tools, pots, and trays are sparkling clean. This helps prevent fungal diseases and other nasties from attacking your delicate cuttings.
Aftercare & Troubleshooting
Once your cuttings are planted, check them regularly. Water only when the surface of the soil feels dry to the touch. You want the soil to be consistently moist, but never waterlogged.
You’ll know your cuttings have rooted when you see new leaf growth or when they offer some gentle resistance if you tug them very lightly. This usually takes anywhere from 4-8 weeks, sometimes longer.
The most common issue you’ll face is rot. If you see cuttings turning black and mushy, it’s usually a sign of too much moisture and not enough air circulation. If you spot this, try to remove the affected cuttings immediately and ensure your mix is draining well. Sometimes, a lack of rooting can also be due to taking cuttings at the wrong time, or simply not giving them enough patience.
A Little Patience, A Lot of Reward
So there you have it! Propagating Darwinia fascicularis is a journey. It requires a bit of attention and a good dose of patience, but the reward of seeing those tiny new plants emerge and grow is simply wonderful. Don’t be discouraged if your first few attempts aren’t perfect. Every cutting is a learning experience, and before you know it, you’ll have a whole new clutch of these delightful shrubs to admire. Happy propagating!
Resource:
https://identify.plantnet.org/k-world-flora/species/Darwinia%20fascicularis%20Rudge/data