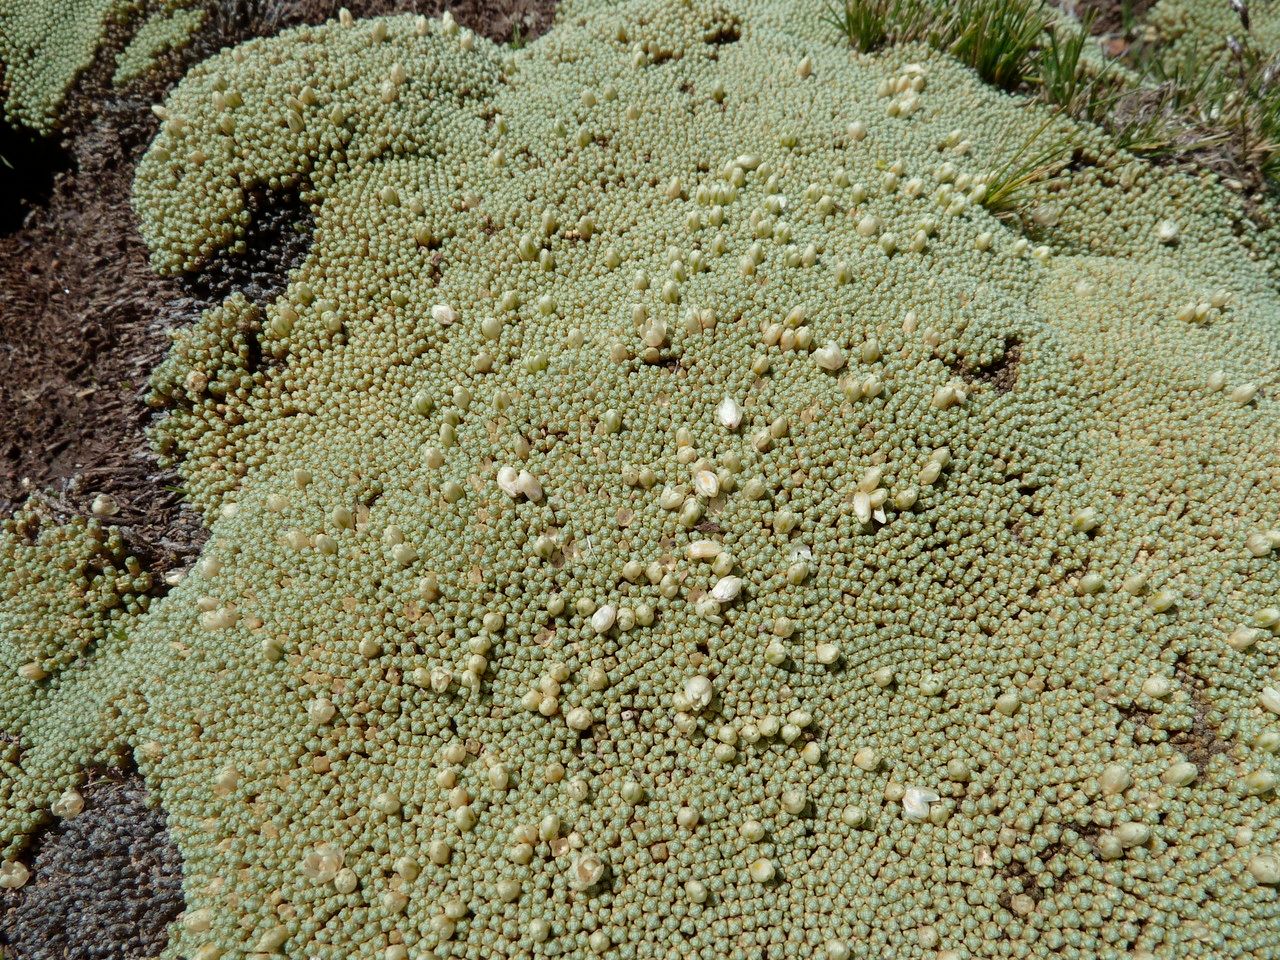
Oh, hello there! Pull up a chair and let’s chat about one of my favorite garden treasures, Pycnophyllum tetrastichum. You know, those delightful, airy mounds of grassy foliage that look like tiny clouds nestled in the garden? They have such a unique, almost ethereal presence. And the best part? You can easily fill your garden (or your friends’ gardens!) with more of them.
Propagating Pycnophyllum tetrastichum is really quite a rewarding experience. It’s not one of those fussy plants that throws a tantrum if you look at it sideways. In fact, I’d say it’s a great plant for beginners looking to dip their toes into the wonderful world of propagation. You’ll get the hang of it in no time, I promise.
The Best Time to Start
For the highest success rate with Pycnophyllum tetrastichum, I always aim for late spring to early summer. This is when the plant is in its active growth phase. The stems are developing nicely, and they have plenty of energy to put into rooting. Trying to propagate too late in the season, when things start to slow down for autumn, can make things a bit more challenging.
Supplies You’ll Need
Here’s what you’ll want to have on hand to get started:
- Sharp pruning shears or a clean knife: For taking clean cuts.
- Rooting hormone (optional but recommended): This can give your cuttings an extra boost. Look for a powder or gel specifically for stem cuttings.
- Well-draining potting mix: I like a blend of about 50% peat moss or coco coir and 50% perlite or coarse sand. This ensures good aeration.
- Small pots or seed trays: Clean ones, of course!
- Plastic bags or a propagation dome: To create a humid environment.
- Watering can or spray bottle: For gentle watering.
- Labels: To keep track of what you’ve planted!
Propagation Methods
The most straightforward way to get more Pycnophyllum tetrastichum is through stem cuttings. Here’s how I do it:
- Select your cuttings: Look for healthy, non-flowering stems that are about 3-4 inches long. Gently bend a stem; if it snaps cleanly, it’s likely ready. Avoid older, woody stems or very young, soft tips.
- Make the cut: Using your sharp shears or knife, make a clean cut just below a leaf node. This is the point where leaves emerge from the stem.
- Prepare the cutting: Gently remove the lower leaves from the cutting, leaving just a few at the top. This prevents them from rotting when placed in the soil or water.
- Dip in rooting hormone (optional): If you’re using rooting hormone, dip the cut end into the powder or gel. Tap off any excess.
- Plant your cuttings: Fill your pots with your well-draining mix. Make a small hole with your finger or a pencil, and insert the cutting, ensuring the nodes where you removed leaves are buried. Gently firm the soil around the cutting.
- Water gently: Water thoroughly until the soil is evenly moist but not waterlogged.
- Create humidity: Cover the pots with a plastic bag or a propagation dome. Make sure the leaves aren’t touching the plastic if possible. You can prop it up with a few skewers if needed.
- Find a good spot: Place your pots in a bright location but out of direct sunlight. Consistent warmth is key, so a sunny windowsill or a spot with a heat mat is ideal.
While water propagation can work for some plants, I’ve found stem cuttings in a soil mix generally yield better results for Pycnophyllum tetrastichum, as it’s less prone to rot. Plus, you avoid the fuss of transplanting delicate water roots.
The “Secret Sauce” (Pro Tips)
Here are a couple of things I’ve learned over the years that seem to make a real difference:
- Don’t rush the water: If you do opt for water propagation, be mindful that only the cut end should touch the water. Any leaves submerged will quickly start to decay and can introduce rot to your cutting. Change the water every few days to keep it fresh.
- Bottom heat is a game-changer: While not strictly necessary, placing your pots on a propagator with a thermostat set around 70-75°F (21-24°C) can significantly speed up root development. It mimics the warmth of spring soil and tells the plant, “It’s time to grow!”
Aftercare & Troubleshooting
Once you’ve got your cuttings planted, the waiting game begins! Keep the soil consistently moist but not soggy. Mist the foliage occasionally if the humidity feels low, especially if you don’t have a dome.
You’ll know your cutting has rooted when you see new green growth appearing at the tip or along the stem. You can also give it a very gentle tug; if there’s resistance, roots have formed. This can take anywhere from 3-6 weeks, so be patient!
The most common issue you’ll encounter is rot. If a cutting turns black and mushy, it’s usually a sign of too much moisture and poor air circulation. Don’t be discouraged! Just remove the affected cutting and adjust your watering and ventilation. Yellowing leaves can sometimes mean too much direct sun; move them to a shadier spot.
A Encouraging Closing
See? Not so daunting, is it? Propagating Pycnophyllum tetrastichum is a wonderful way to multiply these enchanting plants and share them with others. Just remember to be gentle, provide consistent care, and trust the process. Happy propagating, and may your gardens be filled with these delightful little cloud-like beauties!
Resource:
https://identify.plantnet.org/k-world-flora/species/Pycnophyllum%20tetrastichum%20J.Rémy/data