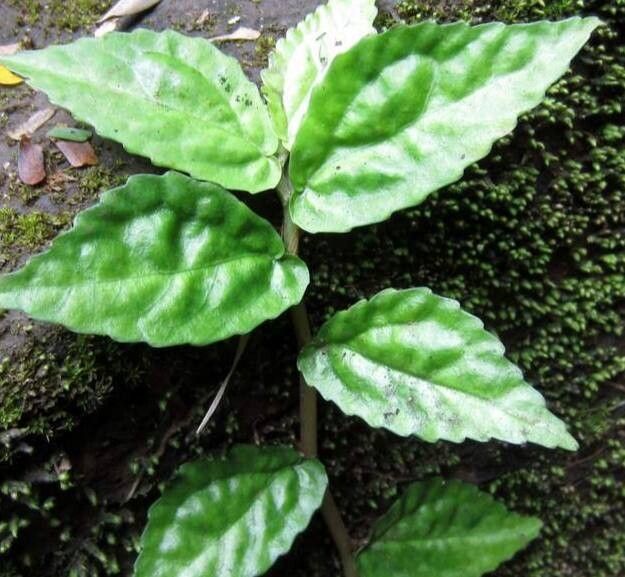
Oh, Pilea pittieri! If you’ve ever marveled at that carpet of heart-shaped leaves, you’re not alone. It’s one of those plants that just radiates charm, isn’t it? And the best part? Bringing more of those beauties into your home is surprisingly doable! I’ve been playing around with Pilea propagation for years, and let me tell you, it’s a joy to watch these little guys take off. For beginners, I’d say it’s pretty friendly. You’ll likely have more success than you expect!
The Best Time to Start
When it comes to Pilea pittieri, you want to propagate when the plant is actively growing. This usually means spring or early summer. You’ll see fresh new growth, and your plant will have the energy to put into developing those roots. Trying to propagate when it’s dormant in winter is like asking someone to run a marathon on an empty stomach – it’s just not going to go as well.
Supplies You’ll Need
Gathering your tools beforehand makes the process so much smoother. Here’s what I usually have on hand:
- Sharp, clean pruning shears or scissors: Essential for making clean cuts.
- Potting mix: A well-draining mix is key. I often use a blend of standard potting soil with perlite or orchid bark to ensure good aeration.
- Small pots or propagation trays: Anything that can hold your cuttings and soil. Old yogurt cups with drainage holes poked in the bottom work in a pinch!
- Rooting hormone (optional): While Pilea pittieri roots readily, a little rooting hormone can give an extra boost.
- Water: For watering your new cuttings.
- A spray bottle: For misting.
- A clear plastic bag or dome: To create a mini-greenhouse effect.
Propagation Methods
The easiest way I’ve found to propagate Pilea pittieri is through stem cuttings. It’s straightforward and always yields great results for me.
- Select a healthy stem: Look for a stem that has at least two or three leaf nodes (where the leaves emerge from the stem). The stem should be firm, not leggy or brown.
- Make the cut: Using your clean shears, cut the stem just below a leaf node. Aim for a cutting that’s about 3-4 inches long. You can take several cuttings at once from a mature plant.
- Prepare the cutting: Gently remove the lower leaves from the cutting, leaving just the top two or three leaves. This prevents them from rotting when planted.
- Apply rooting hormone (optional): If you’re using rooting hormone, dip the cut end of the stem into it. Tap off the excess.
- Plant the cutting: Fill your pot with the well-draining potting mix. Make a small hole in the center and insert the cut end of the stem into the soil, ensuring at least one leaf node is buried. Gently firm the soil around the stem.
- Water lightly: Give the soil a good, gentle watering. You want it moist, but not soggy.
- Create a humid environment: Place a clear plastic bag over the pot, or use a propagation dome. This will trap humidity, which is crucial for root development. You can secure the bag with a rubber band or twist tie.
- Place in bright, indirect light: Find a spot that gets plenty of light but no direct sun, which can scorch the delicate cuttings.
The “Secret Sauce”
Here are a couple of tricks I’ve picked up that really seem to help:
- Don’t let the leaves touch the soil: When you’re planting your stem cutting, make sure the remaining leaves are held up above the soil line. If they sit on damp soil, they’re much more prone to rot and can take the whole cutting down with them. It’s a small detail, but it makes a big difference!
- Bottom heat is your friend: If you have a heating mat designed for seedlings, placing your pots on it can significantly speed up root formation. It mimics the warmth of spring soil and gives those roots a real nudge. Just make sure it’s a low-heat setting.
Aftercare & Troubleshooting
Once you’ve potted up your cuttings, it’s time for patience! Keep the soil consistently moist but not waterlogged. The humidity from the plastic bag is your best friend here. After a few weeks, you should start to see signs of growth – a tiny new leaf unfurling at the tip or even a gentle tug on the cutting if you carefully try to wiggle it (a sign of roots!).
The most common problem you’ll face is rot. If you notice your cutting turning mushy or black at the soil line, it’s likely too much moisture and not enough airflow. If this happens, sadly, it’s usually best to discard it and try again. Sometimes, too little water and lack of humidity can cause the leaves to wilt and dry up, which means it didn’t establish roots before drying out. Just keep an eye on it and adjust watering as needed.
A Welcoming Bloom
Propagating Pilea pittieri is such a rewarding process. Watching those tiny stems transform into established plants is pure magic. Don’t get discouraged if your first try isn’t perfect – gardening is all about learning and adapting. Be patient with your little cuttings, provide them with the right conditions, and soon you’ll have a whole Pilea family to enjoy! Happy propagating!
Resource:
https://identify.plantnet.org/k-world-flora/species/Pilea%20pittieri%20Killip/data