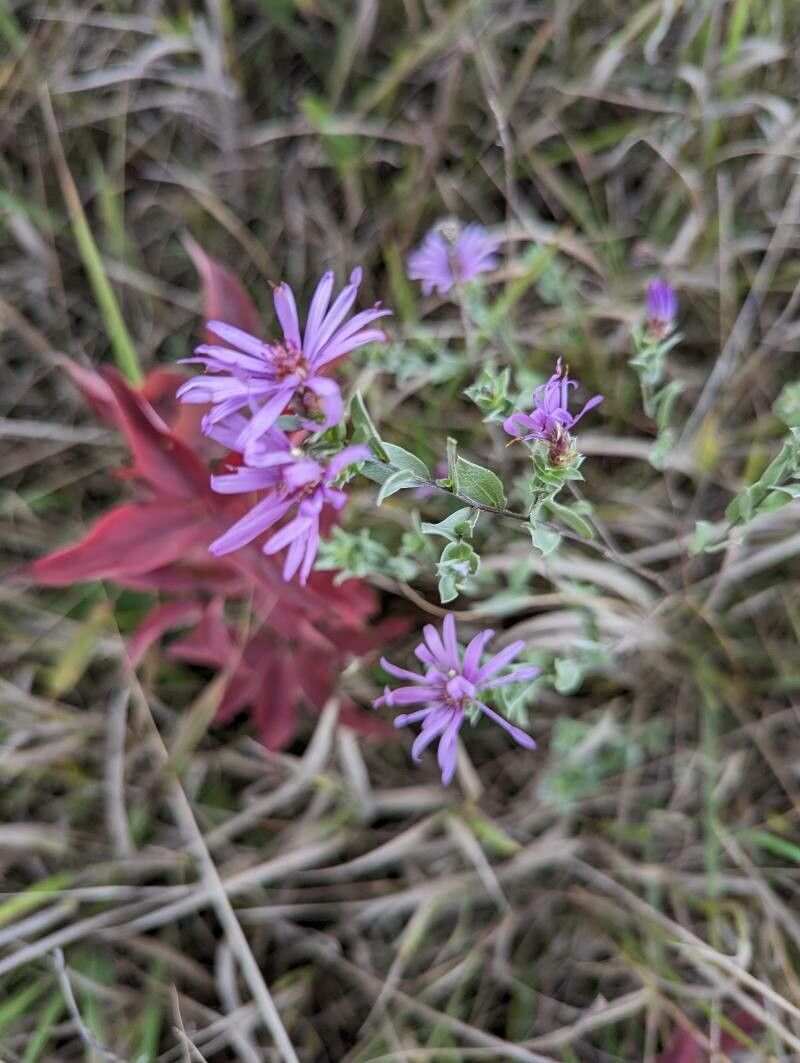
Hello there, fellow plant lovers! It’s so wonderful to have you here in my little digital garden. Today, I want to chat about a plant that truly captures my heart: Silvery Aster (Symphyotrichum sericeum). If you’ve ever admired those delicate, silvery leaves and the cheerful burst of purple flowers that seem to glow in the late afternoon sun, you’re not alone. This prairie native is a gem, and trust me, getting more of them to grow is a deeply satisfying endeavor.
Now, are we talking beginner-friendly here? For Silvery Aster specifically, I’d say it’s borderline. It’s not the easiest plant to propagate for absolute newcomers, but with a little care and attention, I promise you can absolutely succeed. The reward of nurturing a whole new patch of these beauties from just one plant is simply unparalleled.
The Best Time to Start
Timing is everything in the garden, isn’t it? For Silvery Aster, the sweet spot for propagation is late spring to early summer. We’re looking for young, tender growth. Think of it like this: the plant is full of vigor, pushing out new shoots after a good rest. This is when its energy is readily available to focus on developing roots. Waiting until the plant is actively flowering is generally too late, as its energy is directed towards bloom production.
Supplies You’ll Need
Gathering your supplies beforehand makes the whole process so much smoother. Here’s what I always have on hand:
- Sharp, clean pruning shears or a sharp knife: Essential for making clean cuts.
- A good quality potting mix: I like a blend that’s light and drains well. A mix of peat moss, perlite, and a little compost works wonders. You can also use a standard seed-starting mix.
- Small pots or trays: Clean containers are a must to prevent disease.
- Rooting hormone (optional, but recommended): This really gives your cuttings a boost. Look for one with an indole-butyric acid (IBA) base.
- A spray bottle: For misting your cuttings.
- A plastic bag or propagator lid: To create a humid environment.
- Well-rotted compost or leaf mold (for division): To enrich the soil when replanting divided clumps.
Propagation Methods
Silvery Aster is a plant that responds well to a couple of methods. I find stem cuttings and division to be the most reliable.
Stem Cuttings
This is my go-to for increasing my stock.
- Take Cuttings: In late spring or early summer, look for healthy, non-flowering shoots that are about 4-6 inches long. Using your sharp shears, make a clean cut just below a leaf node (where a leaf joins the stem). Remove the lower leaves, leaving just a couple at the top.
- Prepare Cuttings: If you’re using rooting hormone, dip the cut end into it. Give it a gentle tap to shake off any excess.
- Plant Cuttings: Fill your small pots with your prepared potting mix. Make a small hole with your finger or a pencil, and gently insert the cut end of the stem. Firm the soil around it.
- Create Humidity: Water the soil until it’s evenly moist, but not waterlogged. Then, cover the pot with a plastic bag or a propagator lid. This traps humidity, which is vital for cuttings to root. Place the pots in a bright spot, but out of direct sunlight.
Division
This is a great way to rejuvenate established plants and get new ones.
- Dig Up the Plant: In early spring, just as growth is starting, carefully dig up your Silvery Aster clump.
- Separate the Roots: Gently break apart the clump into smaller sections. You want each section to have both roots and at least one healthy shoot. If the roots are very tangled, you can use a clean trowel or even your hands to tease them apart.
- Replant Immediately: Plant the divided sections into their new homes, whether that’s back in your garden or in fresh pots with your potting mix. Water them in well.
The “Secret Sauce” (Pro Tips)
Here are a few little tricks I’ve learned over the years that can really make a difference.
- Don’t let the leaves touch the water: If you’re using a water propagation method (less common for Silvery Aster, but possible for very young shoots), make sure the leaves aren’t submerged. Leaves in water tend to rot, which is the last thing you want.
- Bottom heat is your friend (for cuttings): If you have a heated propagator mat, using it under your pots of cuttings can significantly speed up root development. It mimics the warmth of the soil that roots love.
- Don’t overwater! This is probably the most common mistake. Overly wet soil is an invitation to fungal diseases, and your precious cuttings or divisions will rot before they even have a chance to establish. Keep the soil consistently moist, not soggy.
Aftercare & Troubleshooting
Once your cuttings have roots (you can gently tug on them – if there’s resistance, they’ve rooted!), or your divisions are replanted, it’s time for the next stage.
- Transitioning: Gradually remove the plastic covering from your cuttings over a few days to acclimate them to drier air.
- Watering: Continue to water regularly, allowing the soil to dry out slightly between waterings.
- Feeding: Once your new plants are showing good growth, you can start with a diluted liquid fertilizer once a month during the growing season.
- Signs of Trouble: The most common issue you’ll see is rot. If a cutting turns mushy and black, it’s likely rotted. This usually points to too much moisture or poor air circulation. If your divisions seem to be wilting excessively, ensure they have consistent moisture but not saturation. Sometimes, a little patience is all they need to recover.
And there you have it! Propagating Silvery Aster is a journey that rewards patience and keen observation. Don’t be discouraged if every single cutting doesn’t make it. That’s just part of the learning curve. Enjoy the process, celebrate your successes, and soon you’ll have a whole garden full of these delightful, silvery beauties. Happy gardening!
Resource: