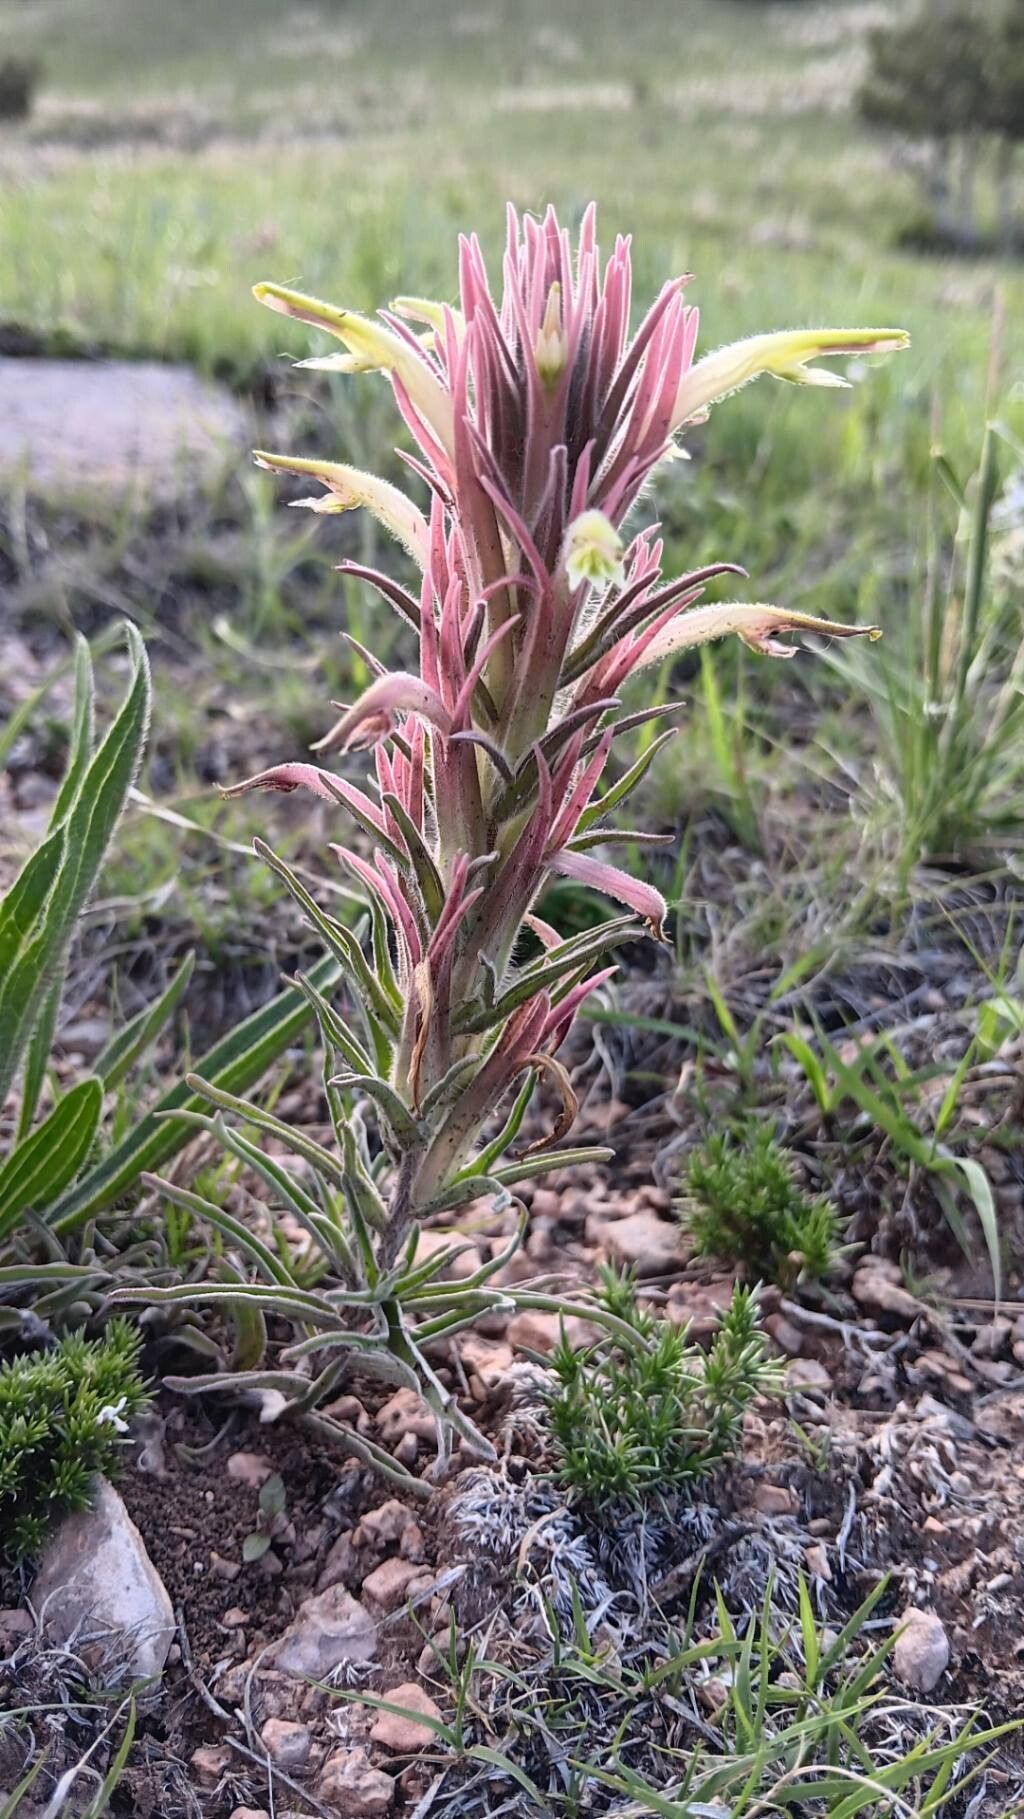
Hello fellow plant lovers! Today, we’re diving into the wonderful world of Castilleja sessiliflora, also known as Desert Paintbrush. These beauties, with their vibrant, often fiery-orange to red bracts (those are the showy leaf-like structures!), bring a splash of wild color to any garden. Getting more of these stunners is incredibly rewarding, seeing a tiny cutting or division flourish into a plant that echoes its parent. Now, I’ll be honest, Castilleja sessiliflora can be a little bit of a diva when it comes to propagation. It’s not the absolute easiest plant for a complete beginner, but with a bit of care and a sprinkle of patience, you can absolutely succeed.
The Best Time to Start
For the highest chance of success, I find late spring to early summer is your golden window. This is when the plant is actively growing, brimming with energy. You want to work with healthy, non-flowering stems or be ready to divide when the plant has finished its main bloom cycle, usually after flowering has ceased.
Supplies You’ll Need
Here’s what I like to have on hand before I get started:
- Sharp, clean pruning shears or a sharp knife: Essential for clean cuts. This minimizes stress and disease.
- Well-draining potting mix: I usually go for a mix of perlite, coarse sand, and a good quality potting soil. A cactus/succulent mix can also work wonders.
- Rooting hormone (optional but helpful): Especially for stem cuttings. Look for one with a fungicide.
- Small pots or propagation trays: Clean ones, of course!
- Watering can with a fine rose or a mister: Gentleness is key.
- A clear plastic bag or a propagator lid: To create a humid environment for cuttings.
- Patience: The most important tool of all!
Propagation Methods
Castilleja sessiliflora is best propagated through a couple of methods:
Stem Cuttings
This is often my go-to for increasing my colony.
- Select your stems: Look for healthy, non-flowering stems that are about 4-6 inches long. They should be firm but not woody.
- Make the cut: Using your clean shears, make a clean cut just below a leaf node. A leaf node is where a leaf emerges from the stem.
- Prepare the cutting: Gently remove the lower leaves from the bottom inch or so of the stem. This prevents them from rotting in the soil.
- Apply rooting hormone: If you’re using it, dip the cut end of the stem into the rooting hormone, tapping off any excess.
- Plant the cutting: Make a small hole in your prepared, slightly moist potting mix. Insert the cutting, ensuring the leaf node where you removed the leaves is buried in the soil. Gently firm the soil around the stem.
- Create humidity: Water thoroughly after planting. Then, cover the pot with a clear plastic bag, sealing it loosely around the rim, or place it in a propagator. This helps retain moisture.
- Provide light and warmth: Place the cuttings in a bright spot out of direct, harsh sunlight. Warmth is also beneficial; a heat mat can be quite effective if you have one.
Division
If your existing plant is looking a bit crowded, this is a great way to get more plants.
- Timing is everything: The best time for division is either in early spring as new growth begins, or in the fall after the plant has finished flowering.
- Gently excavate: Carefully dig up the entire clump. Try to disturb the roots as little as possible.
- Inspect and separate: Gently tease apart the root ball into smaller sections. Each division should have at least one healthy bud or shoot and a good root system. If the roots are very tangled, you might need to carefully use a clean knife or spade to cut through them.
- Replant immediately: Pot up your divisions into well-draining soil, planting them at the same depth they were previously growing. Water them in gently.
The “Secret Sauce” (Pro Tips)
Here are a couple of things I’ve learned over the years that really make a difference:
- Don’t overwater! This is probably the biggest killer of cuttings. Use your finger to check the soil moisture. It should feel slightly moist, never soggy. If planting cuttings, wait until the soil has started to dry out a bit before watering again.
- Bottom heat is your friend for cuttings. A gentle warmth from below really encourages root formation. If you don’t have a heat mat, placing the propagation tray on a sunny windowsill, perhaps with a dark-colored mat underneath, can help absorb a little extra warmth.
- Mist, don’t soak the leaves of cuttings. When you’re creating that humid environment, avoid letting water sit on the leaves for extended periods, as this can encourage fungal issues. A light misting is all you need.
Aftercare & Troubleshooting
Once your cuttings have developed roots (you can often tell by gently tugging on the stem and feeling resistance, or by seeing new growth), it’s time to transition them.
- Acclimatize: Gradually remove the plastic bag or propagator lid over a few days to let the new plants get used to normal humidity.
- Watering: Continue to water when the top inch of soil feels dry. They still need consistent moisture but avoid waterlogged conditions.
- Sunlight: Once they are established, they can be moved to a spot with more direct sunlight.
- Common problems: The most common issue you’ll encounter is rot. This is almost always due to overwatering or poor drainage. If you see a cutting turn mushy and black, or a division’s leaves wilting rapidly, it’s likely rot. Sadly, once it sets in, it can be hard to recover from. Ensure your soil is always well-draining and adjust your watering schedule.
A Encouraging Closing
Propagating Castilleja sessiliflora is a journey, and like all good gardening endeavors, it requires a little faith and a lot of observation. Don’t be discouraged if your first attempt isn’t a roaring success. Learn from it, adjust your approach, and try again. There’s immense satisfaction in nurturing these vibrant plants from small beginnings. Happy propagating!
Resource:
https://identify.plantnet.org/k-world-flora/species/Castilleja%20sessiliflora%20Pursh/data