Oh, hello there! Come on in and grab a mug of something warm. I’m so glad you’re interested in Opuntia lutea. I’ve been growing these beauties for years, and let me tell you, there’s a special kind of satisfaction in watching a tiny piece of this prickly pear transform into a whole new plant. Its vibrant flowers and unique structure are just captivating, aren’t they? And the best part? Propagating Opuntia lutea is wonderfully straightforward, even for those of you just dipping your toes into the world of succulents. You’ll be hooked, I promise!
When the Magic Happens: The Best Time to Start
The sweet spot for propagating Opuntia lutea is undeniably late spring or early summer. This is when the plant is in its most vigorous growth phase. The warmer temperatures and longer days give those cuttings the best chance to establish roots and thrive. Waiting until after the initial bloom, when the plant has had a chance to put on good new growth, is ideal.
Your Propagation Toolkit
Gathering the right tools makes all the difference. Here’s what I always have on hand:
- Sharp, clean pruning shears or a sharp knife: Essential for making clean cuts.
- Well-draining potting mix: A cactus and succulent blend is perfect. You can also make your own by mixing potting soil with perlite or coarse sand.
- Rooting hormone (optional but helpful): This gives your cuttings an extra boost. Look for one formulated for succulents.
- Small pots or trays: Terracotta pots are great because they allow the soil to dry out quicker.
- Gloves: Those spines are no joke!
- A trowel or spoon: For filling pots.
- A watering can with a fine rose attachment or a spray bottle: For gentle watering.
Bringing New Opuntias to Life: Propagation Methods
There are a couple of ways to go about this, and both are pretty darn easy.
1. Stem Cuttings (The Easiest Way)
This is my go-to method and I think you’ll find it the most rewarding.
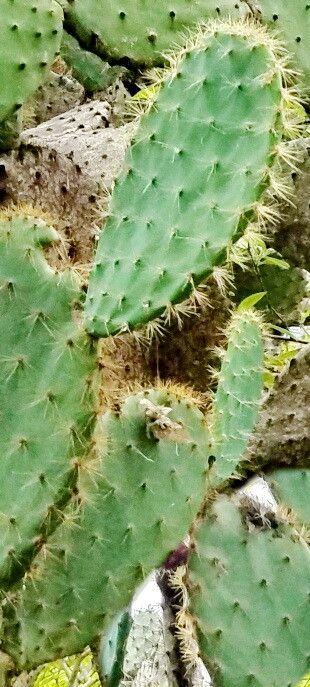
- Find a healthy pad: Look for a mature, firm pad on your Opuntia. Avoid any that look shriveled or waterlogged.
- Make a clean cut: Using your sharp shears or knife, make a clean cut where the pad connects to the main stem or another pad. It’s best to cut at a joint.
- Let it callus: This is a crucial step! Place the cut pad in a dry, well-lit spot, away from direct sun, for 3-7 days (or even longer). You want the cut end to dry out and form a protective scab. This prevents rot when you plant it.
- Plant your cutting: Once callused, you can plant your pad. I like to insert the callused end about an inch or two into your well-draining potting mix. Don’t bury it too deeply!
- Water sparingly: After planting, wait a few days before giving it its first light watering. You want the soil to be just barely moist.
2. Water Propagation (For the Patient and Observant)
While I primarily stick to soil for Opuntia, you can root cuttings in water, though it requires a bit more vigilance.
- Prepare your cutting: Same as above, take a healthy pad and let it fully callus for at least a week, maybe even ten days. This is even more important in water to prevent rot.
- Suspend the cutting: Place the callused cutting so that only the very end of the cut surface is touching or just above the water. You don’t want a large part of the pad submerged. Some people use a jar with a narrow opening to support the pad.
- Change the water regularly: Every few days, refresh the water to keep it clean and oxygenated.
- Patience is key: Roots can take several weeks to appear. Once you see good root development (at least an inch long), you can then transplant it into your well-draining potting mix, following the soil propagation steps.
A Pinch of Expertise: The “Secret Sauce”
Over the years, I’ve learned a few tricks that really seem to help.
- Don’t be afraid of the spines, but be respectful! Wear those gloves, and when handling the pads, I find using a piece of folded newspaper or cardboard to grip them works wonders. It protects both you and the plant.
- Think of it like a desert survivor. Opuntias store water in their pads, so they don’t need much encouragement once planted. Overwatering is the number one killer of new cuttings. I’d rather underwater and wait an extra day than drown a baby plant.
- A little warmth goes a long way. If you’re propagating in early spring or have a cooler house, placing your potted cuttings on a heat mat set to low can significantly speed up root formation. It mimics that nice, warm soil temperature they love.
Nurturing Your New Arrivals & What to Watch For
So, you’ve seen those little white roots peeking out! Congratulations!
- Gradual watering: Once roots are established, you can start watering a bit more regularly, but always let the soil dry out completely between waterings. They are succulents, after all!
- Light is vital: Move your new plants to a bright location, but avoid intense, direct sun for the first few weeks. Gradually acclimate them to more sun as they grow stronger.
- Signs of trouble: Yellowing or mushy pads are usually a sign of rot, often due to overwatering or insufficient drainage. If you see this, act quickly. You might be able to salvage a healthy part of the pad by recutting and letting it callus again. Shriveling, on the other hand, can sometimes indicate insufficient water, but usually, when propagating, it’s better to err on the side of dryness.
Keep Growing!
Propagating Opuntia lutea is such a rewarding journey. It’s a project that connects you with the natural world, and it’s incredibly satisfying to see your effort bloom into new life. Be patient with the process, trust your instincts, and enjoy every step. Happy gardening, my friend!
Resource:
https://identify.plantnet.org/k-world-flora/species/Opuntia%20lutea%20(Rose)%20D.R.Hunt/data