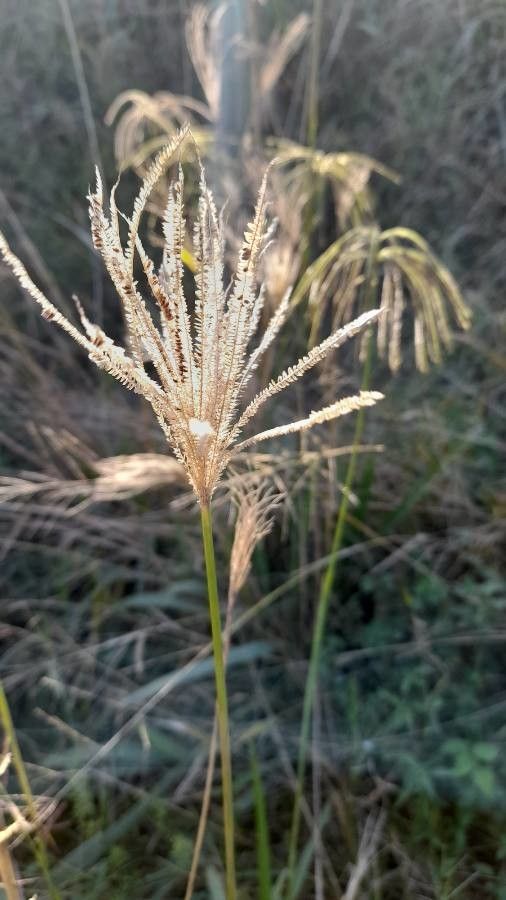
Hello, fellow plant enthusiasts! I’m so excited to chat with you today about a grass that has truly captured my heart: Eustachys paspaloides, often called Sticky Waxy Grass. It’s a beauty, isn’t it? With its delicate, wispy plumes that catch the light just so, it brings such a lovely, airy grace to any garden space. More than just its good looks, though, there’s a deep satisfaction in coaxing new life from existing plants. Propagating this beauty is a wonderfully rewarding experience, and I’m happy to share that it’s quite achievable, even for those just starting their gardening journey.
When to Get Your Hands Dirty
The absolute best time to start propagating Eustachys paspaloides is when the plant is actively growing, usually late spring through mid-summer. You want to see new, healthy growth on your existing plant. This is when it has the most energy to put into developing new roots. Trying to propagate when the plant is dormant or stressed is just setting yourself up for disappointment.
Your Propagation Toolkit
Gathering your supplies beforehand makes the whole process so much smoother. Here’s what you’ll want to have on hand:
- Sharp pruning shears or a clean knife: For making those crucial cuts.
- A good-quality potting mix: I prefer a light, well-draining mix that contains perlite or coarse sand to ensure good aeration. A blend formulated for succulents or cacti often works wonderfully well for grasses.
- Small pots or trays: Clean containers with drainage holes are essential.
- Rooting hormone (optional but helpful): This can give your cuttings an extra boost.
- A spray bottle: For misting.
- Labels: So you don’t forget what you’ve planted where!
Bringing New Life: Propagation Methods
For Eustachys paspaloides, I find division to be the most straightforward and successful method. It’s akin to giving your plant a good haircut and splitting it into manageable pieces.
Propagation by Division:
- Gently dig up the plant: Depending on how established your Eustachys paspaloides is, you might need to dig it up from the ground or carefully remove it from its pot.
- Examine the root ball: Look for natural divisions where the plant seems to be splitting. You’ll want to see healthy roots on each section.
- Separate the divisions: Using your hands or a clean spade, carefully pull the clumps apart. If they are stubborn, you can use your pruning shears or knife to make a clean cut. Aim for divisions that have at least a few shoots and a good amount of root system.
- Potting up: Plant each division in its own small pot filled with your well-draining potting mix. Make sure the base of the new plants is at soil level, just as they were before.
- Water lightly: Give them a gentle watering to help settle the soil around the roots.
The “Secret Sauce”: My Insider Tips
Over the years, I’ve learned a few tricks that just seem to give propagation that extra edge.
- Don’t drown new divisions: While you want to keep the soil consistently moist, avoid waterlogging. Soggy soil is the quickest way to invite rot. Let the top layer of soil start to dry out between waterings.
- Give them a warm welcome: Eustachys paspaloides loves a bit of warmth. Placing your newly divided plants in a location that gets indirect sunlight and ambient warmth (like near a sunny window but not in harsh direct sun) can really encourage root development. A heat mat, if you have one, can be a game-changer.
- Humidity helps: Young divisions often appreciate a little boost in humidity. A light misting with your spray bottle once or twice a day can prevent them from drying out while they establish themselves.
Post-Propagation TLC & What to Watch For
Once your divisions have started to show signs of new growth – you’ll see tiny new shoots emerging – you’re well on your way! Continue to keep the soil consistently moist but not soggy. You can gradually introduce them to more sunlight.
The biggest hurdle you’ll face is rot. If you notice mushy, black stems or leaves that are yellowing and wilting despite adequate watering, this is often a sign of overwatering or poor drainage. In this case, it’s best to remove the affected part immediately. If the whole division seems lost, don’t be discouraged; it happens to all of us!
Keep Growing and Enjoying!
Propagating Eustachys paspaloides is such a wonderful way to expand your collection or share the beauty of this grass with friends. Be patient with your new plants. They’ll take their time getting established, but with a little care and attention, you’ll soon have more of your beloved Sticky Waxy Grass to admire. Happy gardening!
Resource: