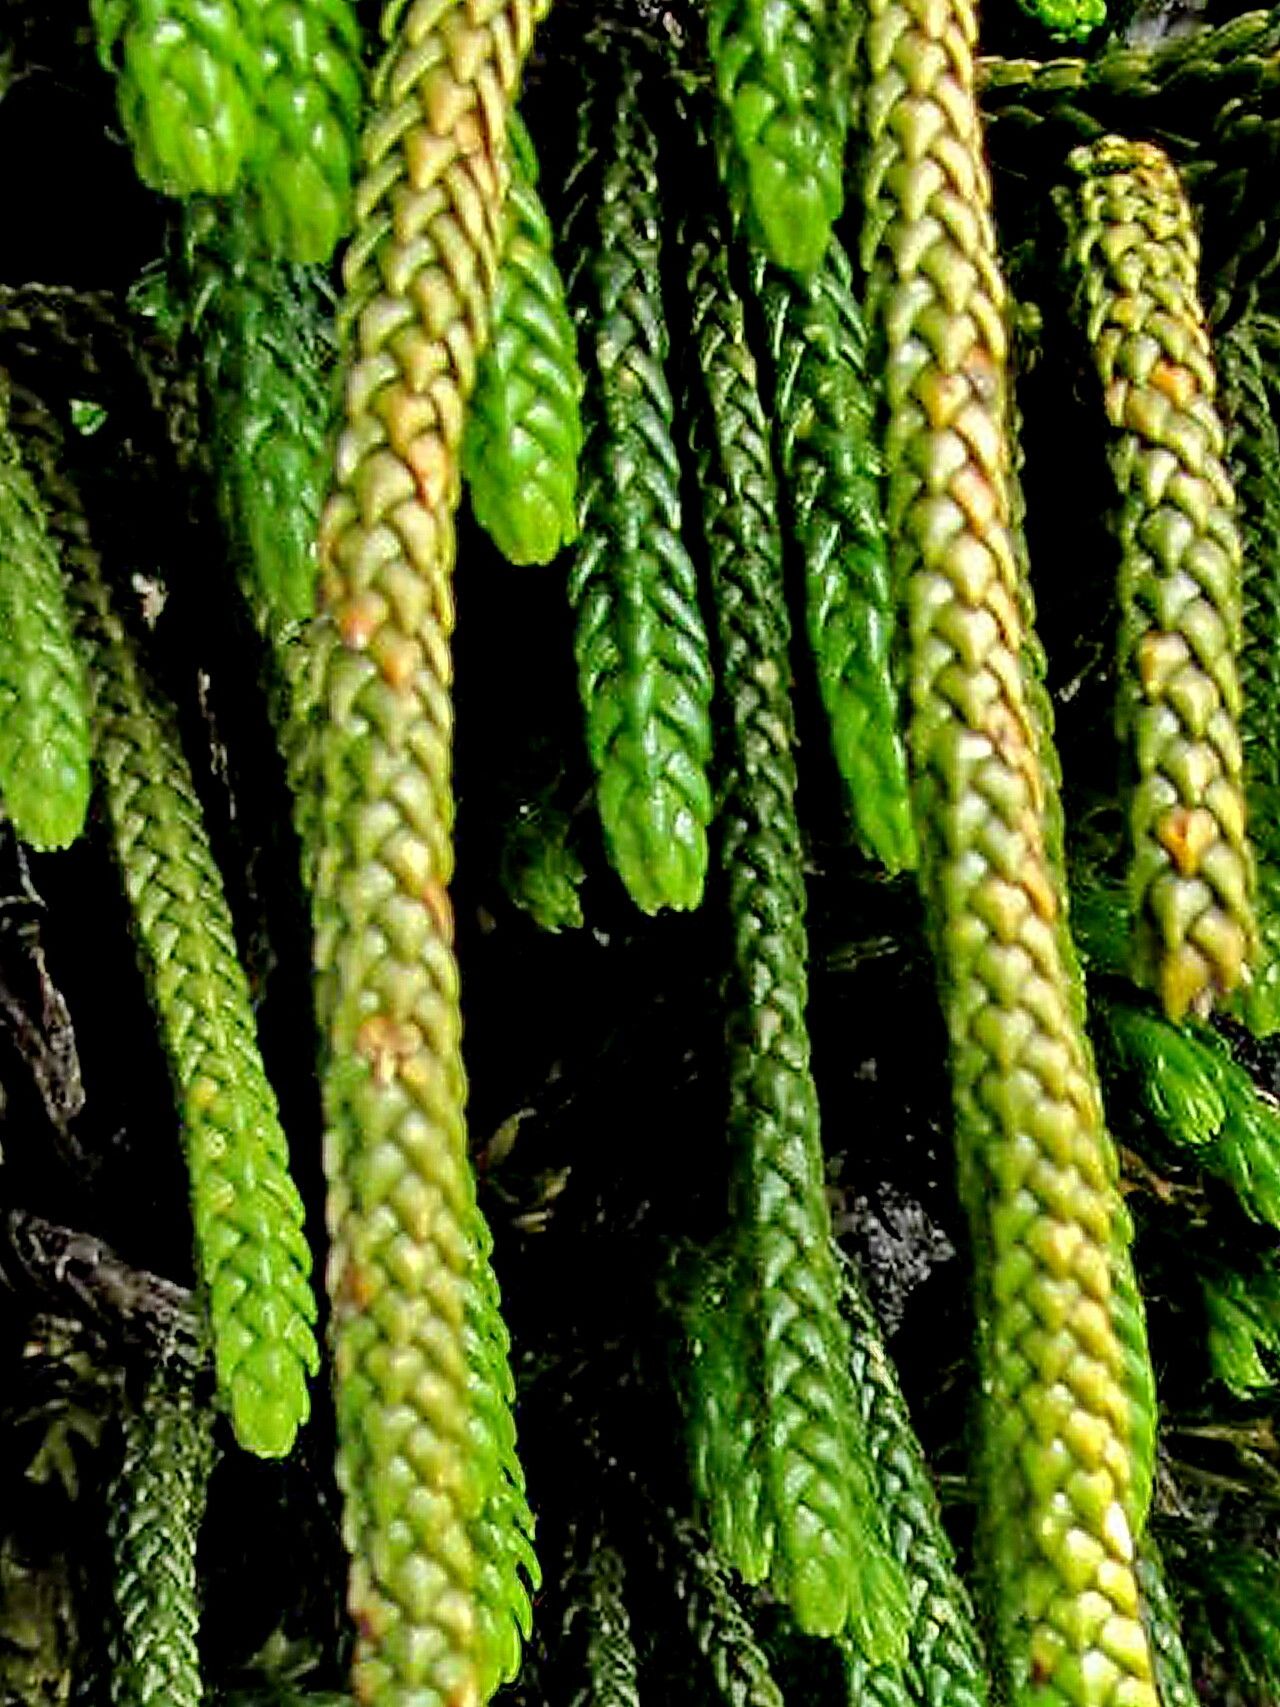
Hello fellow plant lovers! Today, we’re diving into the wonderful world of Huperzia gnidioides, sometimes called trailing clubmoss. If you’re drawn to its unique, trailing habit and the lush, green texture it brings to a shaded corner, you’re in for a treat. Propagating these beauties is a fantastic way to expand your collection, share with friends, or simply marvel at the magic of new life. Now, I’ll be honest, Huperzia gnidioides isn’t the absolute easiest plant to propagate for a complete beginner, but with a little patience and these guidance, you’ll be successful!
The Best Time to Start
For the highest chance of success, I like to start my Huperzia propagations in late spring or early summer. This is when the plant is actively growing and has plenty of energy to put into developing new roots. It’s best to take cuttings from new, healthy growth that’s still somewhat flexible, rather than old, woody stems.
Supplies You’ll Need
Here’s a little kit to get you started:
- Sharp pruning shears or a clean knife: For making clean cuts.
- Well-draining potting mix: A good blend for ferns and aroids works well, or you can make your own with peat moss, perlite, and a bit of orchid bark.
- Small pots or trays: Clean, about 3-4 inches in diameter.
- Rooting hormone (optional but recommended for faster results): A powder or gel formulation.
- Clear plastic bags or a propagation dome: To create a humid environment.
- Spray bottle: For misting.
- Labels and a marker: To keep track of your new babies!
Propagation Methods
Let’s get our hands dirty! I find stem cuttings to be the most reliable method for Huperzia gnidioides.
Stem Cuttings
- Select your cutting: Look for healthy stems about 4-6 inches long. They should have several nodes (little bumps where leaves emerge).
- Make the cut: Using your sharp shears or knife, make a clean cut just below a node.
- Prepare the cutting: Gently remove the lower leaves from about half of the stem. This prevents them from rotting in the soil and encourages root growth higher up.
- Apply rooting hormone (optional): Dip the cut end into your rooting hormone, tapping off any excess.
- Plant the cutting: Fill your small pot with your prepared, moistened potting mix. Make a small hole with your finger and gently insert the cut end of the stem into the soil, ensuring at least one node is buried.
- Firm the soil: Gently firm the soil around the cutting to ensure good contact.
- Create a humid environment: Lightly mist the surface of the soil and the cutting. Then, place the pot inside a clear plastic bag, sealing it loosely, or cover it with a propagation dome. This high humidity is crucial.
The “Secret Sauce” (Pro Tips)
Here are a couple of things I’ve learned over the years that make a real difference:
- Don’t let leaves touch the water in the bag! If you’re using a plastic bag, try to prop it up so the leaves of your cuttings don’t lie against the sides. Condensation is good, but direct leaf contact can lead to rot.
- Bottom heat is a game-changer. Placing your pots on a heat mat set to a low temperature (around 70-75°F or 21-24°C) will significantly speed up root development. It mimics the warmth of spring soil, which these plants love.
Aftercare & Troubleshooting
Once your cuttings are potted, the real waiting game begins.
- Keep it moist but not soggy: Check the soil moisture regularly. It should feel consistently damp, like a wrung-out sponge. If it starts to dry out, lightly mist the surface.
- Provide bright, indirect light: Avoid direct sunlight, which can scorch the delicate new growth and dry out your cuttings too quickly.
- Be patient for roots! It can take anywhere from 4-8 weeks, sometimes longer, for roots to develop. You can gently tug on a cutting to feel for resistance, or if you’re feeling brave, you can sometimes see roots peeking out of the drainage holes.
- Signs of trouble: The most common issue is rot. If your cutting turns mushy, black, or develops mold, it’s likely a goner. This is usually due to too much moisture and not enough air circulation. If you see this happening, remove the affected cutting immediately to prevent it from spreading. Yellowing leaves can also indicate overwatering or a lack of light.
A Encouraging Closing
Watching a new plant emerge from a tiny cutting is one of the most rewarding experiences in gardening. Don’t get discouraged if your first attempt isn’t perfect. Every gardener learns from their successes and their stumbles! So, gather your supplies, take a deep breath, and enjoy the process of nurturing new life. Happy propagating!
Resource:
https://identify.plantnet.org/k-world-flora/species/Huperzia%20gnidioides%20(L.f.)%20Trevis./data