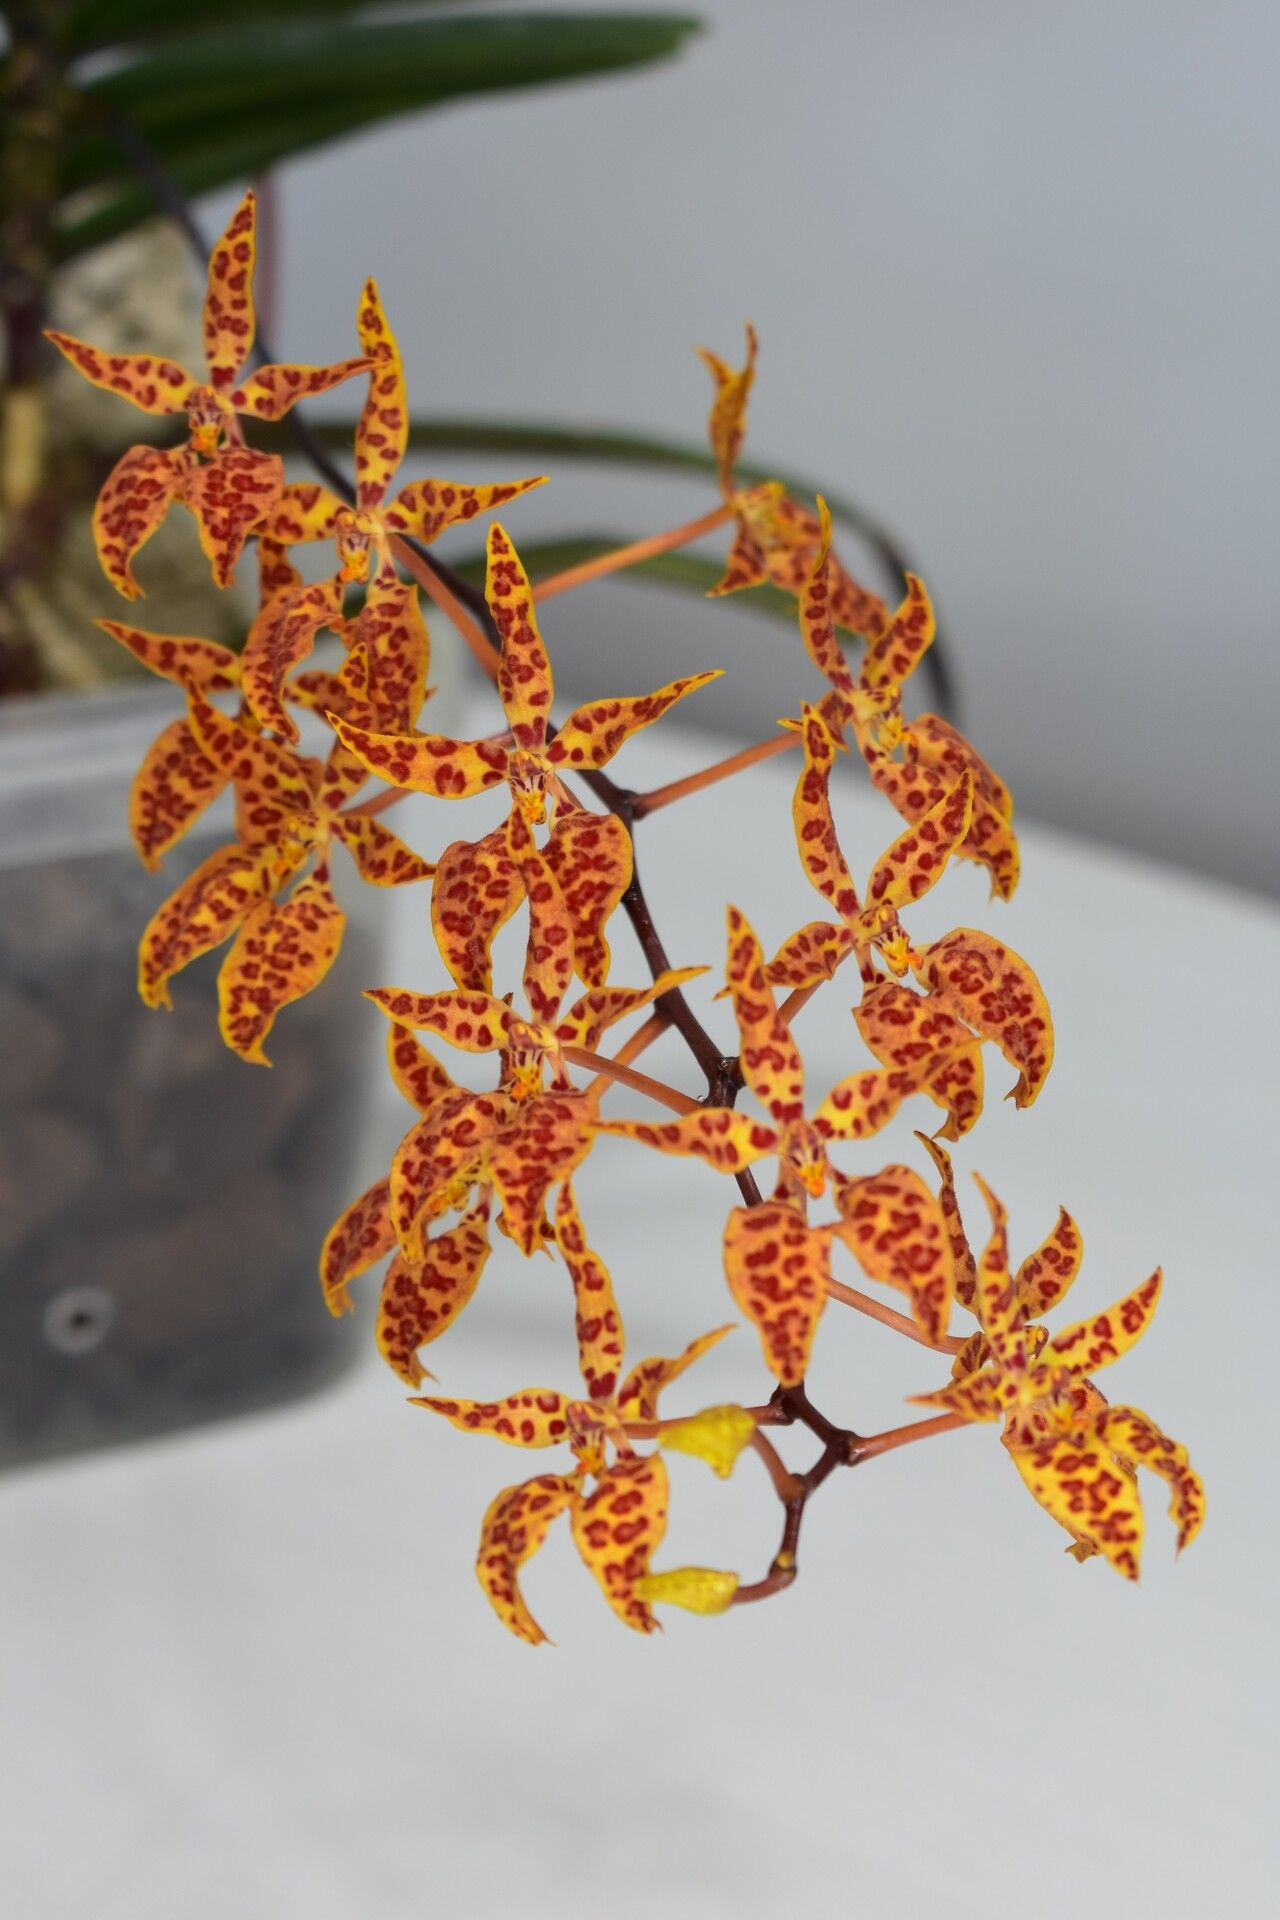
Oh, Renanthera vietnamensis! What a stunner. Those arching sprays of vibrant, fiery red or orange flowers are just show-stopping, aren’t they? I remember the first time I saw one in full bloom – it was like a tropical sunset right in my greenhouse. Propagating this beauty is incredibly rewarding. You get to double, triple, or even quadruple your pleasure, and it’s not as daunting as you might think, though I’ll be honest, it’s not exactly a “stick it in water and forget it” kind of plant for absolute beginners. It requires a little bit of focused attention, but the results are well worth it.
The Best Time to Start
For Renanthera vietnamensis, timing is everything. I find the spring months, just as the plant is waking up from its winter rest and starting to put on new growth, are ideal. You’re looking for new shoots or keikis (baby plantlets) to have emerged and ideally started to develop their own aerial roots. This active growth period means the plant has more energy to dedicate to rooting.
Supplies You’ll Need
Before we dive in, let’s gather our toolkit. Having everything ready will make the process much smoother.
- Sharp, sterile pruning shears or a clean knife: For making precise cuts and preventing disease.
- Cinnamon powder or a mild fungicide: To dust on cuts and protect against infection.
- Sphagnum moss: This is fantastic for holding moisture and encouraging root development.
- Perlite or orchid bark: For creating a well-draining mix.
- Small pots or net pots: Whatever suits your propagation method.
- Rooting hormone (optional but recommended): A gentle dip can give your cuttings a good start.
- A spray bottle: For misting.
- A clear plastic bag or humidity dome: To maintain high humidity around your cuttings.
- Optional: Heat mat: Provides bottom warmth, which can significantly speed up rooting.
Propagation Methods
Renanthera vietnamensis is often propagated through stem cuttings or by separating keikis. Here’s how I tackle it:
Stem Cuttings
- Find a healthy stem that’s at least 6-8 inches long and has at least two to three aerial roots already forming.
- Using your sterilized shears, make a clean cut just below an aerial root. You can take multiple cuttings from a single, mature plant.
- Gently remove the lower leaves, being careful not to damage the aerial roots.
- Dip the cut end into rooting hormone if you’re using it. A little goes a long way.
- Allow the cut end to air dry for a day or two. This helps callus over, preventing rot.
- Prepare your pot by filling it with a well-draining mix of sphagnum moss and perlite or orchid bark. It should be quite airy.
- Gently insert the cutting into the mix, ensuring the aerial roots are nestled within the medium. You might need to stake it lightly to keep it upright.
- Lightly mist the medium and the plant.
- Place the pot inside a clear plastic bag or under a humidity dome. Keep it out of direct sunlight, in bright, indirect light.
Separating Keikis
- Keikis are naturally occurring baby plants that grow off the mother plant. You’re looking for a keiki that has developed its own aerial roots.
- Using your sterilized knife or shears, carefully cut the stem connecting the keiki to the mother plant, making sure to get a bit of the keiki’s base with its roots.
- If the keiki doesn’t have roots yet, I’d advise waiting. It’s much easier when they have their own anchor.
- Pot the keiki similarly to a stem cutting, in a moist, airy mix.
- Cover with a humidity dome or plastic bag.
The “Secret Sauce” (Pro Tips)
Here are a few things I’ve learned over the years that really make a difference:
- Don’t let the leaves touch the water or soggy medium! This is a surefire way to invite rot, especially with orchids. Make sure the aerial roots are the only part making contact with the rooting medium.
- Bottom heat is a game changer. If you can get a gentle bottom heat (around 70-75°F or 21-24°C), it will dramatically speed up root formation. I use a seedling heat mat under my propagation trays in the greenhouse.
- Patience with the aerial roots. When you’re preparing cuttings, try to disturb the existing aerial roots as little as possible. They are what will help your new plant establish itself.
Aftercare & Troubleshooting
Once your Renanthera vietnamensis cutting has started to form new roots – you’ll see them emerging from the medium, or you might even see a new leaf growing – congratulations!
- Gradually acclimate it. Start by opening the plastic bag or dome for a few hours each day. You want to reduce the humidity slowly so the new growth doesn’t shock.
- Continue with bright, indirect light. Avoid direct sun, which can scorch young leaves.
- Water when the medium is almost dry. Orchids don’t like to sit in soggy conditions. Misting the leaves can be beneficial, but ensure good air circulation.
The most common problem you’ll encounter is rot. If you see your cutting turning mushy and black, or if it detaches easily from the medium, it’s likely rot. This is usually due to too much moisture, poor air circulation, or cuts that weren’t allowed to callus properly. Trim away any rotted parts with your sterilized tool, dust with cinnamon, and try again, focusing on keeping things a bit drier and airier.
A Encouraging Closing
Propagating orchids like Renanthera vietnamensis is a journey of observation and a little bit of faith. Don’t be discouraged if your first attempt isn’t picture-perfect. Each plant and even each cutting has its own personality. Enjoy the process, learn from each step, and celebrate those tiny roots when they finally appear. Happy growing!
Resource: