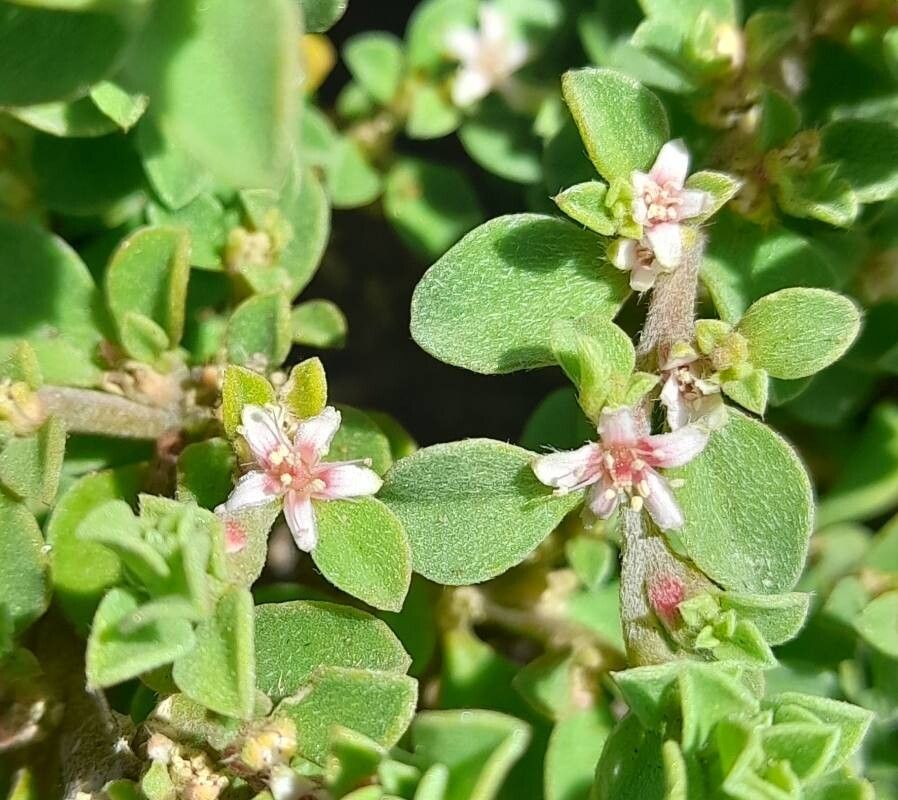
Hello, fellow garden enthusiasts! Today, I want to share a little secret from my own little corner of the green world: Aizoon pubescens. If you’re looking for a plant that brings a unique texture and a touch of the wild to your space, you’ve found it. Its fuzzy, almost velvety leaves are simply delightful. And the best part? Propagating it is incredibly rewarding, and I’m happy to say it’s quite accessible, even for those just dipping their toes into the world of plant propagation. With a little care and attention, you’ll be creating new fuzzy friends in no time!
The Best Time to Start
For Aizoon pubescens, timing really is about tapping into its natural growth cycle. Spring is absolutely your sweet spot. As the weather warms up and the plant is gearing up for active growth, it’s a prime time to take cuttings. You’ll notice new shoots emerging – those are your golden opportunities. Trying to propagate when the plant is dormant or stressed, say in the heat of summer or the chill of winter, will just make things harder on you and the plant.
Supplies You’ll Need
Gathering your tools beforehand makes the whole process smooth sailing. Here’s what I always have on hand:
- Sharp pruning shears or a clean knife: For taking clean cuts.
- Rooting hormone (optional, but helpful): I like to have some on hand, especially for trickier cuttings.
- Well-draining potting mix: A blend designed for succulents or cacti works wonders. You can also mix your own with perlite and potting soil.
- Small pots or seed trays: Clean and with drainage holes, of course!
- Watering can with a fine rose attachment: For gentle watering.
- Plastic bags or a clear propagation dome: To create a humid environment.
- Gloves: Aizoon pubescens can be a bit scratchy!
Propagation Methods
Let’s get our hands dirty! Aizoon pubescens is wonderfully versatile, and I find stem cuttings and division to be the most successful.
Stem Cuttings
This is my go-to method.
- Select healthy stem tips: Look for new, vigorous growth about 3-4 inches long.
- Make a clean cut: Just below a leaf node (where a leaf emerges from the stem).
- Remove lower leaves: Gently strip off the leaves from the bottom half of the cutting. This prevents them from rotting in the soil and exposes the nodes where roots will form.
- Dip in rooting hormone (if using): Just lightly dip the cut end.
- Insert into potting mix: Make a small hole with your finger or a pencil and gently place the cutting in, ensuring the nodes are covered. Lightly firm the soil around it.
- Water gently: Just enough to moisten the soil.
Division
If your plant is getting a bit full, dividing it is a fantastic way to get multiple new specimens.
- Gently remove the plant from its pot: Try to disturb the roots as little as possible.
- Inspect the root ball: Look for natural divisions where you can see distinct clumps of stems and roots.
- Carefully separate the clumps: You can use your fingers or a clean trowel or knife to gently pull or cut apart the root ball. Each section should have healthy roots and some top growth.
- Pot up the divisions: Plant each division in its own pot with fresh, well-draining soil.
- Water lightly: Just enough to settle the soil.
The “Secret Sauce” (Pro Tips)
Here are a couple of things I’ve learned over the years that really make a difference:
-
Embrace the dry spell: After taking cuttings, let the cut end callous over for a day or two before planting. This helps prevent rot. And once they’re in the soil, resist the urge to water constantly. Let the soil dry out slightly between waterings. Overwatering is the quickest way to doom a cutting!
-
Bottom heat is your friend: If you’re propagating in a cooler room, a seedling heat mat can provide a gentle, consistent warmth from below. This stimulates root development and significantly speeds up the process.
Aftercare & Troubleshooting
Once your cuttings have taken root – and you’ll know this when you see new growth or feel gentle resistance when tugging lightly – it’s time to transition them to more regular care.
- Gradually introduce them to more light: Start in bright, indirect light and slowly move them to a spot with a bit more sun.
- Water when the top inch of soil is dry: This will be more frequent as they grow, but always check the soil moisture first.
- Watch for signs of rot: This is usually indicated by mushy, black stems or leaves. If you see this, remove the affected part immediately and try to improve air circulation and reduce watering.
- Patience is key: Don’t despair if not every cutting takes. It’s a natural part of the process!
A Gentle Encouragement
Propagating plants is such a beautiful way to connect with nature and expand your garden. Don’t be discouraged if your first attempts aren’t perfect. Each time you try, you learn a little more. Enjoy the process, celebrate the tiny successes, and know that you’re nurturing life. Happy propagating!
Resource:
https://identify.plantnet.org/k-world-flora/species/Aizoon%20pubescens%20Eckl.%20&%20Zeyh./data