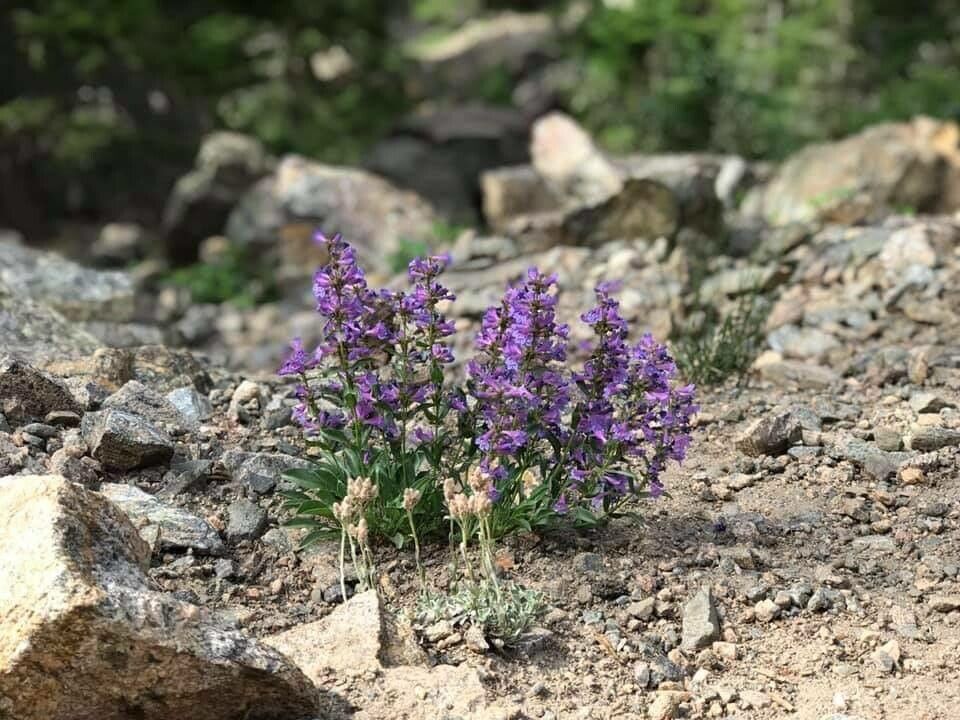
Hello there, fellow plant enthusiasts! It’s so lovely to connect with you today. I’m thrilled to share my passion for a particular gem in the garden: Penstemon angustifolius, often called Narrowleaf Penstemon or Foxflower.
If you’re looking for a plant that brings a splash of vibrant color with delicate, tubular flowers, often in shades of beautiful blue or purple, then this is your plant. They’re absolute darlings for attracting pollinators, too! Propagating them is incredibly rewarding, a wonderful way to multiply your joy and share these beauties with friends. Now, I’ll be honest, Penstemon angustifolius isn’t the absolute easiest plant for a complete beginner to propagate, but with a little care and these tips, you’ll be successful. Don’t be intimidated – think of it as a rewarding challenge!
The Best Time to Start
My favorite time to get these little guys going is in the late spring or early summer. This is when the plant is actively growing, so it has plenty of energy to put into developing new roots. You’ll be looking for stems that are semi-hardened – not brand new and floppy, but not woody and old either. Think of it as that perfect in-between stage.
Supplies You’ll Need
Gathering your supplies beforehand makes the whole process much smoother. Here’s what I always have on hand:
- Sharp, clean pruning shears or a sharp knife: This is crucial for making clean cuts.
- Rooting hormone (optional but helpful): A little boost never hurts!
- Potting mix: A well-draining mix is key. I like a blend of equal parts peat moss or coco coir and perlite or coarse sand.
- Small pots or trays: Clean containers with drainage holes are a must.
- Plastic bags or a propagation dome: To create a humid environment.
- Watering can or spray bottle: For gentle watering.
Propagation Methods
For Penstemon angustifolius, I find that stem cuttings are your best bet for consistent success.
Here’s how I do it:
- Take Your Cuttings: On a bright morning, select several healthy stems from your established plant. Using your sharp shears, make a clean cut just below a leaf node. A leaf node is where a leaf joins the stem. Aim for cuttings that are about 4-6 inches long. Remove the lower leaves, leaving just the top few.
- Prepare the Cuttings: If you’re using rooting hormone, dip the cut end of each stem into the powder, tapping off any excess.
- Plant Your Cuttings: Fill your small pots or trays with your well-draining potting mix. Make a small pilot hole in the soil with a pencil or finger. Gently insert the cut end of the stem into the hole, ensuring the leaf node (where you removed the leaves) is below the soil surface. Firm the soil gently around the stem.
- Water & Cover: Water the soil thoroughly but gently. Then, cover the pots with a clear plastic bag or a propagation dome to create a humid microclimate. This is vital to prevent the cuttings from drying out. You can secure the bag with a rubber band.
The “Secret Sauce” (Pro Tips)
Over the years, I’ve learned a few tricks that really make a difference.
- Don’t overcrowd your pots! Give each cutting a little space. This helps with air circulation and reduces the risk of fungal issues. Overcrowding is a surefire way to invite trouble.
- If you’re using a plastic bag, propped it up with stakes or skewers so it doesn’t directly touch the leaves. Those leaves need to breathe!
- While not strictly essential, bottom heat can significantly speed up root development. I often use a seedling heat mat set to a low temperature (around 70-75°F) under my propagation trays. It’s like a warm hug for your cuttings!
Aftercare & Troubleshooting
Once your cuttings are potted, place them in a bright spot that receives indirect sunlight. Avoid direct sun, which can scorch the delicate new growth. Keep the soil consistently moist but not waterlogged. You can check the moisture by gently poking a finger into the soil.
You’ll know your cuttings have rooted when you see new leaf growth or feel a gentle resistance when you give them a tiny tug. This usually takes 4-6 weeks, but can sometimes take longer.
The most common issue you might encounter is rot. This usually happens when the soil is too wet and there isn’t enough air circulation. If you see stems turning black and mushy at the soil line, it’s usually a sign that rot has set in. If this happens, try to gently remove the affected cutting and ensure your remaining ones have better drainage and air flow. Don’t be discouraged if you lose a few – it’s all part of the learning process!
A Encouraging Closing
Propagating plants is a journey, and each new stem you successfully root is a little triumph. Be patient with your Penstemon angustifolius cuttings. Nature has its own rhythm, and sometimes it just takes a little time. Enjoy the process, celebrate your successes (big or small!), and soon you’ll have a whole new garden full of these delightful Foxflowers to admire and share. Happy growing!
Resource: