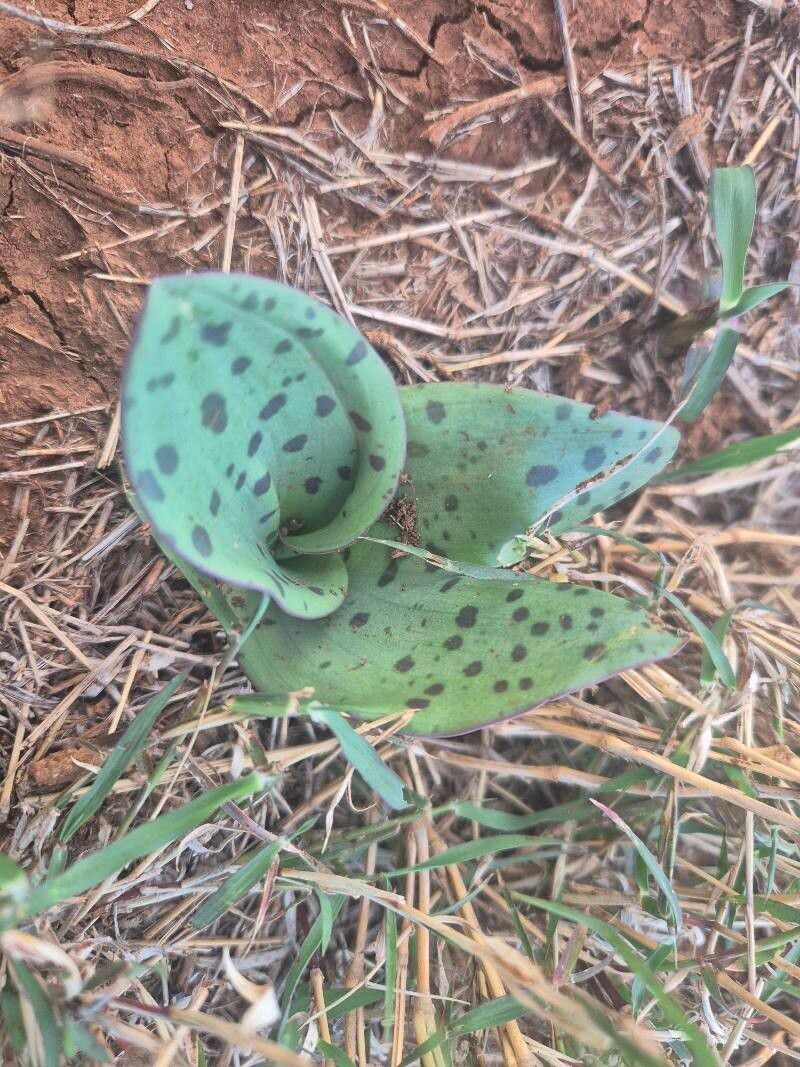
Oh, Ledebouria kirkii! Isn’t she a beauty? Those plump, grey-green leaves with their dusky purple undersides bring such a charming, almost jewel-like quality to any plant collection. I’ve loved working with these little bulbs for years. Propagating them is a wonderfully rewarding way to expand your own collection or share these gems with fellow plant lovers. And the good news? Even as a relative beginner, you’ll find Ledebouria surprisingly forgiving.
The Best Time to Start
My favorite time to get stuck into propagating Ledebouria kirkii is right at the beginning of its active growing season. For most of us, this means late spring or early summer. You’ll notice the plant really starting to put on new growth, and that vigor translates beautifully into successful propagation. Waiting until the plant is actively growing ensures it has the energy reserves to push out those precious new roots.
Supplies You’ll Need
Before we dive in, let’s gather our essentials. Having everything ready makes the process so much smoother!
- Well-draining potting mix: I like to use a mix specifically for succulents or add extra perlite or pumice to a standard potting mix. Ledebouria hates soggy feet.
- Small pots or trays: Clean containers are key to preventing disease.
- Sterile pruning shears or a sharp knife: For clean cuts that heal well.
- Rooting hormone (optional but helpful): A light dusting can give your cuttings a boost.
- Watering can or spray bottle: For gentle watering.
- Labeling sticks: To keep track of your new babies!
- A sunny windowsill or a grow light: To provide bright, indirect light.
Propagation Methods
Ledebouria kirkii is quite adaptable, and you can propagate it using a few different methods. I find division to be the easiest and most successful, especially for beginners.
Division (My Go-To!)
This is essentially like carefully splitting up a clump into smaller, manageable pieces.
- Gently remove the parent plant from its pot. Be very careful not to damage the fleshy bulbs or roots.
- Shake off excess soil so you can clearly see the bulb structures.
- Identify natural divisions. You’ll often see where the bulbs have naturally multiplied and are clustered together.
- Carefully separate the divisions. You can use your fingers to tease them apart. If they’re really stuck, use your sterile pruning shears or knife to make a clean cut. Each division should have at least one bulb and some roots.
- Pot up each division into its own small pot filled with your well-draining mix. Make sure the top of the bulbs are just at or slightly above the soil surface.
- Water lightly. Just enough to settle the soil around the roots.
- Place in bright, indirect light and wait patiently for new growth.
Leaf Cuttings (A Bit More Patience Needed)
This method takes longer but is still a fun way to multiply your plants.
- Select a healthy, mature leaf from the parent plant.
- Gently twist or cut the leaf off the bulb, making sure to get a tiny bit of the bulb’s base attached underneath. This is crucial for success.
- Allow the cut end to callous over for a day or two in a dry spot. This prevents rot.
- Dip the calloused end in rooting hormone (if using).
- Gently press the cut end into the surface of your well-draining potting mix. You don’t need to bury it deeply, just ensure contact with the soil.
- Mist the soil surface lightly to keep it ever so slightly moist.
- Place in bright, indirect light. You might only see tiny plantlets form at the base of the old leaf after several weeks or even months.
The “Secret Sauce” (Pro Tips)
Over the years, I’ve picked up a few tricks that seem to make all the difference.
- Don’t overwater the divisions initially. While they need a bit of moisture to encourage root growth, sodden soil is the fastest way to the compost bin for these guys. Let the soil dry out slightly between waterings, especially in the first few weeks.
- Consider bottom heat. If you’re struggling to get cuttings to root, placing your pots on a gentle seedling heat mat can really speed things up. It mimics the warmth of spring and encourages faster root development. Just make sure it’s a low-temperature mat designed for plants.
- Observe your parent plant. Before you even think about propagating, make sure your parent Ledebouria is healthy and happy. A stressed plant won’t produce strong cuttings or divisions. Good light, proper watering, and a well-draining mix are the foundation for successful propagation.
Aftercare & Troubleshooting
Once you see those first signs of new growth – a tiny leaf unfurling or a promise of roots on your cuttings – you’re in the home stretch!
Continue to water sparingly, allowing the soil to dry out between waterings. As the new plant grows stronger, you can gradually introduce more regular watering, but always err on the side of too dry rather than too wet.
The most common issue you’ll encounter is rot. If a division or cutting turns mushy, black, or starts to decay, it’s usually a sign of too much moisture or a lack of airflow. Unfortunately, if rot sets in, it’s difficult to save. Prevention is key: ensure excellent drainage and don’t water too frequently. Another sign things aren’t going well is if your cuttings simply shrivel up and don’t produce any roots. This can happen if the cut wasn’t clean, didn’t have enough of the bulb base, or if the environment is too dry.
A Encouraging Closing
Propagating Ledebouria kirkii is a journey, and like all good gardening adventures, it requires a little patience and a lot of observation. Don’t get discouraged if your first attempt isn’t perfect – we’ve all been there! Embrace the process, enjoy watching those tiny roots emerge, and soon you’ll be happily admiring your new little troop of Ledebouria. Happy propagating!
Resource: