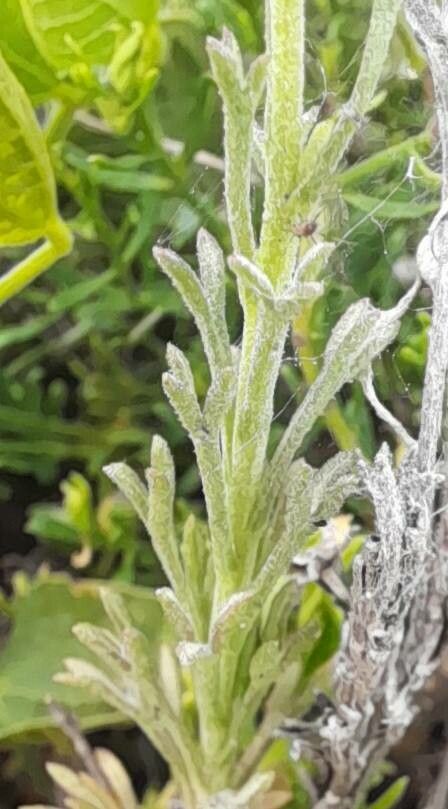
Hello there, fellow garden lovers! I’ve got a little something special to share with you today, a plant that has captured my heart over the years: Microgyne trifurcata. If you’re like me, you adore plants with a unique charm, and this one doesn’t disappoint. Its delicate, trifurcated leaves add such an elegant touch to any space, and the satisfaction of nurturing a new life from a tiny cutting or division is truly unmatched. Now, is it a breeze for absolute beginners? Honestly, Microgyne trifurcata can be a touch on the finicky side, but with a little know-how and a sprinkle of patience, you’ll be well on your way to success. Think of it as a rewarding challenge!
The Best Time to Start
For the highest success rates with Microgyne trifurcata, I always recommend propagating during its active growing season. This typically means late spring through early to mid-summer. During this time, the plant has more energy reserves to draw upon, and the warmer temperatures encourage faster root development. Avoid propagating when the plant is stressed, like during extreme heat or when it’s just finished flowering. A healthy, vigorous parent plant is your best bet for happy new propagations.
Supplies You’ll Need
Gathering your supplies beforehand makes the whole process much smoother. Here’s what I usually have on hand:
- Sharp pruning shears or a clean craft knife: For taking clean cuttings. Sterilize them well!
- A well-draining potting mix: I love a blend of orchid bark, perlite, and a bit of seed-starting mix. This ensures good aeration and prevents soggy roots.
- Small pots or propagation trays: Clean, with drainage holes, of course!
- Rooting hormone (optional but helpful): A powder or gel can give new cuttings a boost.
- A mister or spray bottle: For maintaining humidity.
- Clear plastic bags or a propagation dome: To create a humid environment.
- A dibber or pencil: To make holes for your cuttings.
- Water (if opting for water propagation): Filtered or distilled water is best.
Propagation Methods
Microgyne trifurcata can be a bit particular, but I’ve found two methods to be the most reliable: stem cuttings and division.
Stem Cuttings
This is my go-to for multiplying my collection.
- Select your cutting: Look for a healthy, actively growing stem that’s about 4-6 inches long. It should have at least a few sets of leaves. Avoid stems with flowers or buds, as these require more energy.
- Make the cut: Using your sterilized pruning shears or knife, make a clean cut just below a leaf node. This is where roots are most likely to form. You can even gently scrape a tiny bit of the outer layer of the stem at the node to expose more of the cambium layer where roots emerge.
- Prepare the cutting: Remove the lower leaves, leaving only the top couple of sets. This prevents leaves from rotting once planted. If your cutting is long, you can pinch off the very tip to encourage bushier growth later on.
- Apply rooting hormone (optional): Dip the cut end of the stem into your rooting hormone, tapping off any excess.
- Plant your cuttings: Fill your clean pots with your prepared potting mix. Moisten the mix thoroughly. Use a dibber or pencil to create holes, then gently insert the cuttings, ensuring the nodes are below the soil surface. Lightly firm the soil around the stem to provide support.
- Create a humid environment: Water your pots gently from the bottom if possible. Then, place the pots into clear plastic bags, gently closing them to create a mini-greenhouse, or cover them with a propagation dome. Make sure the leaves aren’t touching the plastic. Place them in bright, indirect light, away from direct sun.
Division
If your Microgyne trifurcata has become a bit crowded in its pot, division is an excellent option.
- Gently remove the plant: Carefully take the plant out of its pot.
- Inspect the root ball: Loosen the soil around the roots with your fingers. You’re looking for distinct clumps of growth that have their own root systems.
- Separate the clumps: With clean hands or a sterile spade, gently pull or cut the root ball apart into smaller sections. Each section should have healthy roots and at least one shoot.
- Pot up the divisions: Pot each division into its own pot filled with your well-draining potting mix.
- Water and place: Water thoroughly and place them in a location with bright, indirect light.
The “Secret Sauce”
Here are a couple of tricks I’ve picked up over the years that can really make a difference:
- Bottom Heat is Your Friend: For stem cuttings, especially if your house is on the cooler side, placing your pots on a gentle seedling heat mat can be a game-changer. It warms the soil and encourages root formation from below, mimicking ideal conditions. Just don’t let it get too hot – think lukewarm bathwater temperature.
- The Air Layering Adventure (for the more adventurous): I’ve had great success with air layering on older, woodier stems. You make a small cut (or remove a ring of bark) on a healthy stem that’s still attached to the parent plant. Wrap this wounded area with moist sphagnum moss and then secure it all with plastic wrap. Roots will form within the moss, and once they’re substantial, you can cut the stem below the new roots and pot it up! It’s a bit more involved, but the success rate is often exceptionally high.
Aftercare & Troubleshooting
Once you see signs of new growth or feel a gentle tug when you lightly wiggle the cutting, you know roots are forming!
- Gradually Acclimate: Once roots have developed, begin slowly acclimatizing your new plants to normal room humidity. Open the plastic bags or propagation dome for increasing periods each day over a week or two.
- Watering: Water when the top inch of soil feels dry. It’s always better to underwater slightly than to overwater.
- Light: Continue to provide bright, indirect light.
- Troubleshooting: The most common issue you’ll encounter is rot. If you see any stem browning or mushy leaves, it’s a sign of too much moisture and poor air circulation. Remove affected pieces immediately and ensure your soil is draining well and that you’re not overwatering. Yellowing leaves can sometimes indicate too much direct light or a nutrient deficiency if the plant has been in the pot for a while.
Don’t get discouraged if not every single cutting takes. Gardening is a journey with its ups and downs. Take a deep breath, celebrate the successes, and learn from the challenges. The joy of watching a tiny piece of plant turn into something beautiful is truly worth the effort. Happy propagating!
Resource:
https://identify.plantnet.org/k-world-flora/species/Microgyne%20trifurcata%20Less./data