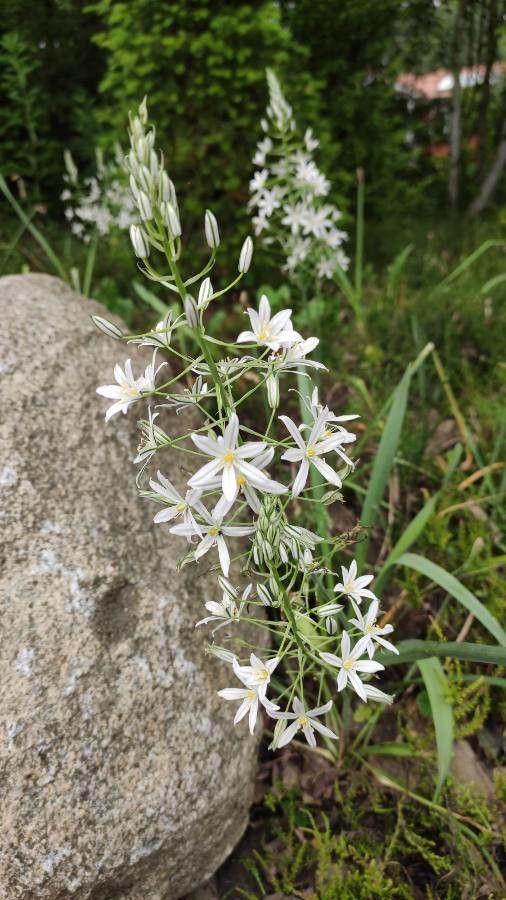
Oh, hello there! Pull up a chair and let’s chat about one of my favorite garden gems: Ornithogalum narbonense, or as I affectionately call it, the Summer Star-of-Bethlehem. I’ve been growing these beauties for two decades now, and let me tell you, they’re like little fireworks in the garden. With their elegant, starry white blooms held high on sturdy stems, they bring a touch of airy grace that just can’t be beat. And the best part? They’re surprisingly rewarding to propagate! If you’re just starting out with plant propagation, Ornithogalum narbonense is a wonderfully forgiving plant to learn with. You’ll be sharing these starry delights with friends in no time.
The Best Time to Start
For Ornithogalum narbonense, late spring to early summer is truly your sweet spot. This is when the plant is actively growing after its spring bloom. You’ll usually see new bulbils forming, or offsets developing around the base of the parent plant. Waiting until after the flowering period has concluded, but before the plant begins its major dormancy, gives you the best chance for successful propagation.
Supplies You’ll Need
Gathering your tools is half the fun, isn’t it? Here’s what I keep handy:
- Sharp, clean pruning shears or a small knife: For making clean cuts.
- A well-draining potting mix: I like a blend of equal parts coarse sand, perlite, and peat moss or coco coir. Alternatively, a good quality cactus or succulent mix works wonders.
- Small pots or trays: With drainage holes, of course! Yogurt cups or recycled containers are great too if you poke some holes.
- A watering can with a fine rose attachment: For gentle watering.
- Rooting hormone powder (optional but recommended): This can give your cuttings a little boost.
- Labels or markers: To keep track of what you’ve planted.
- A sunny windowsill or propagator: With good indirect light.
Propagation Methods
Here’s how we’ll get more of these lovely plants!
Division of Bulbils (The Easiest Way)
This is my go-to for Ornithogalum narbonense. As the parent plant matures, it will naturally produce offsets, or small bulbils, around its base.
- Gently unearth: Wait until the foliage has completely died back in late summer or early fall. Carefully dig around the parent bulb and gently lift the entire clump.
- Separate the babies: You’ll spot smaller bulbs clinging to the main bulb or nestled around it. Gently twist or use your knife to separate these bulbils from the mother plant. Try to ensure each bulbil has at least a tiny bit of root attached if possible.
- Plant them up: Fill your small pots with your well-draining mix. Plant each bulbil about 1-2 inches deep, with the pointed end facing upwards.
- Water lightly: Give them a gentle watering. They don’t need to be soggy, just moist.
- Place them in their new home: Set the pots on a sunny windowsill or in a bright spot.
Stem Cuttings (A Bit More Dexterity)
This method works best when the plant is in active growth.
- Select a healthy stem: Look for a firm, green stem that hasn’t flowered yet or has just finished.
- Make the cut: Using your clean shears, cut a piece of stem about 4-6 inches long. Ideally, make your cut just below a leaf node.
- Prepare the cutting: Remove any lower leaves that might rot if submerged in water or soil.
- Apply rooting hormone (optional): Dip the cut end of the stem into rooting hormone powder. Tap off any excess.
- Place in propagation medium: You have two options here:
- Water propagation: Place the stem cuttings in a jar of clean, room-temperature water. Make sure no leaves are touching the water.
- Soil propagation: Stick the cut end into your prepared well-draining potting mix. Make a small hole with a pencil or your finger first to avoid rubbing off the rooting hormone.
- Provide warmth and light: Place the pots or jars in a warm spot with bright, indirect light.
The “Secret Sauce” (Pro Tips)
Here are a few little tricks I’ve learned over the years that make a world of difference:
- The magic of bottom heat: For stem cuttings, if you can, place your pots or trays on a heating mat. This warmth encourages root development much faster. It’s not strictly necessary, but it’s a definite game-changer!
- Patience with the bulbils: When you’re dividing bulbs, resist the urge to plant them too deeply. They need that little bit of light to kickstart their growth. Just an inch or two is perfect.
- Air circulation is key: Especially with stem cuttings in water, make sure there’s good airflow around them. Stagnant air can encourage fungal issues. If you’re using soil, a light misting periodically is better than drenching.
Aftercare & Troubleshooting
Once you see those tiny roots developing, hurray! For bulbils, continue to keep the soil lightly moist and in that bright spot. Once they have a decent root system and are showing new top growth, you can transplant them into slightly larger pots. For stem cuttings, once roots are about an inch long, carefully transplant them into small pots filled with your well-draining mix. Water them in gently and keep them in a bright, protected location for a few weeks before moving them to their permanent spot.
Now, what if things go sideways? The most common culprit is rot, which usually happens when the medium stays too wet. You might see the stem turning mushy and black, or the bulbil softening and decaying. If this happens, remove the affected part immediately to prevent it from spreading. Ensure your soil is draining freely and that you’re not overwatering. If your cuttings just seem to be sitting there without rooting, don’t despair! Sometimes it just takes a little longer. Ensure they’re still getting enough light and warmth.
A Encouraging Closing
Remember, gardening is a journey, and propagation is a wonderful way to become more intimately acquainted with your plants. Be patient with your new Ornithogalum narbonense babies. Each successful root, each new sprout, is a little victory. Enjoy the process, and soon you’ll have a whole constellation of these beautiful Summer Star-of-Bethlehem to grace your garden and share with fellow plant lovers. Happy propagating!
Resource:
https://identify.plantnet.org/k-world-flora/species/Ornithogalum%20narbonense%20L./data