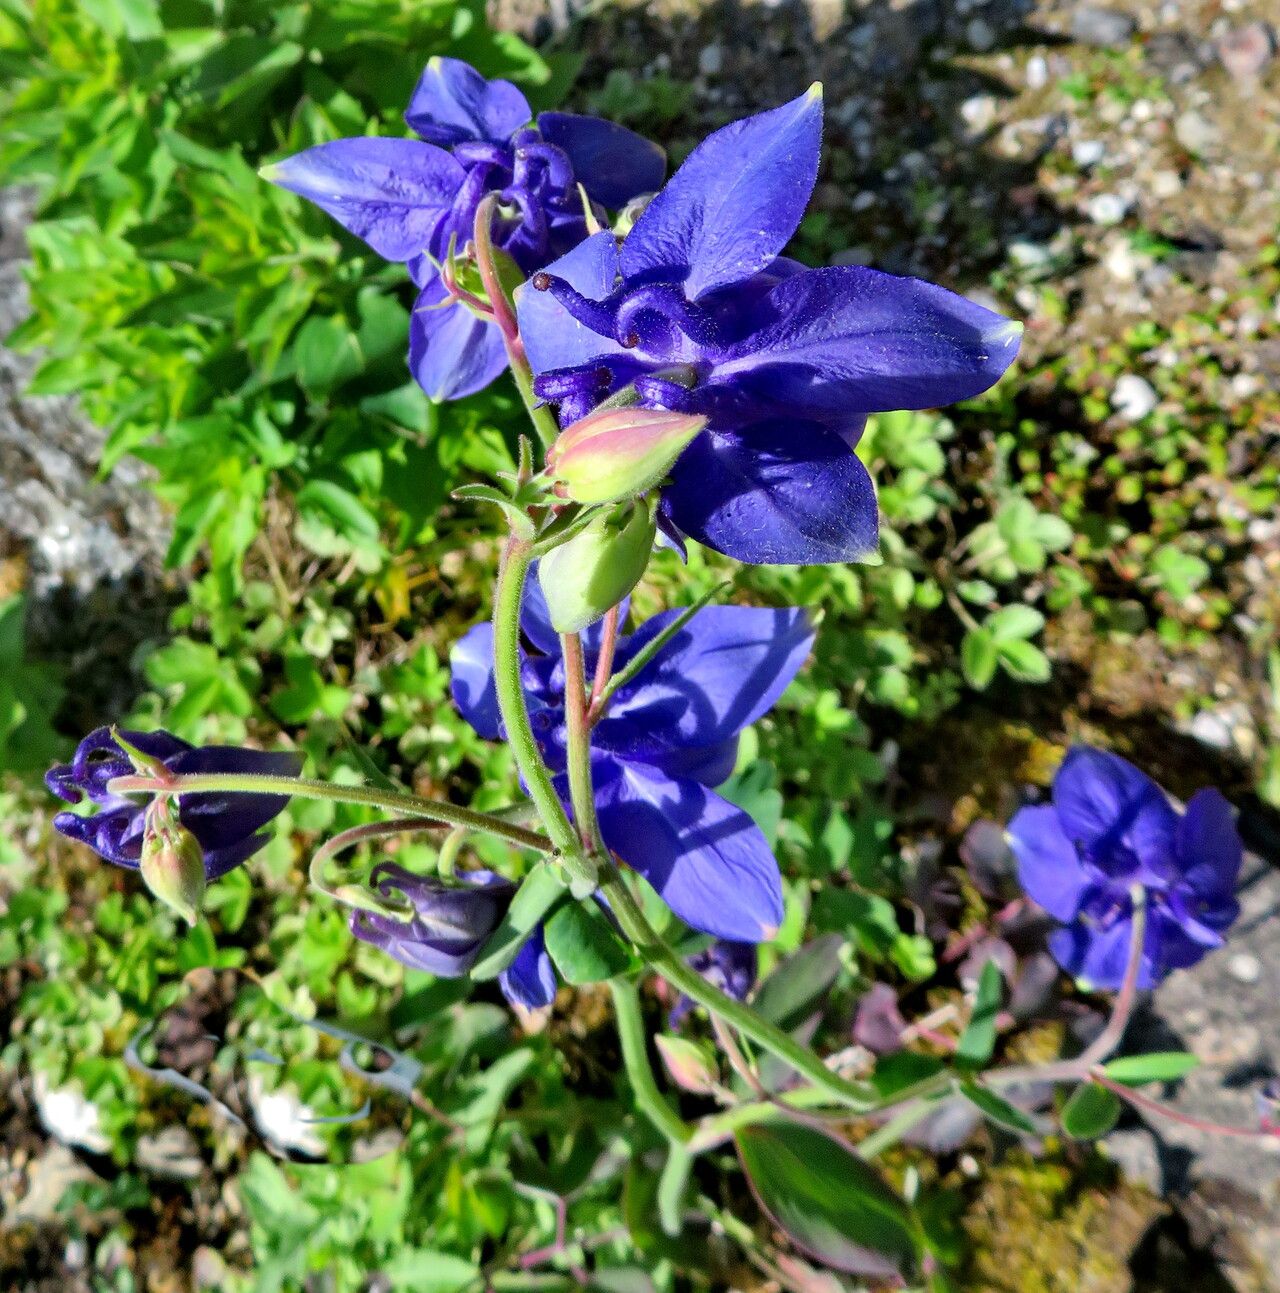
Hello there, fellow garden enthusiasts! Today, we’re going to talk about a truly special plant: Aquilegia sibirica. If you’re drawn to delicate, nodding flowers with a touch of wild charm, then this Siberian Columbine is a wonderful addition to any garden. Propagating it is a deeply satisfying experience, like sharing a little piece of your garden’s magic with others. Now, I know some propagation can feel a bit daunting, but I’m happy to say that Aquilegia sibirica is quite beginner-friendly when it comes to making more of these beauties. You’ll be rewarded with more of those lovely blooms in no time!
The Best Time to Start
For the highest success rate with Aquilegia sibirica, my favorite time to get started is in the early spring. Think of it as the plant waking up and having that surge of energy. You can also have success with late summer cuttings, after the main flowering flush has passed. The key is to work with healthy, vigorous plant material.
Supplies You’ll Need
Before we dig in, let’s make sure you have everything ready:
- Clean, sharp pruning shears or a sharp knife: For making clean cuts.
- A good quality seed-starting mix or a light potting mix: Something that drains well is crucial. I often use a 50/50 blend of peat moss and perlite.
- Small pots or trays: Clean ones, of course! Small cell trays or 3-4 inch pots work perfectly.
- Rooting hormone (optional, but helpful): A powdered or gel type.
- A watering can with a fine rose nozzle or a spray bottle: For gentle watering.
- Plastic bags or a propagator lid: To create a humid environment.
- Labels: Because trust me, you’ll forget what you planted where!
Propagation Methods
For Aquilegia sibirica, the most straightforward and successful methods are typically division and taking basal cuttings.
Division
This is my go-to for established plants. It’s best done in early spring as new growth appears.
- Gently unearth your parent plant: Loosen the soil around the base with a trowel. Carefully lift the entire plant from its spot. You don’t want to break the main root ball too much.
- Inspect the root system: Look for natural divisions in the crown – where the stems emerge from the roots. You might see distinct clumps already.
- Separate the divisions: Using your hands or a clean knife, carefully pull or cut the root ball apart into sections. Ensure each section has a healthy portion of roots and at least a few shoots or buds.
- Replant immediately: Pot up the divisions into your prepared pots or replant them directly into their new garden homes. Water them in well.
Basal Cuttings
This method involves taking cuttings from the base of the plant.
- Gather your cuttings: In early spring, look for young, tender shoots emerging from the base of the plant. Using your clean, sharp shears, snip these shoots off at their base, close to the parent plant. Aim for cuttings that are about 3-4 inches long.
- Prepare the cuttings: Gently strip off any lower leaves. If the cutting is very leafy, you can trim the larger leaves in half to reduce moisture loss.
- Apply rooting hormone (if using): Dip the cut end of each cutting into rooting hormone, tapping off any excess.
- Plant the cuttings: Insert the cut end of each prepared cutting into your moist seed-starting mix. Make a small hole with a pencil or dibber so you don’t rub off the rooting hormone. Bury the cutting so that the leaf nodes are below the surface.
- Create humidity: Water the pot gently and then cover it with a plastic bag or place it in a propagator with a lid. This traps moisture and keeps the cuttings from drying out.
The “Secret Sauce” (Pro Tips)
Here are a few little tricks I’ve learned over the years that can really boost your success:
- Don’t let the leaves touch the water… if you’re doing water propagation on other plants! While Aquilegia sibirica is best not done this way, for other plants, I always make sure no leaves are submerged. Rot is the enemy!
- Bottom heat is your friend. If you have a heated propagator or can place your pots on a heat mat (especially for cuttings), it really encourages root development. It mimics the warmth of spring soil.
- Be patient with divisions. Sometimes, divisions look a bit sad for a few days after replanting. Don’t overwater them, but keep them consistently moist. They’ll perk up!
Aftercare & Troubleshooting
Once your cuttings have rooted (you can gently tug on them; if there’s resistance, they’ve rooted!), or your divisions have settled in, it’s time for a little extra care.
- Gradually acclimate: If you’ve used a plastic bag or propagator, slowly introduce your new plants to the outside air over a few days. Open the bag a little more each day, or lift the lid for longer periods.
- Watering: Keep the soil consistently moist, but not waterlogged. Overwatering is the quickest way to invite rot, especially for young plants.
- Light: Place new plants in a bright spot with indirect light. Direct sun can scorch delicate new growth.
- Troubleshooting: The most common issue you’ll see is rot. This usually happens from overwatering or poor drainage. If a cutting turns mushy and black, sadly, it’s probably a lost cause. Just remove it to prevent it from spreading. With divisions, wilting might occur if the roots were damaged, but consistent moisture and a bit of shade usually help them recover.
So there you have it! Propagating Aquilegia sibirica is a rewarding journey. Don’t be discouraged if your first attempt isn’t perfect. Gardening is all about learning and experimenting. Be patient with your little green charges, and enjoy the process of bringing more of these charming blooms into your life. Happy gardening!
Resource:
https://identify.plantnet.org/k-world-flora/species/Aquilegia%20sibirica%20Lam./data