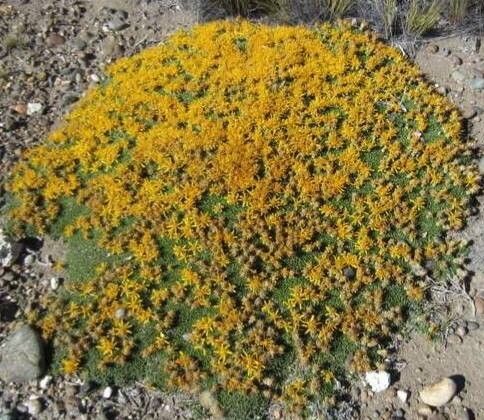
Oh, Brachyclados caespitosus! Isn’t it just a delight? I remember the first time I saw one, a cheerful burst of delicate, daisy-like flowers tumbling over a stone wall. It’s that charming, slightly wild look, coupled with those lovely blooms, that really captures my heart. And the best part? You can easily bring that joy into your own garden, or even share it with friends, by propagating them.
Now, is it a breeze for a total newbie? Honestly, it’s somewhere in the middle. It’s not the plant that immediately springs to mind for absolute beginners just dipping their toes into propagation. But don’t let that deter you! With a little care and attention, you’ll be well on your way to success. And the satisfaction of nurturing a new plant from a tiny cutting or division is just immense.
The Best Time to Start
For Brachyclados caespitosus, I always find spring to be the sweet spot. This is when the plant is actively growing. You want to take cuttings or divide it when it’s bursting with life, not when it’s dormant or stressed by extreme heat. Aim for late spring, just as new growth is becoming firm but not yet woody.
Supplies You’ll Need
Here’s what you’ll want to have on hand before you get started:
- Sharp, clean pruning shears or a sharp knife: A clean cut is crucial to prevent disease.
- Rooting hormone (optional, but helpful): A powder or gel can really give your cuttings a boost.
- Well-draining potting mix: I like to use a mix of equal parts peat moss and perlite, or a commercial seed-starting mix.
- Small pots or trays: Clean, with drainage holes!
- A spray bottle: For misting.
- Clear plastic bags or a propagation dome: To create a humid environment.
- Labels and a pen: So you don’t forget what you’ve planted!
- For division: A trowel or a sturdy fork.
Propagation Methods
There are a couple of reliable ways to multiply your Brachyclados caespitosus.
Stem Cuttings
This is my go-to method for many plants, and Brachyclados caespitosus responds beautifully.
- Select healthy stems: Look for non-flowering, healthy shoots that are about 4-6 inches long. Pinch off any flowers or buds you see.
- Make the cut: Using your sharp shears, make a clean cut just below a leaf node. A leaf node is where a leaf attaches to the stem; this is where roots are most likely to form.
- Prepare the cutting: Gently strip off the lower leaves, leaving just a few at the top. This reduces moisture loss and prevents leaves from rotting in the soil.
- Apply rooting hormone (optional): Dip the cut end of the stem into your rooting hormone, tapping off any excess.
- Plant the cuttings: Fill your small pots with your prepared potting mix. Make a small hole in the center with your finger or a pencil. Insert the cutting into the hole, ensuring the node where you removed the leaves is below the soil surface. Gently firm the soil around the stem.
- Water and cover: Water the pot gently to settle the soil. Then, place the pot inside a clear plastic bag or cover it with a propagation dome. This traps humidity, which is essential for cuttings to root.
Division
This method is great if you have a more mature, clump-forming Brachyclados caespitosus.
- Gently unearth the plant: In spring, carefully dig around the edges of the plant and lift it from the ground or its pot. Try to disturb the roots as little as possible.
- Inspect and separate: Gently shake off excess soil to see the root system. You should be able to see natural divisions in the root ball.
- Divide carefully: Using your hands, a trowel, or even a sturdy fork, gently pull or cut the plant apart. Each division should have a healthy root system and some leafy top growth.
- Replant immediately: Plant the divisions into new pots or directly into your garden, treating them as you would a newly purchased plant. Water them in well.
The “Secret Sauce” (Pro Tips)
Here are a couple of things I’ve learned over the years that really make a difference:
- When using the plastic bag or propagation dome for cuttings, ensure the leaves don’t touch the inside of the bag. If they do, they’re more prone to fungal issues. You can use small stakes to prop up the bag if needed.
- Bottom heat is your friend! If you can, place your pots of cuttings on a heat mat designed for seedlings. This gentle warmth stimulates root development significantly. I’ve seen cuttings root twice as fast with a bit of bottom heat.
Aftercare & Troubleshooting
Once your cuttings are planted and happily covered, the waiting game begins!
Keep the soil consistently moist, but not soggy. Mist the foliage occasionally, especially if the humidity isn’t high. Place the pots in a bright spot, but out of direct, harsh sunlight.
After a few weeks, gently tug on a cutting. If you feel resistance, that’s a good sign of root development! You can also look for new leaf growth. Once they have a decent root system, you can slowly acclimate them to normal room conditions by opening the plastic bag for a few hours each day before removing it entirely. Then, pot them up into slightly larger containers as they grow.
The most common problem you might encounter is rot. This usually happens if the cuttings are kept too wet or if there’s poor air circulation. If you see leaves turning black and mushy or the stem feels slimy at the soil line, it’s likely rot. Unfortunately, you often have to discard those cuttings and start again, making sure to improve drainage and air flow next time.
A Encouraging Closing
Propagating plants is truly a journey of patience and observation. Don’t get discouraged if your first attempt isn’t perfect. Nature has its own rhythm, and sometimes things just take their time. Celebrate the successes, learn from the setbacks, and most importantly, enjoy the process of bringing more of these beautiful Brachyclados caespitosus into your world. Happy gardening!
Resource: