Oh, hello there! Come on in and pull up a chair. If you’re anything like me, you’ve probably fallen head over heels for the Sweet Buckeye, Aesculus sylvatica. Its delicate spring blossoms, its cheerful fall color, and that lovely, informal habit – it’s a tree that just makes you smile. And you know what’s even more rewarding than enjoying one? Growing your own! Propagating these beauties can be a little… shall we say, an adventure. It’s not quite as straightforward as a begonia cutting, but with a bit of know-how and patience, you can absolutely multiply your joy.
The Best Time to Start
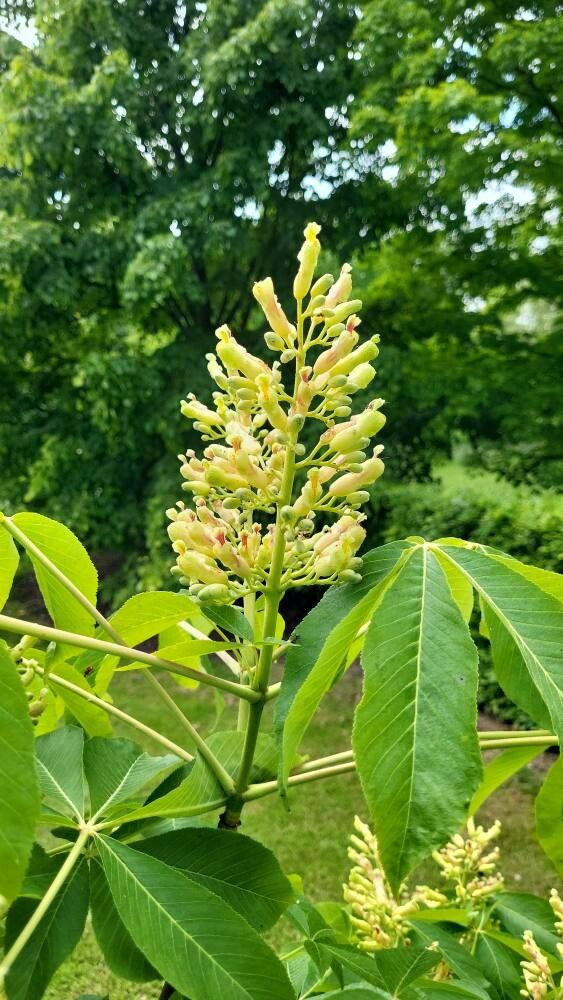
Generally, the late spring to early summer is your sweet spot for propagating Sweet Buckeyes, especially if we’re talking about softwood cuttings. This is when the new growth is still tender and flexible, full of youthful vigor, and ready to take root. You can also have success with semi-hardwood cuttings later in the summer, as the growth starts to mature a bit. Fall is when you’ll be gathering those wonderful seeds, so that’s a whole other avenue to explore.
Supplies You’ll Need
Here’s a little kit to get you started. Don’t worry, it’s mostly things you might already have lying around:
- Sharp Pruning Shears or a Clean Knife: For making clean cuts.
- Rooting Hormone: A powder or gel can really give your cuttings a boost. Look for one specifically for woody plants.
- Potting Mix: I like a well-draining mix – about 50% peat moss or coco coir and 50% perlite or coarse sand works wonders.
- Small Pots or Trays: With drainage holes, of course!
- Plastic Bags or a Propagator with a Lid: To create a humid environment.
- Labeling Stakes: You will forget what you planted where!
- Watering Can with a Fine Rose: For gentle watering.
- (Optional) Bottom Heat Mat: This can significantly speed up root development.
Propagation Methods
Let’s get our hands dirty! I find these two methods to be the most reliable for Sweet Buckeyes:
1. Softwood Cuttings
This is my go-to method in late spring.
- Take Your Cuttings: Look for healthy, new shoots that are still somewhat flexible. Aim for pieces about 4-6 inches long. Make your cut just below a leaf node.
- Prepare the Cuttings: Gently remove the lower leaves, leaving just a few at the top. If the leaves are very large, you can even cut them in half to reduce water loss.
- Dip in Rooting Hormone: Lightly moisten the bottom cut end and dip it into your rooting hormone. Tap off any excess.
- Pot Them Up: Fill your small pots or trays with your prepared potting mix. Make a hole with a pencil or your finger, and insert the cutting all the way up to the first leaf node. Gently firm the soil around it.
- Create Humidity: Water the soil gently. Then, cover the pots with a plastic bag or place them in a propagator. Make sure the leaves don’t touch the plastic if possible – you can use small stakes to prop it up.
- Find a Warm Spot: Place the pots in a bright location, but out of direct sunlight. If you have a bottom heat mat, now’s the time to use it!
2. Seed Propagation
Fall is seed-collecting time! The nuts of the Sweet Buckeye are usually called “conkers” or “horse chestnuts” by some, but technically, Aesculus sylvatica produces seeds that look similar.
- Collect Seeds: Wait until the seed pods have ripened and the seeds have fallen to the ground. Look for plump, healthy seeds without any obvious damage.
- Stratification (The Cold Treatment): Buckey seeds usually need a period of cold to germinate. You have two main options:
- Direct Sowing: In the fall, sow the seeds directly into a prepared garden bed or large pots filled with soil. Cover them with about an inch of soil. The winter cold will do the stratification for you.
- Refrigeration: Mix the seeds with a bit of moistened peat moss or vermiculite in a zip-top bag. Label it and place it in the refrigerator for about 60-90 days. Check the moisture every few weeks.
- Sowing After Stratification: Once the cold period is over (either naturally in the garden or after refrigeration), you can sow the seeds about an inch deep in pots or directly in the ground. Keep the soil consistently moist.
- Germination: Be patient! Germination can be sporadic and may take several months.
The “Secret Sauce” (Pro Tips)
Here are a couple of things I’ve learned over the years that can make a real difference:
- Cleanliness is Key: Always use sterilized tools when taking cuttings. This prevents the spread of any nasty pathogens that could kill your precious new plants before they even get started. A quick wipe with rubbing alcohol will do.
- Don’t Rush the “Hardening Off”: Once your cuttings have roots (you can gently tug on them – if they resist, they’ve got something!”) and you want to move them out of their humid environment, don’t do it all at once. Gradually increase ventilation over a week or two. Open up the propagator a bit more each day, or take the plastic bag off for longer periods. This prevents shock.
Aftercare & Troubleshooting
Once your cuttings have formed a good root system, it’s time for them to become independent little plants!
- Transplanting: Gently transplant your rooted cuttings into larger individual pots with a good quality potting mix. Water them in well.
- Location: Continue to keep them in a bright, but not scorching, location. You can gradually move them to their permanent spot as they grow stronger, keeping in mind their mature light needs.
- Watering: Keep the soil consistently moist but not waterlogged. This is crucial.
- Troubleshooting: The most common enemy is rot. If your cuttings look mushy, black, or just seem to be collapsing, it’s usually a sign of too much moisture and not enough air circulation. Make sure your potting mix is well-draining and try to improve airflow. If you see mold on the soil surface, gently scrape it off and increase ventilation. If they just seem to wither and dry out, they might not have rooted strongly enough, or they’re losing too much moisture – check your humidity levels and consistent watering.
A Encouraging Closing
Growing a new plant from a cutting or a seed is a truly magical experience. It connects you to the life cycle of these woody wonders in a very special way. Don’t be discouraged if not every attempt is a roaring success. Gardening is a journey of learning and observation. Keep trying, keep observing, and most importantly, enjoy the process of coaxing new life from your beloved Sweet Buckeye. You’ve got this!
Resource:
https://identify.plantnet.org/k-world-flora/species/Aesculus%20sylvatica%20W.Bartram/data