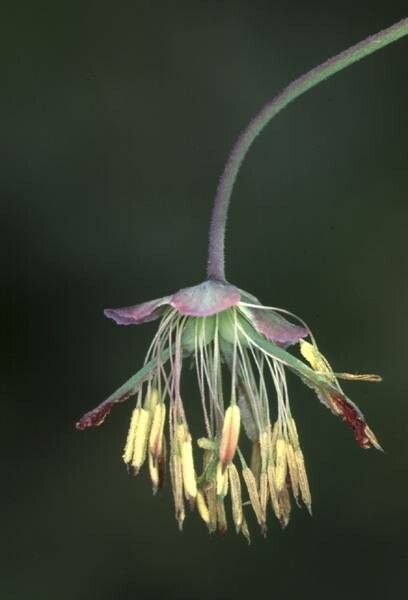
Oh, hello there! Grab a mug of your favorite beverage, pull up a chair, and let’s talk about the enchanting world of Thalictrum macrocarpum. These nodding beauties, with their airy foliage and delicate, often bee-loved flowers, are a true delight in any garden. And the best part? You can easily multiply them yourself! Propagating Thalictrum macrocarpum can be a wonderfully rewarding experience, adding more of these graceful plants to your landscape or sharing them with gardening friends. For those new to the propagation game, I’d say Thalictrum macrocarpum falls into the “moderately easy” category. It’s not as foolproof as, say, a succulent, but with a little patience and the right approach, you’ll find success.
The Best Time to Start
My personal favorite time to get started with Thalictrum macrocarpum propagation is late spring to early summer. This is when the plants are actively growing, full of vigor, and have plenty of fresh, pliable stems. Starting during this period allows your new cuttings or divisions ample time to establish themselves before the intensity of summer heat or the chill of autumn sets in. You’re essentially giving them their best fighting chance to thrive.
Supplies You’ll Need
Here’s what I always have on hand when I’m getting ready to propagate:
- Sharp, clean pruning shears or a sharp knife: This is crucial for making clean cuts and reducing the risk of disease.
- Rooting hormone (optional, but recommended for cuttings): While not strictly necessary, it gives cuttings a significant boost. Look for a powder or gel.
- Well-draining potting mix: A good blend for me is roughly equal parts peat moss, perlite, and compost. For divisions, you can use something closer to your garden soil amended with compost.
- Small pots or containers: Seedling trays work well for cuttings, while slightly larger pots are good for divisions. Make sure they have drainage holes!
- Watering can with a fine rose: Gentle watering is key to avoid disturbing delicate roots.
- Zip-top bags or a small propagation dome: This helps maintain humidity around cuttings.
- Labels and a waterproof marker: Trust me, you will forget what you planted and when!
Propagation Methods
Thalictrum macrocarpum is most commonly propagated through division, though stem cuttings can also be successful.
Division: The Classic Approach
This is my go-to method for Thalictrum macrocarpum, especially for mature plants.
- Assess Your Plant: Wait until after flowering or in early spring before new growth really takes off. Gently loosen the soil around the base of the plant.
- Excavate Carefully: Using a garden fork or trowel, carefully dig around and under the root ball. Lift the entire plant from the ground.
- Separate the Roots: Gently shake off excess soil. You’ll see that Thalictrum macrocarpum often forms clumps with multiple stems emerging from a central root system. You can usually split the clump by hand, teasing the roots apart. For tougher divisions, use your clean knife or pruners to cut through any tangled roots. Aim for divisions that have at least a few healthy stems and a good portion of root attached.
- Replant Immediately: Prepare a new planting hole in your garden or pot up the divisions into well-draining soil. Water thoroughly and keep them consistently moist for the first few weeks.
Stem Cuttings: For the Adventurous
This method takes a bit more finesse but is very satisfying.
- Take Your Cuttings: In late spring or early summer, choose healthy, non-flowering stems. Look for stems that are slightly woody at the base but still flexible at the tip – often called “semi-hardwood” cuttings. Using your sharp pruners, cut stems about 4-6 inches long. Make your cut just below a leaf node (where the leaf attaches to the stem).
- Prepare the Cuttings: Remove the lower leaves, leaving just a couple at the top. This prevents them from rotting in the soil. If you’re using rooting hormone, dip the cut end into the hormone powder or gel to coat it.
- Pot Them Up: Fill your small pots with your well-draining potting mix. Make a small hole with your finger or a pencil. Insert the cut end of the stem into the hole, gently firming the soil around it.
- Create a Humid Environment: Water gently to settle the soil. Then, create a mini-greenhouse by covering the pot with a clear plastic bag (supported by stakes so it doesn’t touch the leaves) or place it under a propagation dome. Place the pots in a bright location out of direct sunlight.
The “Secret Sauce” (Pro Tips)
Here are a couple of things I’ve learned over the years that make a big difference with Thalictrum:
- For Stem Cuttings: Avoid Soggy Bottoms! This is where good drainage truly shines. If your cuttings sit in waterlogged soil, they’ll rot before they ever have a chance to root. Make sure your potting mix is airy, and if you’re using a propagation dome, open it for an hour or so each day to allow for some air circulation.
- For Divisions: Don’t Be Afraid to Be Firm. While you want to be gentle, sometimes those roots are tangled. A sharp, clean tool is your friend here. And, if a division looks a little sad initially, don’t despair. Just keep it consistently watered (not soggy!) and it will likely perk up as it settles in. Sometimes a good drink is all they need.
Aftercare & Troubleshooting
Once your divisions are replanted or your cuttings start showing signs of rooting (you might see new leaf growth or feel a gentle tug when you lightly pull on a stem), it’s time for continued care.
- Keep them Consistently Moist: This is the golden rule for new propagations. They don’t have established root systems yet, so they’ll dry out quickly. Water when the top inch of soil feels dry.
- Gradually Acclimate Cuttings: Once they look robust, slowly introduce your cuttings to more direct light and eventually take off their covers for longer periods. This prevents them from going into shock.
- Watch for Rot: The most common sign of failure, especially with cuttings, is mushy, black stems or leaves. This is a clear indication of too much moisture and lack of air circulation. If you see this, remove the affected cutting immediately to prevent it from spreading and review your watering and ventilation habits. Brown, crispy leaves can sometimes mean it’s too dry, or they’re getting too much direct sun while still vulnerable.
Happy Propagating!
There you have it – a little roadmap to multiplying your beloved Thalictrum macrocarpum. Don’t be discouraged if your first few attempts aren’t perfect. Gardening is a journey of learning and discovery. Be patient with your new plants, give them a little extra TLC, and celebrate every little sign of success. Happy propagating, and may your gardens be ever more filled with these lovely plants!
Resource:
https://identify.plantnet.org/k-world-flora/species/Thalictrum%20macrocarpum%20Gren./data