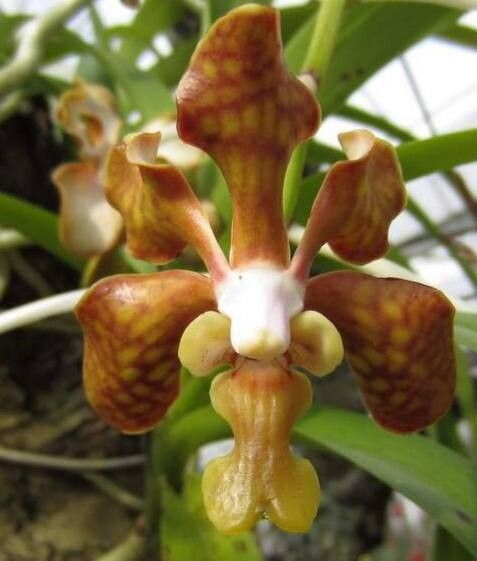
Hello there, fellow plant lovers! If you’re anything like me, you’ve probably fallen head over heels for the stunning blooms of Vanda brunnea. These orchids, with their vibrant colors and exotic charm, are truly a sight to behold. And what’s even more rewarding than admiring them? Growing new ones yourself! While Vanda brunnea can be a touch more demanding than some common houseplants, propagating it is a deeply satisfying endeavor that is absolutely achievable with a little guidance. Think of it as a delightful challenge that rewards your patience.
The Best Time to Start
When it comes to Vanda brunnea, the spring and early summer are your prime windows of opportunity. This is when the plant is bursting with new growth and has the energy to dedicate to developing new roots and shoots. You’ll often find the best time is just after the blooming period, when the plant is transitioning into its active growth phase.
Supplies You’ll Need
Before we dive into the fun part, let’s gather our tools. You’ll want to have these on hand to make the process as smooth as possible:
- Sharp, sterile pruning shears or a clean knife: Essential for making clean cuts to prevent disease.
- Potting medium: For Vanda brunnea, a well-draining orchid mix is crucial. This usually includes bark chips, perlite, and sometimes sphagnum moss. Avoid anything that retains too much moisture.
- Small pots or containers: Clean ones, of course! Small net pots or even clear plastic cups with drainage holes work well.
- Rooting hormone (optional but recommended): A powdered or gel rooting hormone can give your cuttings a helpful boost.
- Water: Clean, room-temperature water is best. If your tap water is very hard, consider using distilled or rainwater.
- Clear plastic bags or a humidity dome: To maintain a consistent, humid environment for your cuttings.
- Orchid fertilizer: A diluted orchid fertilizer for after roots have formed.
Propagation Methods
Vanda brunnea is most commonly propagated through division. This involves carefully separating a mature plant into smaller sections, each with its own healthy roots and at least one pseudobulb (the swollen base of the stem).
Here’s how we’ll tackle it:
- Assess your plant: Look for a mature Vanda brunnea that has multiple growths or is starting to outgrow its pot. You’re looking for a division point where you can clearly see where one growth separates from another.
- Gently remove from pot: Carefully ease the orchid out of its container. If it’s tightly rooted, you might need to gently squeeze the pot or even cut it away around the root ball.
- Clean the roots: Gently remove as much of the old potting mix as possible. You can rinse the roots under lukewarm water to get a clearer view.
- Locate the division point: Examine the plant to find where you can separate it. You’re aiming for sections that have at least two or three healthy pseudobulbs and a good amount of roots.
- Make the cut: Using your sterilized pruning shears or knife, make a clean cut through the rhizome (the creeping stem that connects the pseudobulbs) to separate the divisions. Ensure each section has enough roots to support itself.
- Dry the cuts: It’s a good idea to let the cut surfaces air dry for a few hours, or even overnight, in a well-ventilated spot. This helps to callus over the wound and prevent rot.
- Pot up your divisions: Plant each division in its own clean pot with fresh, well-draining orchid mix. Make sure the roots are spread out nicely at the bottom of the pot. Don’t pot them too deeply; the top of the pseudobulbs should be at or just above the surface of the mix.
- Watering after potting: Water sparingly for the first week or two. You want the potting mix to be lightly moist, not soggy.
The “Secret Sauce” (Pro Tips)
Now, for a couple of little secrets that can make a big difference.
- Don’t be afraid to trim damaged roots: If you find any mushy or dried-out roots during the division process, don’t hesitate to trim them off with your sterile tool. It might seem counterintuitive, but healthy roots will grow faster from a clean start.
- Consider a humidity tent: After potting your divisions, a lightly enclosed environment can be a game-changer. You can achieve this by placing the potted divisions inside a clear plastic bag (loosely tied) or under a humidity dome. This keeps the humidity high, which is exactly what Vandas love when they’re trying to establish themselves. Just remember to open the bag or dome for a few minutes each day to allow for air circulation and prevent fungal issues.
Aftercare & Troubleshooting
Once your divisions are potted, it’s all about patience and gentle care. Keep them in a spot with bright, indirect light and maintain that consistent humidity. Water when the potting mix is approaching dryness, not on a strict schedule.
The first signs of success will be new root growth, which might appear as tiny green tips extending from the pseudobulbs. Don’t expect this overnight; it can take several weeks or even months.
Now, let’s talk about what to watch out for. The most common problem you might encounter is rot. This usually happens if the potting mix stays too wet. You’ll see the pseudobulbs become soft, mushy, and discolored. If you spot this, immediately remove the affected plant from its pot, trim away all the rot (going a little into healthy tissue if necessary), and let the piece air dry thoroughly for a few days before repotting in fresh, dry mix. Sometimes, even with the best efforts, a division might not make it. Don’t get discouraged!
Wrap Up
Propagating Vanda brunnea is a journey, not a race. It requires a bit of observation, a gentle touch, and a whole lot of patience. But trust me, when you see those first new roots emerge, or even better, a tiny new shoot unfurling, the feeling of accomplishment is immense. Enjoy the process of learning and nurturing these beautiful orchids. Happy growing!
Resource:
https://identify.plantnet.org/k-world-flora/species/Vanda%20brunnea%20Rchb.f./data