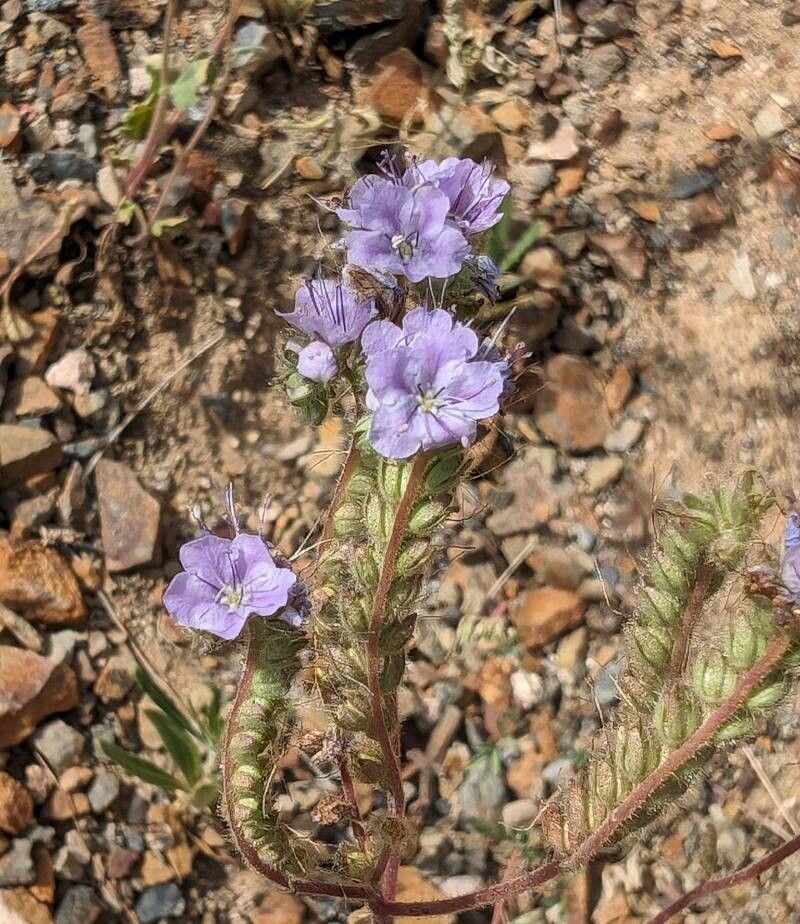
Hello there, fellow garden enthusiasts! I’m so happy you’re here to talk about Phacelia ciliate, or as I like to call her, the Fringeleaf Scorpionweed. If you’ve ever seen those gorgeous, fuzzy, purple-blue blooms gracing a garden, you’ve likely fallen under her spell. She’s an absolute magnet for pollinators and brings such a unique texture and color to any landscape. And the best part? She’s a breeze to propagate, which means you can easily fill your garden with these beauties or share them with friends. Even if you’re just dipping your toes into the world of plant propagation, Phacelia ciliate is a wonderfully forgiving subject.
The Best Time to Start
Honestly, with Phacelia ciliate, you’ve got flexibility. The absolute gold standard, though, is to start in the spring. This is when the plant is bursting with new growth, and cuttings taken now will have plenty of time to establish before the heat of summer or the chill of fall. You can also have success with late summer cuttings, but spring is where I see the most vigor.
Supplies You’ll Need
Gathering your supplies makes the whole process feel so much more organized, doesn’t it? Here’s what I always have on hand:
- Sharp, clean pruning shears or a sharp knife: For making those crucial, clean cuts.
- Small pots or seed trays: With drainage holes, of course!
- A quality potting mix: I like a light, well-draining mix. A blend of peat moss, perlite, and a bit of compost works wonders.
- Rooting hormone (optional but recommended): Especially if you’re a beginner. It gives those cuttings a little boost.
- A spray bottle: For keeping things nicely hydrated without waterlogging.
- A small trowel or dibber: To make planting your cuttings easy.
- Clear plastic bags or a propagation dome: To create a humid microclimate.
Propagation Methods
For Phacelia ciliate, stem cuttings are my go-to method. It’s straightforward and yields fantastic results.
-
Take the Cuttings: Choose healthy, non-flowering stems from a mature plant. You want stems that are somewhat firm but not woody. Look for stems about 4-6 inches long. Using your clean shears, make a clean cut just below a leaf node (where a leaf emerges from the stem). These nodes are where roots are most likely to form. Remove the lower leaves, leaving just a few at the top.
-
Prepare the Cuttings: If you’re using rooting hormone, dip the cut end of each cutting into the hormone, tapping off any excess. This step isn’t strictly necessary for Phacelia ciliate, which is pretty enthusiastic about rooting, but it can certainly speed things up.
-
Plant the Cuttings: Fill your pots or trays with your prepared potting mix. Use your trowel or dibber to poke a small hole in the center of each pot or cell. Gently insert the cut end of the cutting into the hole, making sure the lowest leaf node is below the soil surface. Firm the soil gently around the base of the cutting to ensure good contact.
-
Create Humidity: This is key! Water the soil lightly until it’s evenly moist, but not soggy. Then, cover the pots with a clear plastic bag or a propagation dome. This traps moisture and humidity, creating a mini-greenhouse that encourages root development. Make sure the leaves aren’t touching the plastic if possible, as this can lead to rot.
-
Provide Light: Place your pots in a bright spot, but out of direct, harsh sunlight. A sunny windowsill is often perfect.
The “Secret Sauce” (Pro Tips)
Here are a couple of things I’ve learned over the years that can really make a difference:
- Don’t let the leaves touch the water: If you’re doing water propagation (which is also an option for Phacelia ciliate if you prefer), make sure only the cut stem is submerged, not the leaves. Leaves left in water will quickly rot and can take the whole cutting down with them.
- Bottom heat is your friend: If you have a heat mat designed for seedlings, placing your pots on it can significantly speed up root formation. It mimics the warmth of spring soil and gives those roots an extra nudge. You’ll likely see roots forming around the bottom of the pot in just a few weeks with this method.
Aftercare & Troubleshooting
Once you start seeing new growth emerging from the top of your cutting, that’s a good sign that roots are developing! You can gently tug on a cutting; if there’s resistance, roots have formed.
- Gradual Acclimation: Once roots are established (usually after 3-6 weeks), it’s time to gradually acclimate your new plants to drier air. Start by removing the plastic bag or dome for an hour or two each day, increasing the time until they can thrive without it.
- Watering: Continue to water them when the top inch of soil feels dry. They’ll need consistent moisture as they grow.
- Potting Up: As they get larger, you’ll want to pot them up into larger containers with fresh potting mix.
Now, what if things go wrong? The most common issue you’ll encounter is rot. This usually happens if the soil is kept too wet or if there’s poor air circulation. If you see your cuttings turning yellow and mushy, or if mold appears, it’s usually a sign of too much moisture and not enough air. Remove any affected cuttings immediately and ensure the remaining ones have good airflow. Don’t be discouraged if not every single cutting takes – it’s part of the learning process!
So there you have it! Propagating Phacelia ciliate is a truly rewarding experience. It’s a chance to connect with nature, multiply your garden’s beauty, and share that joy with others. Be patient, observe your plants, and most importantly, enjoy the journey of growing something new. Happy gardening!
Resource:
https://identify.plantnet.org/k-world-flora/species/Phacelia%20ciliata%20Benth./data