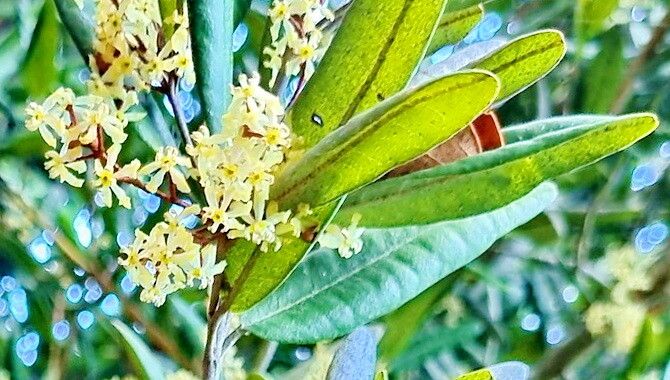
Well hello there, fellow plant enthusiasts! I’m so excited to chat with you today about a truly special plant: Aextoxicon punctatum. You might know it by its common name, the Chilean Holly or “Olivillo.” Honestly, its glossy, dark green leaves and graceful, often tree-like form make it a real showstopper in any garden. And the best part? Growing your own from cuttings or other methods is incredibly rewarding. It’s a plant that’s not overly fussy, but requires a little know-how to get started, especially if you’re new to propagating woody shrubs. Don’t worry, though, that’s what I’m here for!
The Best Time to Start
For Aextoxicon punctatum, the sweet spot for propagation is generally late spring to early summer. This is when the plant is actively growing and has plenty of energy. You’ll want to look for stems that are semi-hardwood. This means they’re no longer brand new and floppy, but not yet woody and tough. They should be bendable but feel firm. Think of it like a pencil that’s just starting to harden – not a fresh twig, but not a dried-out stick either.
Supplies You’ll Need
Gathering your tools makes the process so much smoother. Here’s what I usually have on hand:
- Sharp, clean pruning shears or secateurs: A clean cut is crucial to prevent disease.
- Rooting hormone (optional, but recommended): This gives your cuttings a much better chance at success. I prefer the powder form for ease of use.
- A well-draining potting mix: A good blend for woody cuttings is often 50% peat moss or coco coir and 50% perlite or sharp sand. You can also buy specialized propagation mixes.
- Small pots or seed trays: Make sure they have drainage holes!
- A plastic bag or propagator: This creates a humid environment for the cuttings.
- Watering can with a fine rose or a spray bottle: To mist the cuttings gently.
- Labels and a permanent marker: Don’t forget to label your pots!
Propagation Methods
Let’s get our hands dirty! For Aextoxicon punctatum, propagating from stem cuttings is usually the most successful approach.
- Take Your Cuttings: Using your clean shears, select healthy, vibrant stems from your parent plant. Aim for cuttings that are about 4-6 inches long. Make a clean cut just below a leaf node (the point where a leaf attaches to the stem). Remove the lower leaves, leaving just a couple of pairs at the top. This prevents them from rotting when buried.
- Prepare the Cuttings: If you’re using a rooting hormone, dip the cut end of each stem into the powder, tapping off any excess. This helps stimulate root development.
- Plant Your Cuttings: Fill your pots with your prepared potting mix. Make a small hole with a pencil or your finger, then insert the cutting. Gently firm the soil around the base of the stem. You can typically fit 2-3 cuttings per small pot, giving them a little space to grow.
- Create a Humid Environment: Water the soil thoroughly but gently. Then, cover the pot with a clear plastic bag. You can use a stake or two to keep the bag from touching the leaves. This traps moisture and humidity, which is vital for cuttings to root. Alternatively, you can place the pots inside a propagator.
- Find a Suitable Spot: Place your pots in a bright location that receives indirect light. Avoid direct sun, as this can scorch the young cuttings and dry out the plastic bag too quickly.
The “Secret Sauce” (Pro Tips)
Here are a few things I’ve learned over the years that can really boost your success:
- Don’t let the leaves touch the water! If you’re doing something like water propagation (which I find a bit trickier for woody plants like this), ensure the leaves are above the water level. Excess moisture on foliage can lead to rot. For stem cuttings in soil, this means trimming off those lower leaves.
- Bottom heat is your friend. Placing your pots on a heat mat designed for propagation can significantly speed up root formation. It mimics the warmth of spring soil and gives those roots a real encouragement to get going. Just make sure the heat isn’t too high; a gentle warmth is all you need.
- Be patient with your watering. The soil should remain consistently moist but never waterlogged. Overwatering is a quick way to invite rot. I often use a spray bottle to mist the surface if it starts to look dry, especially under the plastic.
Aftercare & Troubleshooting
Once you start to see signs of new growth – tiny leaves unfurling at the top – that’s a great indication that roots are forming! You can gently tug on a cutting; if there’s resistance, roots have likely taken hold.
Gradually acclimate your new plants to normal humidity by opening the plastic bag a little each day over a week. Once they’re no longer covered, you can water them as you would a small seedling. Keep them in their snug pots until they’ve developed a good root system, which might take a few months. Then, you can transplant them into slightly larger pots as needed.
The main concern you’ll face is rot. If you see stems turning black, mushy, or collapsing, it’s usually a sign of too much moisture and not enough air circulation, or potentially a fungal issue. Sadly, once rot sets in, it’s hard to recover. This is why good drainage and careful watering are so important from day one.
A Little Encouragement
Propagating plants is a journey, and Aextoxicon punctatum is a wonderful one to embark on. Don’t be discouraged if your first few attempts don’t yield a forest! Each cutting you try, each observation you make, teaches you something. Enjoy the process of nurturing these tiny beginnings, and before you know it, you’ll be sharing your own home-grown Chilean Hollies with friends and family. Happy propagating!
Resource:
https://identify.plantnet.org/k-world-flora/species/Aextoxicon%20punctatum%20Ruiz%20&%20Pav./data