Hello fellow plant lovers!
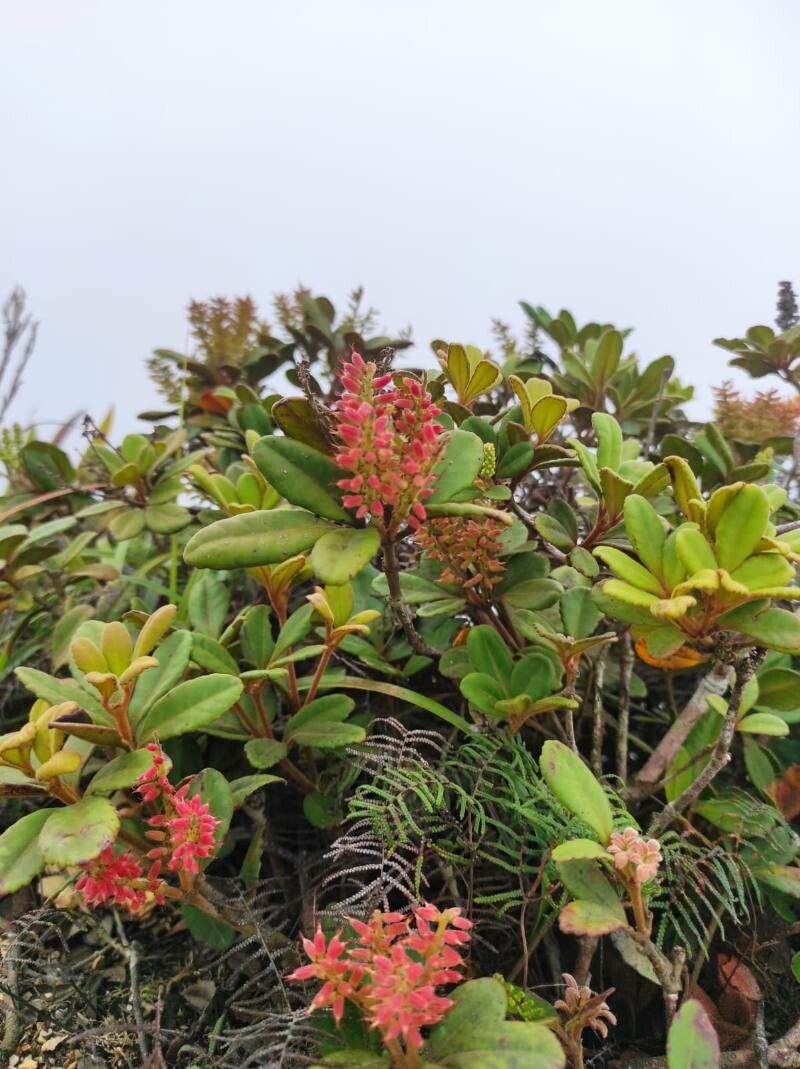
Today, we’re diving into the wonderful world of Pterophylla ouaiemensis. If you’re drawn to plants with intricate, feathery foliage that seems to dance in the slightest breeze, you’re going to adore this one. Its delicate beauty adds a touch of lushness to any indoor jungle, and the best part? You can easily multiply your own collection by propagating it. I’ve found that Pterophylla ouaiemensis is quite forgiving, making it a delightful project even if you’re just starting your plant parent journey. Watching a tiny cutting transform into a full-fledged plant is truly one of the most rewarding feelings in gardening.
The Best Time to Start
For the highest success rate with your Pterophylla ouaiemensis, I’ve found that spring and early summer are your golden windows. This is when the plant is in its most active growth phase. New shoots are emerging, and the stems are full of life and energy, ready to sprout roots. Trying to propagate during a period of dormancy, like deep winter, can be much more challenging. Wait until you see healthy, active growth.
Supplies You’ll Need
Gathering the right tools beforehand makes the whole process smoother. Here’s what I always have on hand:
- Sharp, clean pruning shears or a knife: Cleanliness is crucial to prevent disease transmission.
- Rooting hormone (optional but recommended): A rooting powder or gel can significantly boost your success.
- Well-draining potting mix: A good blend of peat moss, perlite, and a little bit of compost works wonders. You can also find specific succulent or cactus mixes that will do the trick.
- Small pots or propagation trays: Clean containers that offer good drainage are ideal.
- Plastic bags or a clear propagation cover: This helps maintain humidity around your cuttings.
- Water: For water propagation, clean room-temperature water is best.
- Spray bottle: For lightly misting cuttings.
- Labels and a marker: To keep track of your projects!
Propagation Methods
I find that stem cuttings are the most reliable and straightforward method for Pterophylla ouaiemensis.
Stem Cuttings:
- Find a healthy stem: Look for a vibrant, non-flowering stem that’s at least 4-6 inches long.
- Make the cut: Using your sterilized pruning shears or knife, make a clean cut just below a leaf node (where a leaf attaches to the stem). This node is where roots are most likely to form.
- Remove lower leaves: Gently strip off the bottom leaves, leaving at least two or three at the top. This prevents them from rotting once planted.
- (Optional) Apply rooting hormone: Dip the cut end of the stem into your rooting hormone, tapping off any excess.
- Plant your cutting: Fill your small pot or tray with your well-draining potting mix. Make a small hole in the center and insert the cut end of the stem. Gently firm the soil around it.
- Water lightly: Give the soil a light watering. Avoid saturating it.
- Create a humid environment: Cover the pot with a clear plastic bag or propagation lid. This creates a mini-greenhouse, keeping the humidity high, which is vital for rooting. Make sure the bag doesn’t touch the leaves too much – you can use stakes to prop it up.
- Place in bright, indirect light: Find a spot that receives plenty of bright light but no direct sun, as this can scorch your new cuttings.
Water Propagation (An alternative for some varieties):
While stem cuttings are my go-to, some gardeners have success with water.
- Prepare your cutting: Follow steps 1-3 from the stem cutting method.
- Place in water: Put the cuttings into a clean jar or vase filled with room-temperature water.
- Ensure leaves stay dry: This is key! Do not let any leaves touch the water. Submerged leaves will rot and can kill the cutting before it even has a chance to root. You might need to prop the stems up with a toothpick or rubber band to keep the leaves clear.
- Change water regularly: Change the water every few days to keep it fresh and oxygenated.
- Place in bright, indirect light: Just like with soil propagation, bright, indirect light is best.
- Wait for roots: You should start to see small white roots emerging from the nodes within a few weeks. Once the roots are about an inch long, you can transplant them into soil.
The “Secret Sauce” (Pro Tips)
I’ve learned a few tricks over the years that make a big difference!
- Bottom Heat is Your Friend: If you can, place your propagation tray on a gentle heating mat. This little boost of warmth from below encourages root development much faster. It mimics the warmth of spring soil.
- Don’t Overwater! This is probably the most common mistake. Cuttings are very susceptible to rot. The soil should be consistently moist, but never soggy. A good rule of thumb is to let the top inch of soil dry out slightly before watering again. A spray bottle can be your best friend here for light misting in the early stages.
- Be Patient with the “Wiggle Test”: When you think your cutting has rooted (usually after 3-6 weeks), give it a very gentle tug. If you feel resistance, it means roots have formed. If it feels loose, give it more time. Resisting the urge to pull it up to check is vital!
Aftercare & Troubleshooting
Once your cuttings have developed a good root system – you’ll see new growth emerging and they’ll resist that gentle tug – it’s time to treat them like the young plants they are!
- Gradually acclimate: If you’ve been using a plastic bag for humidity, slowly start to remove it over a few days to help the plant adjust to normal room humidity.
- Water as needed: Water when the top inch of soil feels dry.
- Fertilize sparingly: You don’t need to fertilize right away. Wait until you see active new growth, and then use a diluted liquid fertilizer at half strength every 4-6 weeks during the growing season.
Signs of Trouble:
- Wilting: This can mean it’s not getting enough water, or it might be getting too much and starting to rot. Check the soil moisture.
- Yellowing leaves: Often a sign of overwatering. Ensure your pot has good drainage.
- Black, mushy stems: This is definitely rot, usually caused by too much moisture and poor air circulation. Sadly, if rot sets in, it’s very difficult to save the cutting. Prevention (proper watering and airflow) is key.
A Little Encouragement
Gardening is all about patience and observation. Don’t get discouraged if some cuttings don’t make it; it happens to all of us! Celebrate your successes, learn from any setbacks, and most importantly, enjoy the magical process of growing new life. Happy propagating!
Resource: