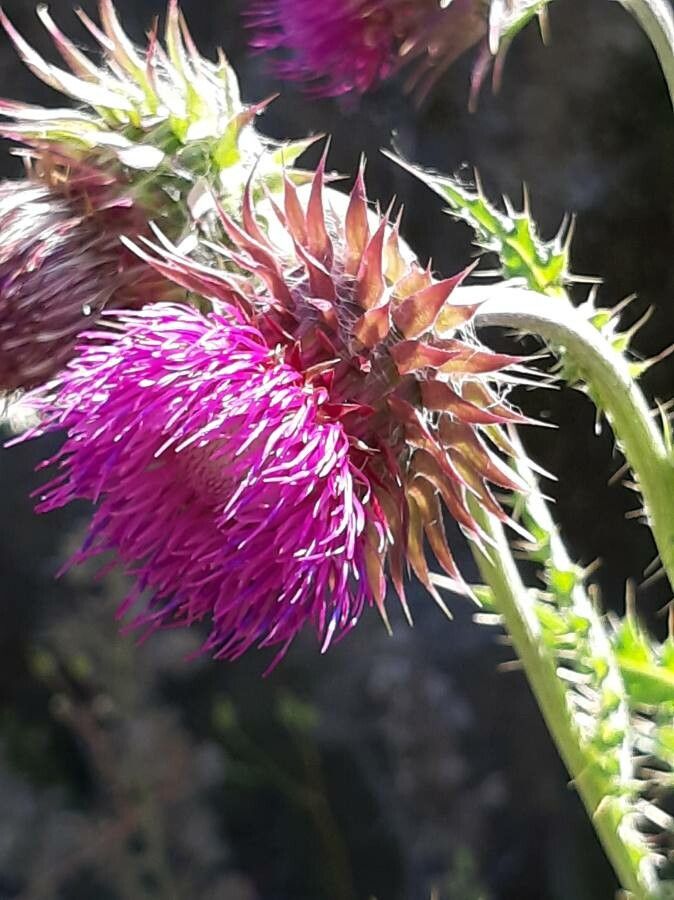
Oh, the glorious Carduus nutans, or nodding thistle! If you’ve ever seen one of these stunners in full bloom, you know the appeal. Their magnificent rich magenta flower heads, nodding so gracefully on sturdy stems, are a magnet for bees and butterflies. Plus, honestly, there’s a touch of wild beauty in them that just speaks to my soul. If you’re looking to add more of this wonderful plant to your garden, or perhaps share its beauty with a friend, propagating it is a super rewarding project. And I’m happy to tell you, it’s quite doable, even for those who are just starting their gardening journey!
The Best Time to Start
Timing is everything in the garden, isn’t it? For Carduus nutans, I’ve found the absolute sweet spot for propagation is late spring to early summer. This is when the plant is actively growing and has plenty of energy to put into developing new roots. You’ll want to look for stems that are firm and have established themselves, not the very youngest, floppy growth.
Supplies You’ll Need
Gathering your tools before you begin makes the whole process smoother. Here’s what I usually have on hand:
- Clean, sharp pruning shears or a knife: Vital for making clean cuts to prevent disease.
- Rooting hormone (optional, but recommended): This powder or gel can give your cuttings an extra boost.
- Well-draining potting mix: A good blend of peat moss, perlite, and a bit of compost works wonderfully. You don’t want anything that holds too much moisture.
- Small pots or trays with drainage holes: For your cuttings to grow in.
- A spray bottle with water: For misting.
- A clear plastic bag or dome: To create a humid environment.
- A trowel or dibber: For making holes to insert your cuttings.
Propagation Methods
Carduus nutans is a trooper, and thankfully, it’s pretty amenable to a few different propagation techniques. My go-to is usually stem cuttings, as it’s reliable and allows me to make several new plants from one mother plant.
Stem Cuttings
- Choose your source: Head to your healthy, established Carduus nutans. Look for stems that are semi-hardwood – meaning they’ve started to firm up but aren’t woody and old.
- Make the cut: Using your clean shears or knife, take cuttings that are about 4-6 inches long. Make a clean cut just below a leaf node. A leaf node is where a leaf emerges from the stem; this is where those magical root-forming cells live!
- Prepare the cutting: Gently remove the lower leaves from the cutting, leaving only the top few. This reduces water loss and prevents leaves from rotting in the soil.
- Dip in hormone (optional): If you’re using rooting hormone, dip the cut end into the powder or gel. Tap off any excess.
- Planting time: Fill your small pots with your well-draining potting mix. Use your trowel or dibber to make a hole in the center of the pot. Gently insert the cut end of your Carduus nutans cutting into the hole, ensuring the leaf nodes you removed are buried. Firm the soil gently around the cutting.
The “Secret Sauce” (Pro Tips)
Now, for a couple of little tricks that I’ve picked up over the years that really give your cuttings an edge.
- Bottom heat is your friend: If you can, place your pots on a heat mat or in a warm spot. Carduus nutans, like many plants, loves a little warmth at its base, which encourages root development. You don’t need it blazing hot, just a gentle warmth.
- Humidity is key, but with a caveat: While we want to keep those cuttings moist and humid, make sure the leaves don’t actually touch the soil or water. If you’re using a humidity dome or plastic bag, ensure there’s a little air circulation. Stagnant, wet leaves are an invitation for fungal diseases, and we definitely don’t want that!
Aftercare & Troubleshooting
Once your cuttings are planted, it’s time to nurture them.
- Keep it moist: Water regularly, but don’t let the soil become waterlogged. The goal is consistently damp, not soggy. A good indicator is when the top inch of soil feels dry to the touch.
- Provide light: Place your pots in a bright location, but out of direct, harsh sunlight, especially during the hottest part of the day. A sunny windowsill is often perfect.
- Check for roots: In a few weeks, gently tug on a cutting. If you feel resistance, congratulations! You’ve got roots! You’ll also start to see new leaf growth.
- Troubleshooting: The most common issue you might encounter is rot, often appearing as a black, mushy stem. This is usually a sign of too much moisture or not enough air circulation. If you see this, it’s best to discard the affected cutting to prevent it from spreading and improve your conditions for the remaining ones. Lack of rooting might mean it’s too early in the season, or perhaps the cutting wasn’t quite right. Don’t get discouraged; just try again!
A Encouraging Closing
Propagating Carduus nutans is such a satisfying way to multiply these stunning plants. It takes a little patience, a keen eye, and the willingness to learn from each little sprout. So, gather your supplies, get your hands in the soil, and enjoy the process of watching new life emerge. Happy gardening, my friends!
Resource:
https://identify.plantnet.org/k-world-flora/species/Carduus%20nutans%20L./data