Oh, hello there! It’s so lovely to connect with you through this little corner of the internet. Today, we’re diving into the wonderful world of Sideroxylon mirmulano, a plant that truly steals my heart with its delicate beauty and surprisingly resilient nature. If you’ve ever admired its glossy leaves and graceful form, you might be wondering if you can bring a little piece of that magic into your own garden, or maybe even start a whole new collection. Well, let me tell you, propagating this gem is incredibly rewarding, and while it has its quirks, it’s definitely achievable, even for those just dipping their toes into the plant propagation pond.
The Best Time to Start
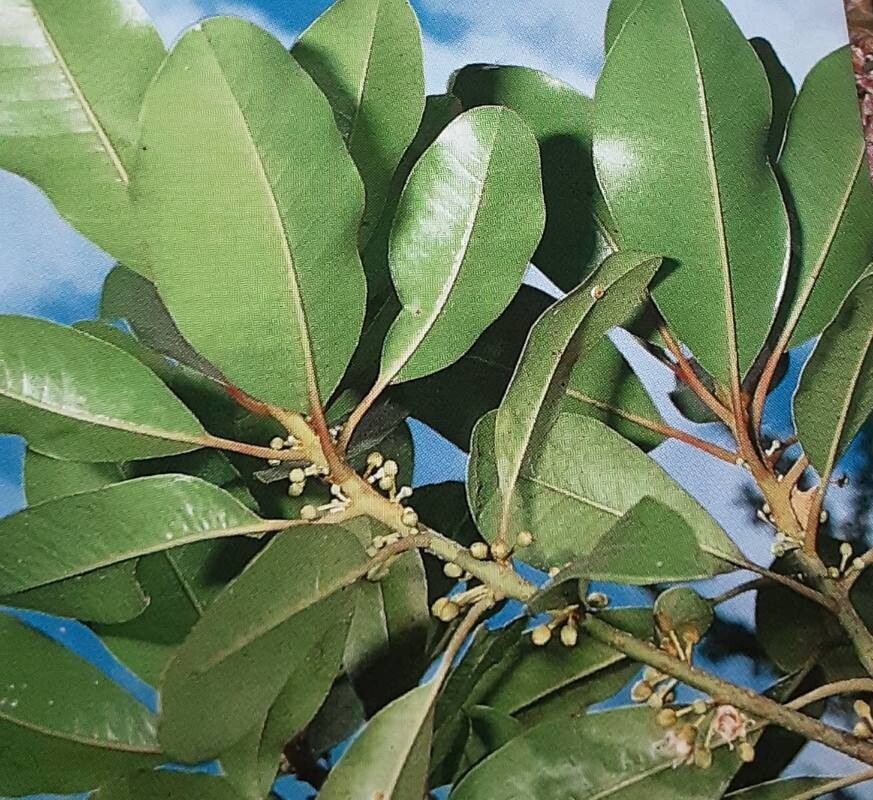
For Sideroxylon mirmulano, the sweet spot for propagation is undeniably late spring or early summer. This is when the plant is actively growing, pushing out new, vigorous shoots that have the energy to root. Waiting until after the plant has finished its main flush of growth, but before the intense heat of mid-summer, gives your cuttings the best chance to establish themselves without being stressed by extreme temperatures.
Supplies You’ll Need
Before we get our hands dirty, let’s make sure we have everything we need. Having your tools organized beforehand makes the whole process so much smoother.
- Sharp, clean pruning shears or a sharp knife: Essential for making clean cuts, which are crucial for successful rooting.
- Rooting hormone powder or gel: While not always strictly necessary, it can give your cuttings a significant boost.
- Well-draining potting mix: I like a blend of equal parts peat moss or coir, perlite, and a little bit of coarse sand.
- Small pots or trays: Clean pots with drainage holes are a must, about 3-4 inches in diameter work well.
- Plastic bags or a propagator: To create a humid environment for your cuttings.
- Water: For moistening your soil and misting.
- Labeling tags: To keep track of what you’ve planted and when.
Propagation Methods
There are a couple of ways to go about this, and I find the most success with stem cuttings.
1. Taking Stem Cuttings:
- First, grab your clean pruners. Look for healthy, semi-hardwood stems. These are stems that are no longer floppy and green, but not yet completely woody. You’re aiming for pieces that are about 4-6 inches long.
- Make a clean cut just below a leaf node. A leaf node is where a leaf attaches to the stem – this is where the magic of rooting happens!
- Now, remove the lower leaves. Leave just one or two sets of leaves at the top. This reduces water loss and prevents leaves from rotting in the soil.
- Dip the cut end of the stem into your rooting hormone, if you’re using it. Tap off any excess.
- Moisten your potting mix in your small pots. It should feel damp, not soggy.
- Gently insert the cutting into the soil, making sure the lowest leaf node is buried. You can use a pencil or your finger to make a small hole first.
- Gently firm the soil around the cutting.
- Water lightly to settle the soil.
2. Creating a Humid Environment:
- This is vital for cuttings. You can slip a clear plastic bag over the pot and the cutting, making sure the bag doesn’t touch the leaves too much, or use a propagator with a lid. This traps humidity, mimicking the conditions your cutting needs to sprout roots before it can properly absorb water from the soil.
- Place your pots in a bright spot, but out of direct sunlight. Too much sun will scorch your fragile cuttings.
- Keep the soil consistently moist, but not waterlogged. Mist the leaves occasionally if the humidity seems low within the bag or propagator.
The “Secret Sauce”
Here are a couple of little tricks I’ve picked up over the years that really seem to make a difference with trickier plants like Sideroxylon mirmulano.
- Don’t let the leaves touch the water. If you’re misting or if there’s any condensation within your propagator, make sure the foliage isn’t sitting in pools of water. This is a fast track to rot, and we want healthy growth, not mush!
- Bottom heat is your friend. If you have a heat mat designed for seed starting, placing your pots on it can significantly speed up the rooting process. It encourages root development from below, giving your cuttings that extra push. You can also mimic this by placing your pots on top of a warm but not hot appliance, like a refrigerator, but always monitor for consistent warmth.
Aftercare & Troubleshooting
Once your cuttings have successfully rooted (you can often tell by new leaf growth or a gentle tug that meets resistance), it’s time to transition them into brighter light and reduce humidity gradually.
- Acclimatize slowly: Gradually remove the plastic bag or open the propagator vents over a week or so. This helps the plant adjust to drier air.
- Watering: Water when the top inch of soil feels dry to the touch.
- Fertilizing: Wait a few weeks after you see good new growth before feeding with a diluted liquid fertilizer.
Now, what if things don’t quite go as planned? Don’t fret! It happens to all of us.
- Rotting stems: This is usually a sign of too much moisture and not enough air circulation. Ensure your soil is very well-draining and don’t overwater. If you see mushy, black stems, it’s time to discard that cutting and start fresh with improved conditions.
- No new growth: This can mean the cutting simply hasn’t rooted yet, or it may not be viable. Patience is key! But if weeks turn into months with absolutely no signs of life, it might be time to try again.
A Little Encouragement
Growing new plants is a journey, and each cutting is a little experiment. Some will thrive, and some won’t, but that’s all part of the learning process. Be patient with your little Sideroxylon mirmulano cuttings. Celebrate every tiny sign of life, and don’t be afraid to try again if the first attempt isn’t a roaring success. The joy of nurturing a new plant from a tiny piece of your cherished one is truly unparalleled. Happy propagating!
Resource:
https://identify.plantnet.org/k-world-flora/species/Sideroxylon%20mirmulano%20R.Br./data