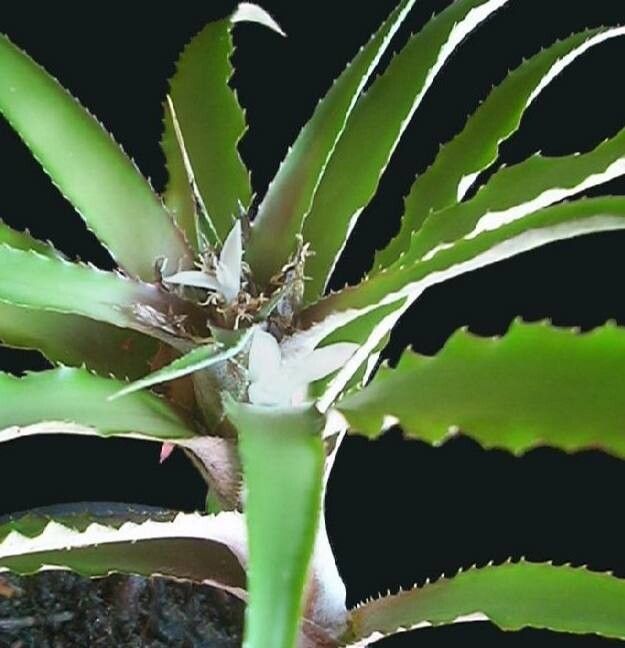
Hello there, fellow plant lovers! I’m so delighted to have you join me today. We’re diving into the wonderful world of Cryptanthus bahianus, often known as the “Earth Stars.” If you’ve ever admired their starburst-like foliage, a mesmerizing blend of greens, bronzes, and reds, you’re in for a treat. Propagating them is a fantastic way to multiply these beauties and share them with friends, or simply to fill your home with even more gorgeous foliage. For beginners, I’d say Cryptanthus are quite forgiving, making this a rewarding project you can absolutely nail!
The Best Time to Start
You know, the perfect moment to get your propagation party started is when your Cryptanthus mother plant is actively growing. Think late spring through early fall. During these warmer months, they’re bursting with energy and are far more likely to send out those healthy pups or offsets we’re looking for. You’ll see a noticeable surge in their growth, and any new baby plants will be plump and ready for their own adventure.
Supplies You’ll Need
Gathering your tools is half the fun, right? Here’s what you’ll want to have on hand for a successful propagation:
- Sterile pruning shears or a sharp knife: For clean cuts that minimize disease.
- Well-draining potting mix: A mix formulated for cacti and succulents works wonderfully. I often add a good scoop of perlite or coarse sand to my regular potting soil for extra aeration.
- Small pots or propagation trays: Something appropriately sized for the new babies.
- Rooting hormone powder (optional but recommended): This gives your cuttings a little boost.
- Watering can with a fine spray: To keep things gently moist.
- Clear plastic bags or a propagation dome: To create a humid environment.
- Labels and a pen: Because trust me, you will forget which is which!
Propagation Methods
Cryptanthus are wonderfully amenable to a couple of methods, but my absolute favorite, and the easiest for most of us, is division.
Division: The Easiest Way to Multiply Your Earth Stars
Your mature Cryptanthus will naturally produce baby plants, called pups or offsets, around their base. It’s like they’re giving you gifts!
- Gently remove the mother plant from its pot. You can do this by turning the pot on its side and carefully coaxing the plant out. If it’s stubborn, a gentle tap or two should do the trick.
- Inspect the root system. You’ll see where the pups are attached to the main plant.
- Carefully separate the pups. Use your sterile pruning shears or knife to make a clean cut where the pup meets the mother plant. Try to get a few roots attached to each pup if possible, but don’t stress if they don’t have many to start with.
- Allow the cuts to callus over. This is important! Let the separated pups sit out in a dry, well-ventilated spot for 24-48 hours. This helps prevent rot when you replant them.
- Pot them up. Fill your small pots with your well-draining potting mix. Make a small hole in the center and nestle the pup in, firming the soil gently around its base.
- Water sparingly. Give them a light watering initially, just enough to settle the soil. Overwatering at this stage is the quickest way to cause problems.
The “Secret Sauce” (Pro Tips)
Here are a few little nuggets of wisdom I’ve gathered over the years that really make a difference:
- Don’t let the leaves touch the water (if you ever decide to try water propagation): Though I champion division, some folks like to try water. If you do, make sure only the cut stem is submerged, not any of the foliage. Wet leaves are an invitation for rot!
- Bottom heat is your friend: For an extra boost, especially if you’re getting a late start or want to speed things up, placing your pots on a gentle heat mat can work wonders. Think of it as a cozy warm hug for those developing roots.
- Patience with the pups: Don’t be tempted to yank on a pup to see if it has roots. They need time to establish themselves. If they wiggle easily, they probably haven’t rooted fully.
Aftercare & Troubleshooting
Once your pups are potted, treat them like young children. Keep them in bright, indirect light. Avoid direct sun, which can scorch their delicate leaves. Water only when the soil feels almost dry to the touch.
Signs of trouble often include mushy, yellowing leaves, which usually means overwatering and potential rot. If you see this, gently unpot the plant, trim away any rotted bits with your sterile tool, let it callus again, and repot in fresh, dry soil. If the leaves start to shrivel and crisp, it might be a sign they’re too dry, so give them a gentle drink.
A Encouraging Closing
And there you have it! Propagating Cryptanthus bahianus is a truly satisfying journey. Remember to be patient with your new plant babies. They’re working their magic underground, and with a little TLC, you’ll soon be rewarded with gorgeous, healthy Earth Stars. Happy propagating!
Resource:
https://identify.plantnet.org/k-world-flora/species/Cryptanthus%20bahianus%20L.B.Sm./data