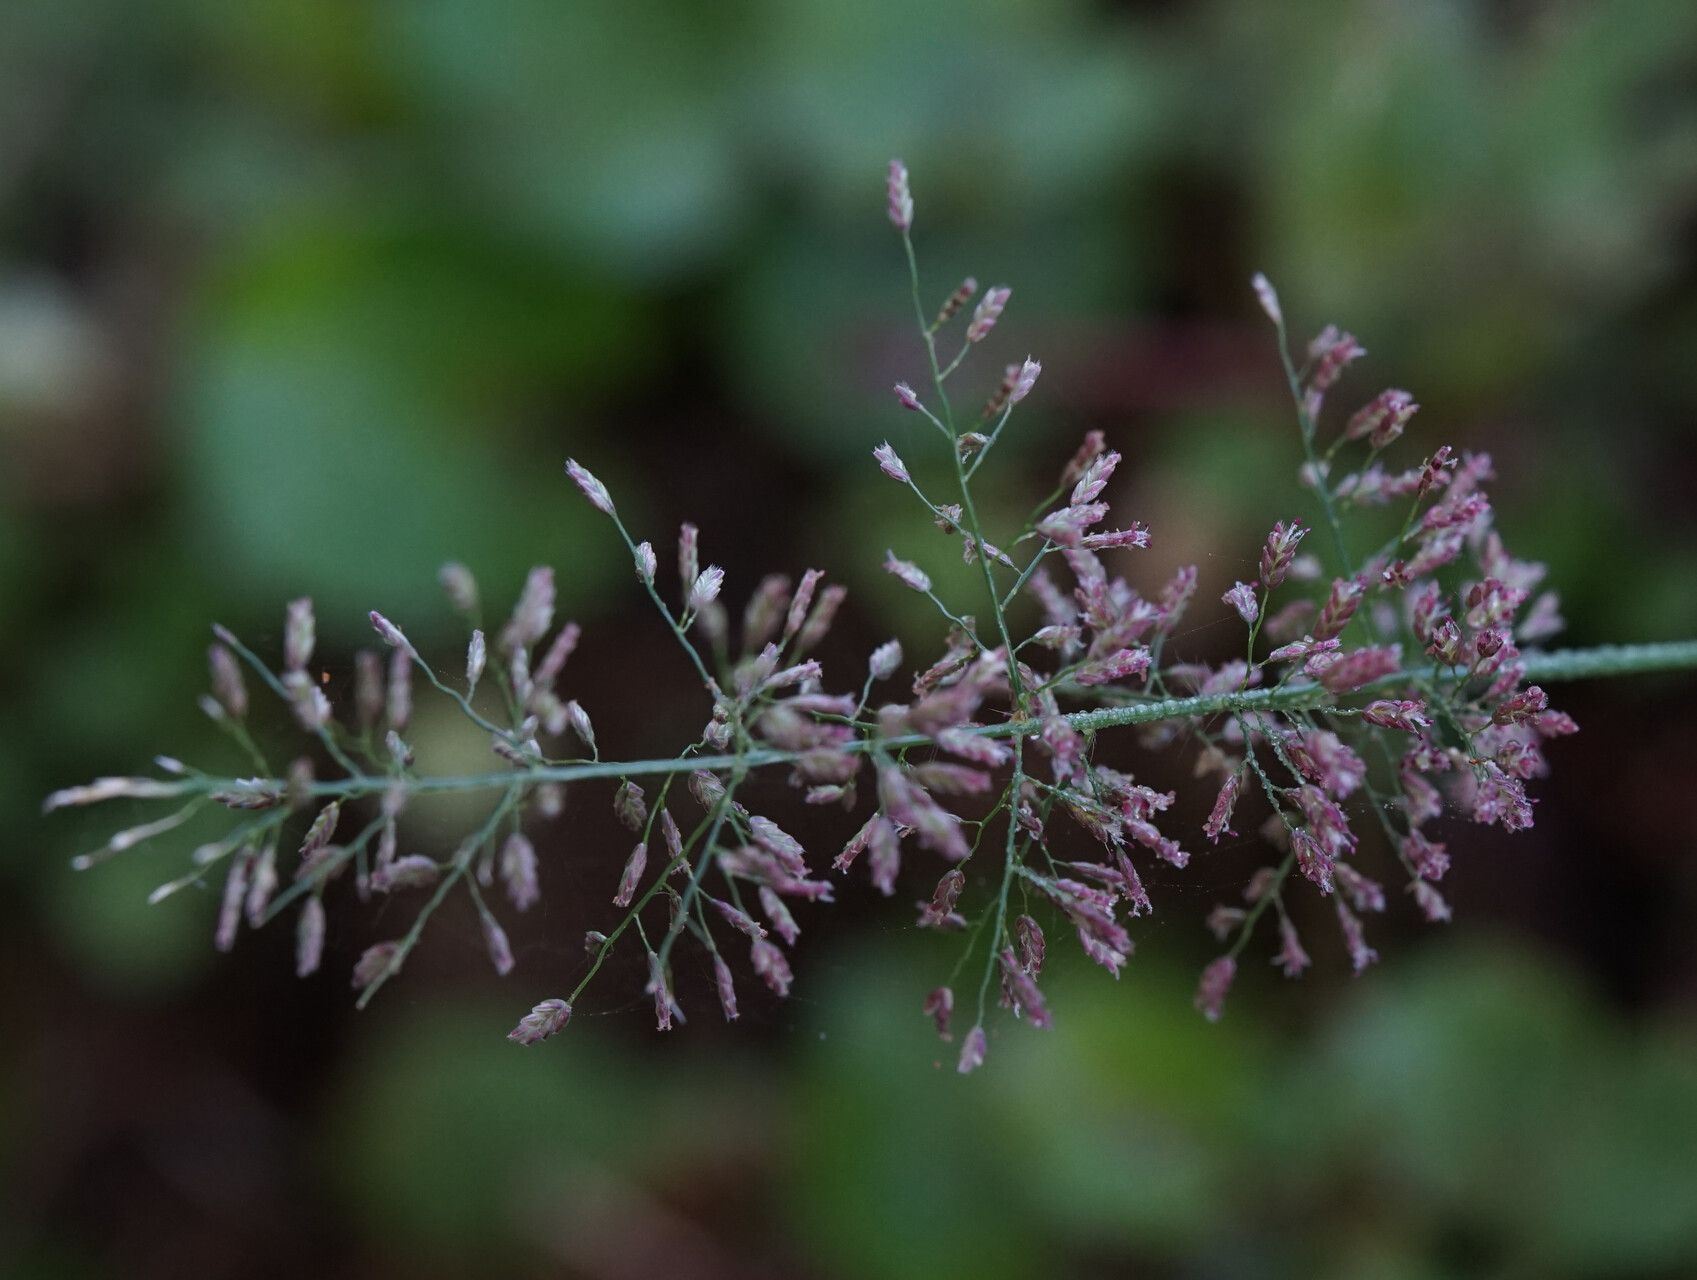
Hello there, fellow plant enthusiasts! Let’s talk about a truly delightful grass: Eragrostis tenella, often called pink lovegrass. This beauty, with its delicate, airy pink plumes that shimmer in the breeze, brings such a romantic, natural feel to any garden. Propagating it is a wonderful way to not only fill your own space with its charm but also to share the magic with friends. And the best part? It’s quite forgiving, making it a lovely project for beginners and seasoned gardeners alike.
The Best Time to Start
For the highest success rate with Eragrostis tenella, I always recommend working with it in its active growing season. Think late spring or early summer. This is when the plant has plenty of energy stored and is ready to put out new growth, which makes propagation much easier. You’ll likely be dividing or taking cuttings from established plants that are already looking vigorous.
Supplies You’ll Need
Here’s what I like to have on hand before I get started:
- Sharp pruning shears or a clean craft knife: For making precise cuts.
- Well-draining potting mix: A blend of potting soil, perlite, and a bit of coarse sand works perfectly for cuttings and divisions. For seeds, a lighter seed-starting mix is best.
- Small pots or trays: Clean containers with drainage holes are crucial.
- Optional rooting hormone: While lovegrass is pretty good at rooting on its own, a little hormone can speed things up.
- Watering can with a fine rose: To avoid disturbing your new cuttings.
- Plastic bag or propagation dome: To create a humid environment for cuttings.
- Labels and a marker: Don’t forget to label your efforts!
Propagation Methods
Eragrostis tenella is wonderfully versatile. You can propagate it by division or from seed.
Division
This is my go-to method for lovegrass. It’s straightforward and often results in multiple new plants!
- Dig up the plant: In late spring or early summer, carefully dig up your Eragrostis tenella plant. Loosen the soil around the edges and gently lift the entire clump.
- Clean the roots: Gently shake off excess soil from the root ball. You want to see the main clumps and root structure.
- Separate the divisions: Use your hands or a clean trowel to gently pull the plant apart. Look for natural breaks where the root system is already divided. You want each division to have a good amount of roots and some healthy foliage.
- Replant immediately: Pop your divisions into pots filled with your well-draining potting mix. Make sure the crown of the plant is at soil level. Water them in gently.
From Seed
Starting lovegrass from seed is also a rewarding process.
- Sow seeds: In early spring, fill small pots or trays with a light seed-starting mix. Lightly press the seeds onto the surface of the soil; don’t bury them too deeply, as they need light to germinate.
- Water gently: Use a spray bottle to mist the soil until it’s evenly moist.
- Provide warmth and light: Cover the pots with a plastic bag or propagation dome to retain humidity. Place them in a warm spot, ideally with bottom heat from a heat mat. They need bright, indirect light.
- Be patient: Germination can take anywhere from a week to several weeks. Keep the soil moist but not waterlogged. Once seedlings appear, you can remove the plastic cover gradually.
The “Secret Sauce” (Pro Tips)
Here are a few things I’ve learned over the years that can really help your propagations thrive:
- Don’t overwater divisions: While they need moisture, soggy soil is the enemy of young roots. Let the top inch of soil dry out slightly between waterings for divisions. For cuttings, consistent moisture is key, but still, avoid soggy feet.
- Mimic nature with cuttings: If you choose to take stem cuttings (which is less common but possible with Eragrostis tenella), don’t let the leaves of the cutting touch the water or the soil surface. Trim off any lower leaves that would be submerged. This prevents rot from setting in.
- Bottom heat is a game-changer for seeds: Especially when starting from seed, a gentle heat source from below (like a seed starting mat) significantly speeds up germination and increases success. Your little lovegrass seeds will thank you!
Aftercare & Troubleshooting
Once your divisions are replanted or your seeds have sprouted and developed a few leaves, the real growth begins. Keep them in a bright spot, out of direct, scorching sun, and continue to water them appropriately. Water them when the top inch of soil feels dry to the touch.
Now, what if things go awry? The most common issue you’ll encounter is rot. This usually happens with cuttings or seedlings that are kept too wet, or if they lack good air circulation. If you see mushy stems or leaves turning yellow and limp, it’s a sign of overwatering or insufficient drainage. Pull out any affected parts immediately and assess your watering habits. For divisions, if a clump looks completely dead and there’s no sign of new growth after a few weeks, you might have to say goodbye, but don’t get discouraged.
A Gentle Encouragement
Propagating plants is a journey, and sometimes it has its twists and turns. The most important thing is to be patient, observant, and enjoy the process of coaxing new life from your beloved Eragrostis tenella. Each new little plant is a testament to your green thumb and a lovely reminder of the gardening magic we can create. Happy propagating!
Resource: