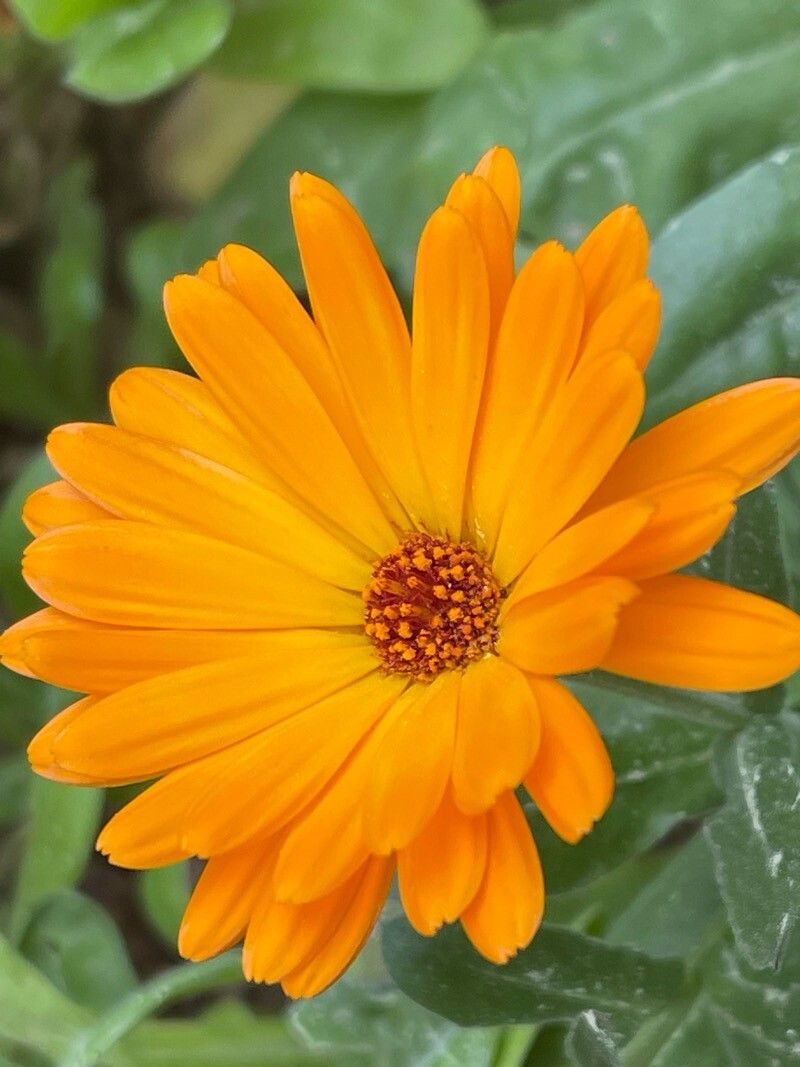
Hello there, fellow garden lovers! Today, we’re diving into the sunny world of Calendula stellata, also known as the starry calendula. If you’ve ever admired those bright, cheerful daisy-like flowers that seem to glow in the garden, you’re not alone! They’re an absolute joy to have around, providing splashes of sunshine from early spring right through to the first frosts. What’s even better is that this delightful plant is surprisingly easy to grow from scratch. For beginner gardeners, this is a fantastic plant to get your hands dirty with. It’s rewarding to watch a tiny seed or cutting transform into a blooming beauty you’ve nurtured yourself.
The Best Time to Start
When it comes to Calendula stellata, spring is your golden ticket. Your best bet for success is to sow seeds after the last frost has passed, or when the soil has warmed up nicely. This warm soil encourages germination and gives young plants a strong start. If you’re looking to take cuttings, the late spring or early summer is ideal, when the plant is actively growing and producing plenty of new, healthy shoots.
Supplies You’ll Need
Gathering your supplies beforehand makes the whole process smoother. Here’s what I always have on hand:
- Fresh Calendula seeds or healthy cuttings: Choose plump seeds free from damage, or firm, non-woody stems.
- Seed starting mix or a well-draining potting mix: Something light and airy is key. I often mix in a bit of perlite for even better drainage.
- Small pots or seed trays: Biodegradable pots are lovely if you want to plant them directly into the garden later.
- Watering can with a fine rose: Gentle watering is crucial to avoid disturbing tiny seeds or delicate cuttings.
- Labels and a marker pen: Trust me, you’ll thank yourself later for knowing what’s what!
- Rooting hormone powder (optional but helpful): This can give cuttings a little boost.
- A clean, sharp pair of pruning shears or a knife: For taking neat cuttings.
Propagation Methods
Calendula stellata is a champion at self-seeding, but if you want to be more deliberate or create specific varieties, here are my go-to methods.
From Seed: The Classic Approach
- Prepare your pots: Fill your pots or seed trays with your prepared seed-starting mix.
- Sow the seeds: Place 1-2 seeds on the surface of the soil and gently press them in. Calendula seeds don’t need to be buried very deep – about ¼ inch is plenty.
- Water gently: Use your fine-rose watering can to moisten the soil. You want it damp, not waterlogged.
- Provide warmth and light: Place the pots in a warm spot, around 65-70°F (18-21°C). A sunny windowsill works wonderfully.
- Be patient: You should see germination in about 7-14 days. Keep the soil consistently moist.
- Thinning: Once the seedlings have a few sets of true leaves, thin them out to the strongest one per pot. This gives them room to grow.
From Cuttings: A Rewarding Challenge
- Select your cuttings: Look for healthy, non-flowering stems that are about 3-4 inches long. Pinch off any lower leaves.
- Prepare the cutting: If you’re using rooting hormone, dip the cut end into the powder.
- Plant the cutting: Make a small hole in your prepared potting mix (use something with good drainage here, maybe with extra perlite). Insert the cut end of the stem into the hole and gently firm the soil around it.
- Water and cover: Water the soil thoroughly and, if you have one, place a clear plastic bag over the pot to create a mini-greenhouse. This helps retain humidity.
- Placement: Put the pot in a bright spot but out of direct, harsh sunlight.
- Check for roots: After a few weeks, gently tug on the cutting. If there’s resistance, roots have formed! You’ll want to see new growth as well.
The “Secret Sauce”
Here are a couple of little tricks that have made a world of difference for me over the years:
- Don’t drown your seedlings! Calendula, especially as seedlings, is susceptible to damping off (a fungal disease). While you want consistently moist soil, avoid letting them sit in soggy conditions. Good drainage is your best friend. If you’re starting seeds indoors, consider a slightly grittier mix.
- Bottom heat for cuttings: If you have a heat mat designed for seed starting, using it under your pots of cuttings can significantly speed up root development. It mimics the warmth of spring soil and gives those roots a real kickstart.
Aftercare & Troubleshooting
Once your seeds have sprouted or your cuttings have rooted, it’s time for the next stage. Water your new plants consistently, but again, don’t let them become waterlogged. As they grow, you might want to pinch out the growing tips of seedlings once they have a few sets of true leaves. This encourages bushier growth and more flowers. If you’ve potted up cuttings, once they are robust enough, you can transplant them into larger pots or directly into your garden.
The most common issue you might encounter is rot. This usually happens with overwatering or poor drainage. If you see seedlings or cuttings wilting and turning mushy at the base, it’s often a sign of too much moisture. Remove any affected plants immediately to prevent it from spreading and assess your watering and drainage habits. Sometimes, the cutting just doesn’t take – that’s part of the process! Don’t get discouraged.
A Little Patience, A Lot of Sunshine
Propagating Calendula stellata is a wonderful journey, from tiny seed to blooming marvel. It’s a chance to connect with nature and fill your garden with cheerful color. Be patient with the process, celebrate every little success, and most importantly, enjoy the rewarding feeling of growing your own beautiful garden. Happy planting!
Resource:
https://identify.plantnet.org/k-world-flora/species/Calendula%20stellata%20Cav./data