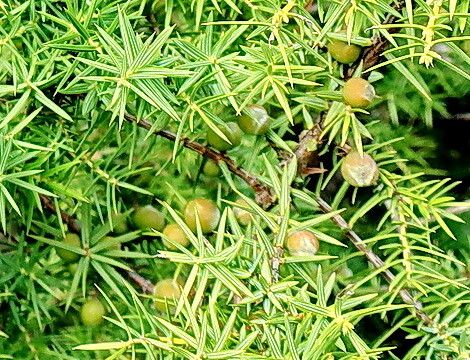
Oh, Juniperus deltoides! What a handsome conifer. Its graceful, outstretched branches and lovely evergreen foliage bring such a wonderful texture to the garden. And the best part? You can actually create more of these beauties from your existing plants. Isn’t that just the most satisfying feeling – taking a piece of something you love and nurturing it into a whole new life?
Successfully propagating junipers, including our friend Juniperus deltoides, can feel a little tricky at first, but honestly, it’s more about timing and a little bit of patience than anything overly complicated. I wouldn’t shy you away from it as a beginner, but it’s good to know it might require a bit more attention than, say, a succulent.
The Best Time to Start
For junipers, the sweet spot for propagation is late spring to early summer. This is when the plant is actively growing and has plenty of energy. You’ll want to take cuttings from semi-hardwood. This means the stems are no longer brand new and floppy, but they haven’t become completely woody and stiff either. They should give a little when you bend them, but snap cleanly if you try to break them.
Supplies You’ll Need
Gathering your tools beforehand makes the whole process smoother. Here’s what you’ll want on hand:
- Sharp Pruning Shears or a Craft Knife: For clean cuts.
- Rooting Hormone: A powder or gel will help encourage root development.
- Well-Draining Potting Mix: A mix of peat moss, perlite, and coarse sand works wonders. You can even find special succulent or cactus mixes that are excellent for this.
- Small Pots or Trays: With drainage holes, of course!
- Clear Plastic Bags or a Propagation Dome: To maintain humidity.
- Horticultural Charcoal (optional): Can help keep the soil sweet.
- Dibber or Pencil: For making holes in the soil.
Propagation Methods: Stem Cuttings
This is my go-to method for junipers. It’s reliable and you can take multiple cuttings from one plant.
- Take Your Cuttings: Using your clean shears or knife, take cuttings that are about 4 to 6 inches long. Make the cut just below a leaf node (where the leaves grow from the stem).
- Prepare the Cuttings: Gently strip off the lower leaves from the bottom inch or so of the cutting. This prevents them from rotting in the soil and exposes the nodes where roots will form.
- Apply Rooting Hormone: Dip the cut end of each cutting into your rooting hormone, tapping off any excess.
- Plant Your Cuttings: Fill your pots or trays with your prepared potting mix. Use a dibber or pencil to make holes in the soil, then insert the cuttings. This prevents the rooting hormone from rubbing off. Gently firm the soil around each cutting.
- Water Gently: Water the soil thoroughly but gently. You don’t want to dislodge the cuttings.
- Create a Humid Environment: Cover the pots or trays with a clear plastic bag or a propagation dome. Make sure the plastic doesn’t touch the leaves of the cuttings. If it does, prop it up with a small stick or two.
The “Secret Sauce” (Pro Tips)
Here are a few tricks I’ve learned along the way that can really boost your success:
- Cleanliness is Crucial: Always use sterilized tools. This might sound obvious, but it’s one of the most common reasons cuttings fail—disease can enter through uncleaned cuts. A quick wipe with rubbing alcohol does the trick.
- Don’t Overwater (Initially): While humidity is key, soggy soil is the enemy. The potting mix should be moist but not waterlogged. The plastic cover will help trap moisture, so you won’t need to water much until roots start to form.
- Bottom Heat is Your Friend: If you have it, placing your pots on a heated propagation mat can significantly speed up root formation. It mimics the warmth of spring and encourages root development from below.
Aftercare & Troubleshooting
Once your cuttings have rooted – this can take anywhere from 4 weeks to several months – you’ll start to see signs of new growth. You might notice tiny leaves unfurling at the top. Gently tug on a cutting; if there’s resistance, new roots have formed!
When you see roots, it’s time to start acclamating them to drier air. Gradually lift the plastic bag for a few hours each day, increasing the time until you can remove it completely. Continue to water when the top inch of soil feels dry.
The most common problem you’ll encounter is rot. If a cutting turns black and mushy, it’s usually a sign of overwatering or poor drainage. Unfortunately, there’s not much you can do once rot sets in, so it’s best to discard it to prevent it from affecting other cuttings. Another sign of failure is wilting that doesn’t improve even after watering – this can indicate a lack of root development.
A Encouraging Closing
Watching those tiny roots emerge is a truly joyful experience. Be patient with your juniper cuttings. Nature works on its own time, and sometimes, they just need a little extra encouragement and a lot of love. Enjoy the process, and soon you’ll have new juniper trees to share or plant in a special spot in your garden! Happy propagating!
Resource:
https://identify.plantnet.org/k-world-flora/species/Juniperus%20deltoides%20R.P.Adams/data