Hey there, fellow green thumbs! It’s me, your garden-loving friend with a solid two decades of dirt under my fingernails. Today, we’re diving into the wonderful world of Cardamine diphylla, also known as Twinleaf or Two-leaved Toothwort.
Why You’ll Love Propagating Twinleaf
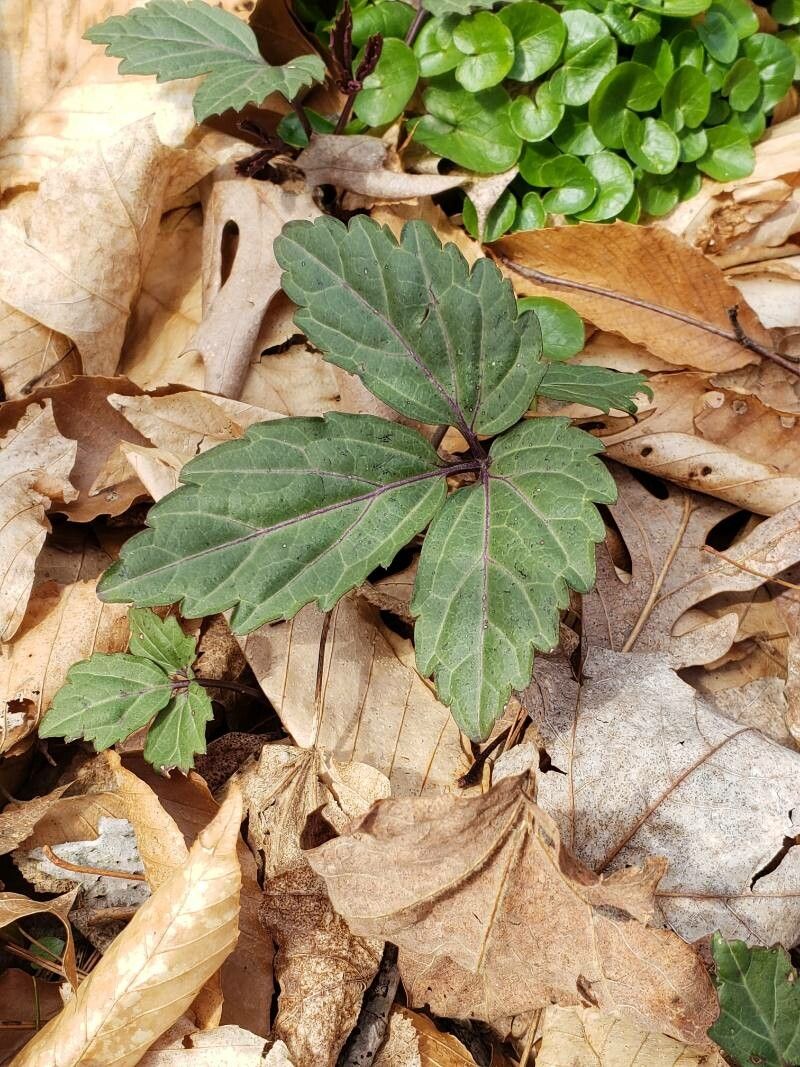
This charming woodland native is such a delight. Its delicate white flowers grace the shady corners of my garden in spring, and then those distinctive pairs of leaves take over, creating a lovely groundcover. The best part? Propagating it yourself is incredibly rewarding. It’s a fantastic way to fill out a shady spot, share with friends, or simply experience the magic of bringing new life into existence. For beginners, I’d say Twinleaf is moderately easy to propagate. It doesn’t demand perfect conditions, but a little TLC goes a long way.
The Best Time to Start
Honestly, the sweet spot for propagating Twinleaf is late spring or early summer, right after they’ve finished their spectacular bloom. You’re looking for new, vigorous growth. If you can catch them at this stage, when the plant is full of energy and ready to expand, you’ll see the best results. Avoid trying to take cuttings when the plant is stressed or during extreme heat.
Supplies You’ll Need
Gather these little helpers, and you’ll be well on your way:
- Sharp pruning shears or a clean knife: For making clean cuts.
- Potting mix: A well-draining mix is crucial. I like to use a blend of equal parts peat moss (or coir), perlite, and compost.
- Small pots or trays: Whatever you have on hand will do, just make sure they have drainage holes.
- Watering can: For gentle watering.
- Clear plastic bags or domes: To create a humid environment.
- Rooting hormone (optional but helpful): Especially for stem cuttings. I usually have some on hand, but Twinleaf can root without it if you’re patient.
- Labels: To keep track of what you’ve planted!
Propagation Methods for Twinleaf
Twinleaf is a plant that responds beautifully to division, and I’ve also had success with stem cuttings. Let’s walk through them.
Division (My Favorite!)
This is usually the easiest and most successful method for Twinleaf.
- Gently excavate: In late spring or early summer, carefully dig up your established clump of Twinleaf. Try to disturb the roots as little as possible.
- Find natural breaks: Look for where the plant naturally wants to divide. You’ll often see separate crowns or sections. You can usually tease these apart with your hands. If it’s a stubborn division, use your clean knife or trowel to slice through the root ball where there are few roots.
- Plant the divisions: Pot each division into its own container filled with your well-draining potting mix. Make sure each division has at least one or two shoots and a good amount of root.
- Water well: Give them a good drink of water.
Stem Cuttings
This method takes a bit more patience, but it’s a fantastic way to increase your stock.
- Take your cuttings: In late spring or early summer, select healthy, non-flowering stems that are about 4-6 inches long. Use your sharp shears to make a clean cut just below a leaf node (the little bump where a leaf attaches to the stem).
- Prepare the cuttings: Remove the lower leaves from the stem, leaving only the top two or three leaves. If you’re using rooting hormone, dip the cut end into it now.
- Pot them up: Fill small pots with your potting mix and gently insert the cut end of each stem. The leaf nodes should ideally be buried in the soil.
- Create humidity: Water the mix lightly and then cover the pot with a plastic bag or dome. This traps moisture and helps the cuttings root.
The “Secret Sauce” (Pro Tips)
Here are a few things I’ve learned over the years that can make a big difference:
- Don’t drown your cuttings: This is paramount for stem cuttings. While they need moisture, soggy soil is a recipe for rot. Ensure your potting mix is well-aerated with perlite or sand. If I’m really worried, I’ll give my pots a soak from the bottom until the top feels moist, then let them drain thoroughly.
- Patience with the roots: For divisions, the roots are already there, so it’s mostly about settling in. For cuttings, it can take several weeks, sometimes even a couple of months, for roots to form. Try not to jostle them too much to check. You’ll see new leaf growth as a good indicator that they’ve rooted.
- Indirect light is key: Both divisions and cuttings do best in bright, but indirect light. Direct sun will scorch those delicate leaves and dry out the potting mix too quickly. A shady porch or an east-facing window is usually perfect.
Aftercare & Troubleshooting
Once your divisions have settled in (which is usually pretty quick after watering!), keep the soil consistently moist but not waterlogged. For your stem cuttings, once they start showing new growth, you can gradually acclimate them to open air by lifting the plastic bag for longer periods each day.
The most common enemy here is rot, which usually happens from too much moisture and poor air circulation. If you see a stem turning black and mushy, or a division wilting dramatically despite watering, it’s a sign of trouble. Remove the affected plant part immediately. Healthy new growth is your best sign of success.
A Little Encouragement to Finish
Propagating plants is a journey, and there’s always a learning curve. Don’t be discouraged if not every single cutting takes. Celebrate the successes, and learn from the ones that don’t. Enjoy the process of nurturing new life, and soon you’ll have even more beautiful Twinleaf to grace your garden. Happy planting!
Resource:
https://identify.plantnet.org/k-world-flora/species/Cardamine%20diphylla%20(Michx.)%20Alph.Wood/data