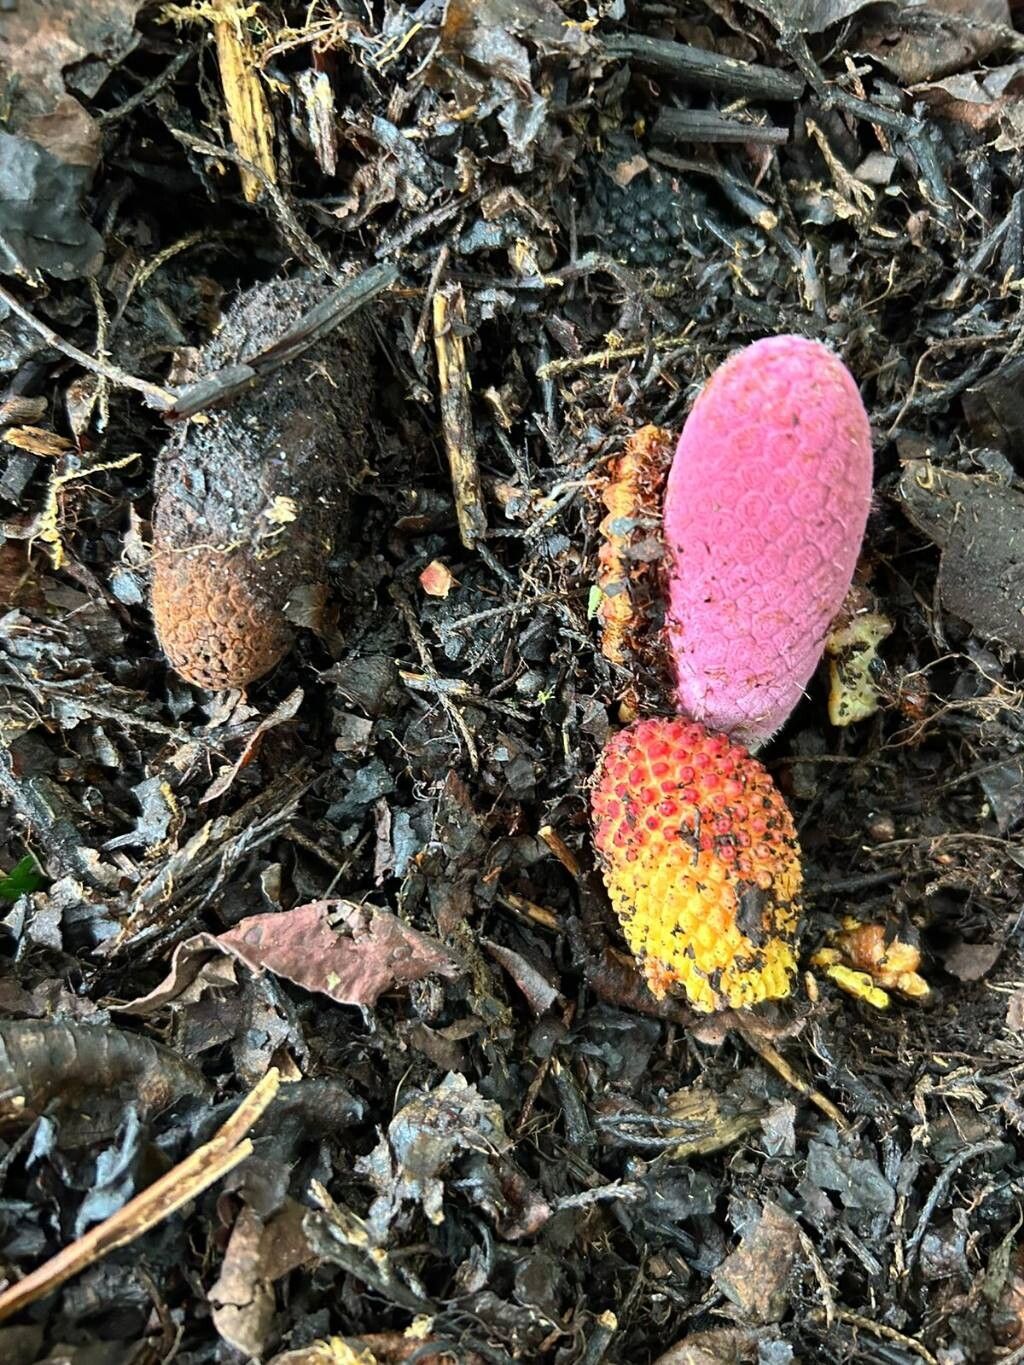
Hello, fellow plant pals! If you’ve ever admired the vibrant blooms and lush foliage of Corynaea crassa, you’re in for a treat. This beauty, often called the “Velvet Orchid” for its exquisite texture and striking colors, is a truly rewarding plant to grow. And the icing on the cake? Propagating it yourself! It’s a wonderful way to expand your collection or share these delights with friends. Now, I’ll be honest, Corynaea crassa can be a little fussy for absolute beginners, but with a little care and these tips, you’ll be well on your way to success.
The Best Time to Start
My favorite time to get busy with propagation is as the plant is entering its active growing season, typically in spring or early summer. This is when the plant has plenty of energy stored up to produce new roots and leaves. Trying to propagate too late in the year, when light levels are lower and temperatures are dropping, can make things a bit more challenging.
Supplies You’ll Need
Here’s what you’ll want to have gathered before you begin:
- Sharp, clean pruning shears or a sharp knife: Sterilize them with rubbing alcohol before each use!
- Rooing hormone (optional but helpful): Look for one containing IBA.
- A well-draining potting mix: I like a blend of peat moss, perlite, and orchid bark for my Corynaea.
- Small pots or seed trays: Clean and with drainage holes.
- Clear plastic bags or a propagator: To create a humid environment.
- A spray bottle: For misting.
- Labels: So you don’t forget what you’ve planted!
Propagation Methods
There are a few ways to go about this, but I find two to be the most reliable for Corynaea crassa.
Stem Cuttings
This is my go-to method. It’s wonderfully effective if you have a healthy, mature plant.
- Identify a healthy stem: Look for a section that has at least two or three leaf nodes. Nodes are those little bumps where leaves emerge.
- Make the cut: Using your sterilized shears or knife, carefully cut the stem just below a node. Aim for a cutting that is about 3-4 inches long.
- Prepare the cutting: Gently remove any lower leaves that might be below the soil line when you plant it. This prevents rot.
- Apply rooting hormone (optional): Dip the cut end of the stem into your rooting hormone. Tap off any excess.
- Plant the cutting: Insert the cut end about an inch deep into your prepared, moist potting mix. Make sure the nodes are buried.
- Create a humid environment: Mist the cutting and the soil surface generously. Then, cover the pot with a clear plastic bag or place it in a propagator. This traps moisture.
- Provide light and warmth: Place the pot in a bright, indirect light spot. A little bottom heat, like from a seedling heat mat, can really speed things up.
Division
If your Corynaea has grown bushy and is starting to fill its pot, division is a great option. It’s like giving your plant a much-needed haircut and getting new babies in the process!
- Gently remove the plant from its pot: Tip it over and coax it out.
- Inspect the root ball: You’re looking for natural breaks in the plant where it has produced multiple crowns or clusters.
- Separate the divisions: Using your hands or a sterilized knife, carefully pull or cut the plant apart. Each division should have at least one or two healthy root systems and some foliage.
- Pot up the divisions: Plant each division in its own pot with fresh, well-draining potting mix. Bury the roots and ensure the base of the plant is at soil level.
- Water gently: Water thoroughly, then allow the excess to drain.
The “Secret Sauce” (Pro Tips)
Here are a couple of things I’ve learned that make a big difference:
- Avoid soggy bottoms: This is paramount when propagating Corynaea. A slightly damp medium is good, but waterlogged is a recipe for rot. Ensure your pots have excellent drainage and don’t let the pot sit in standing water.
- Patience is a virtue (and bottom heat helps): Don’t be discouraged if you don’t see roots forming immediately. For stem cuttings, it can take several weeks, even months. Providing a consistent warmth at the base of the pot can significantly encourage root development.
Aftercare & Troubleshooting
Once you see signs of new growth – tiny leaves or the cutting resisting a gentle tug – it means roots have formed!
- Gradually acclimate: If you used a plastic bag, start by opening it for a few hours each day to let the humidity slowly decrease. This prevents shock.
- Keep it consistently moist: Water when the top inch of soil feels dry.
- Watch out for rot: The biggest enemy is overwatering. If you see yellowing leaves that then turn mushy and black, or the stem starting to rot at the soil line, it’s usually a sign of too much moisture. If you catch it early, you might be able to save a healthy part of the cutting by repotting it in fresh, dry media.
A Little Encouragement
Propagating plants is such a rewarding journey. There will be times when not every cutting takes, and that’s perfectly okay. Think of it as a learning experience! Be patient, observe your plants, and celebrate every little success. Happy propagating, and enjoy your ever-growing collection of Corynaea crassa!
Resource:
https://identify.plantnet.org/k-world-flora/species/Corynaea%20crassa%20Hook.f./data