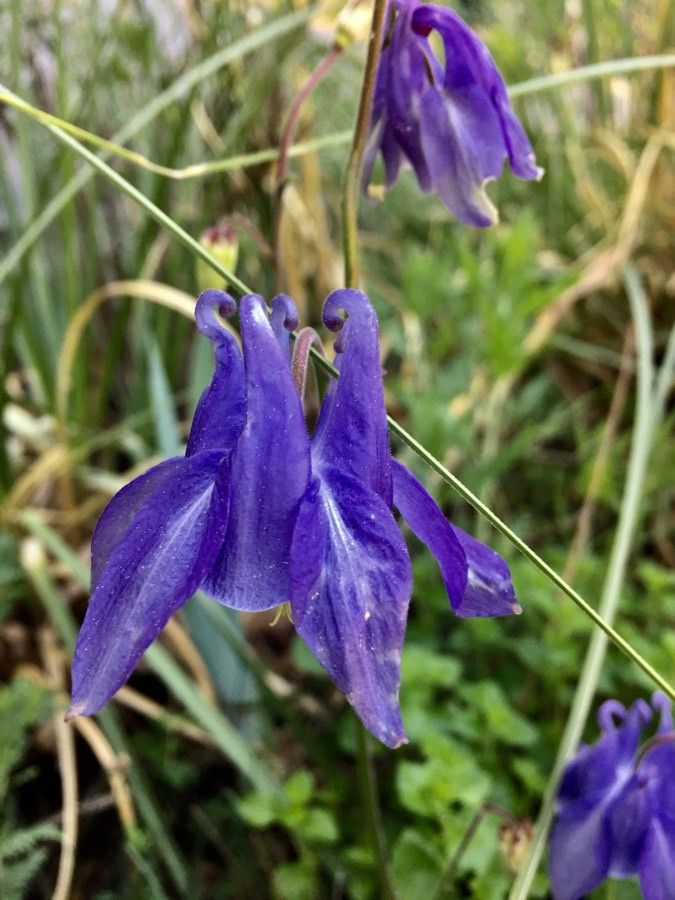
Hello, fellow garden enthusiasts! If you’ve ever admired the delicate, nodding blossoms of Aquilegia vulgaris – our common columbine – you know just how charming they are. Their spiky spurs and charming colors can really light up a garden. And guess what? They’re surprisingly rewarding to propagate yourself! It’s not a difficult plant to get started with, even for those who are just dipping their toes into the world of plant propagation. I find it’s one of those joys that just keeps on giving.
The Best Time to Start
My sweet spot for getting new columbines going is usually late spring to early summer, right after they’ve finished their main flush of bloom. You can also take cuttings in early autumn, but I find the spring ones tend to establish themselves a bit more vigorously before the cooler weather sets in. The key is to work with healthy, actively growing plants.
Supplies You’ll Need
Here’s what I always have on hand:
- Sharp, clean pruning shears or a sharp knife: For making those essential cuts.
- Small pots or seedling trays: With good drainage holes.
- Propagating mix: A light, airy mix is best. I often use a blend of peat moss (or coco coir) and perlite in a 1:1 ratio. Sometimes I’ll add a touch of fine compost.
- Rooting hormone (optional but helpful): A powdered or liquid hormone can give your cuttings a real boost.
- Watering can with a fine rose: To water gently without disturbing new roots.
- Plastic bags or a propagator lid: To create a humid environment.
- Labels and a waterproof marker: So you don’t forget what you planted!
Propagation Methods
Columbines are quite amenable to a couple of easy propagation methods. My personal favorite is division, as it’s almost foolproof. But let’s talk about cuttings too!
Division (My Go-To!)
This is honestly the easiest way to get more columbines.
- Dig up the plant: When the plant is dormant or finished flowering, carefully dig up the entire clump. The best time for this is really early spring before new growth really takes off, or in the fall after the leaves have started to die back.
- Gently tease apart: Using your hands or a trowel, gently separate the clump into smaller sections. Ensure each section has at least one healthy shoot and some good roots.
- Replant immediately: Plant your new divisions in their spots in the garden or in pots filled with good soil. Water them well, and they should establish quite happily.
Stem Cuttings
This method requires a bit more patience, but it’s very satisfying.
- Take cuttings: Look for semi-hardwood stems – these are usually the current year’s growth that has started to firm up a bit. Using your clean shears, cut lengths of about 4-6 inches, just below a leaf node (where a leaf attaches to the stem).
- Prepare the cuttings: Remove the lower leaves, leaving just a couple at the top. If your cuttings are very long, you can even trim the remaining leaves in half to reduce water loss.
- Apply rooting hormone: Dip the cut end of each stem into your rooting hormone, if you’re using it. Tap off any excess.
- Pot them up: Fill your pots or trays with your propagating mix. Make a small hole with a pencil or your finger and insert the cutting, firming the soil gently around the base.
- Create humidity: Water gently. Then, cover the pots with a plastic bag or place them in a propagator lid to create a humid environment. Place them in a bright spot out of direct sunlight.
The “Secret Sauce” (Pro Tips)
Now, for a couple of little tricks that have served me well over the years:
- Don’t let the leaves touch the water (for water propagation, if you try that): While some plants are happy to root in water, columbine cuttings can be prone to rot if their leaves are submerged. I almost always stick to soil-based propagation for them. If you do try water, change it frequently and only keep the bare stem submerged.
- Bottom heat is your friend: For cuttings, placing your pots on a heated propagator mat can significantly speed up root development. It mimics the warmth of spring and encourages those roots to form more quickly.
Aftercare & Troubleshooting
Once your cuttings have rooted (you’ll see new growth emerging, or you can gently tug and feel resistance), it’s time for a little more focused care.
- Harden them off: Gradually introduce your new plants to the outside world. If they’ve been under cover, remove the plastic bag or lid for increasing periods each day over a week or two.
- Transplant: Once they are well-rooted and have a few sets of leaves, you can transplant them into slightly larger pots or directly into their final garden positions.
- Watch for rot: The most common issue you’ll encounter is rot. This usually happens with cuttings that are kept too wet and not allowed to breathe. If you see stems turning mushy or blackening, it’s a sign of too much moisture. Ensure good drainage and don’t overwater. If you’re unsure, it’s better to err on the side of slightly too dry than too wet.
A Encouraging Closing
Be patient with your new columbines! Propagation is a journey, and sometimes plants take their own sweet time. Enjoy the process of nurturing these little bits of life, and soon you’ll have even more of those beautiful, nodding flowers gracing your garden. Happy growing!
Resource:
https://identify.plantnet.org/k-world-flora/species/Aquilegia%20vulgaris%20L./data