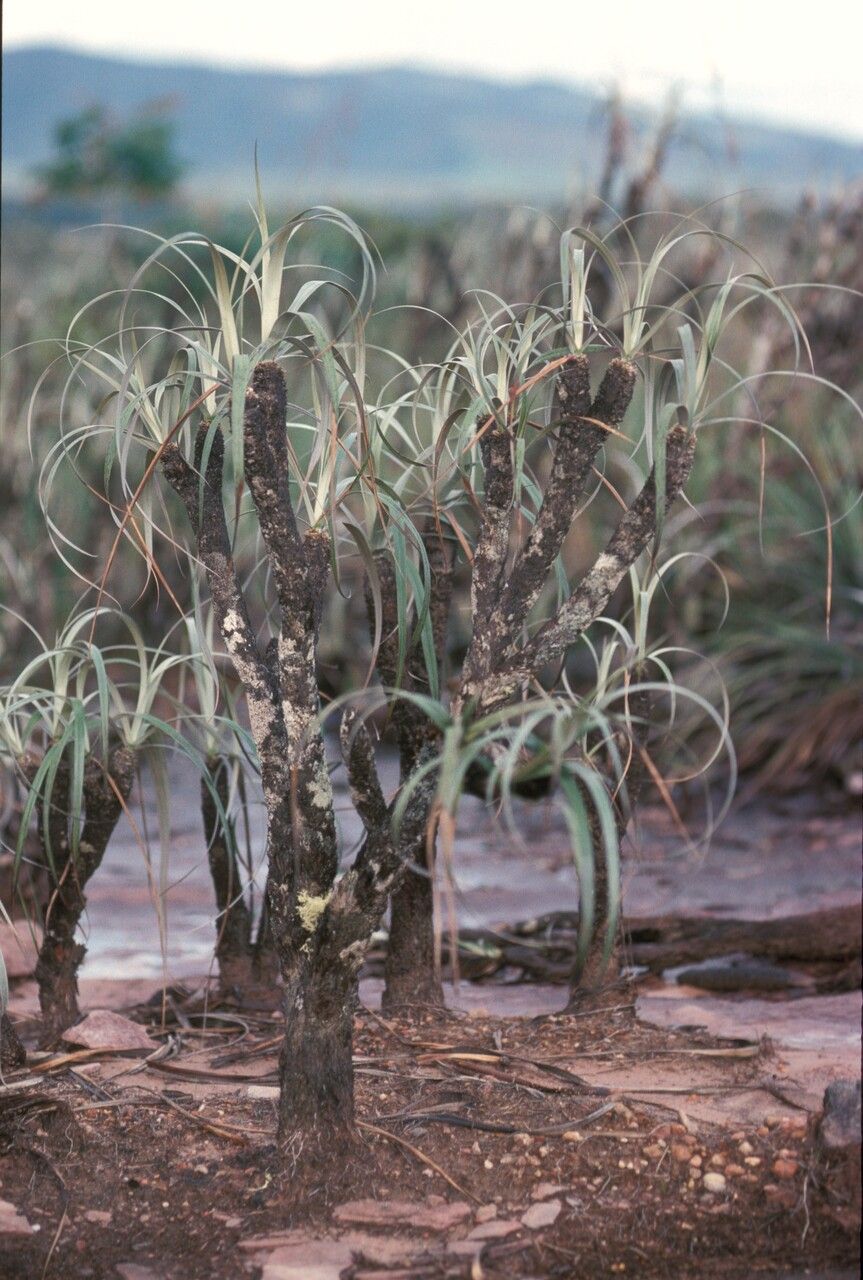
Oh, Vellozia tubiflora! Isn’t that a beauty? I remember the first time I saw one, all those elegant, sword-like leaves emerging from a woody base. It’s like a piece of living sculpture, isn’t it? And the satisfaction of growing your own from a tiny piece? Pure joy. If you’re curious about propagating Vellozia, you’ve come to the right place. Let me tell you, while it’s not a foolproof “stick it in the dirt and forget it” kind of plant, with a little attention, you can absolutely succeed. It’s a wonderfully rewarding project for those of you looking to expand your green collection.
The Best Time to Start
My best advice for Vellozia tubiflora? Aim for spring or early summer. This is when the plant is really in its growth phase. New growth is generally more vigorous and eager to put down roots. Starting when the days are getting longer and warmer gives your cuttings the best possible energy boost. Avoid trying this during the cooler, dormant months; you’ll just be fighting an uphill battle.
Supplies You’ll Need
Here’s what I always have on hand when I’m propagating:
- Sharp, clean pruning shears or a sterile knife: Essential for making clean cuts.
- Rooting hormone (optional, but recommended): A little help to encourage those roots to form. Look for one with a fungicide mixed in if you can.
- Well-draining potting mix: I like a blend of roughly 50% potting soil and 50% perlite or coarse horticultural sand. You want air to get to those roots!
- Small pots or seed trays: Whatever suits the size of your cuttings. Make sure they have drainage holes.
- A watering can or spray bottle: For gentle watering.
- Labels and a permanent marker: You’ll thank me when you’ve got a few projects going!
Propagation Methods
The most reliable way to get new Vellozia tubiflora plants going is through stem cuttings. It’s straightforward and generally gives good results.
- Select Your Cuttings: Gently examine your mature Vellozia. Look for healthy stems that are at least 4-6 inches long. You want stems that are firm but not woody. Ideally, these should have some new growth at the tip.
- Make the Cut: Using your clean pruning shears or knife, make a clean cut just below a leaf node. A leaf node is a point on the stem where leaves emerge. This is where the magic will happen – roots will sprout from here.
- Prepare the Cutting: Carefully remove the lower leaves from the cutting. You want at least two leaf nodes exposed below where you’ll make the cut for planting. This prevents leaves from rotting in the soil. If your cutting has very large leaves, you can even cut them in half to reduce water loss.
- Apply Rooting Hormone (Optional): If you’re using rooting hormone, dip the cut end of the stem into the powder or gel. Tap off any excess.
- Plant Your Cuttings: Fill your small pots with your well-draining potting mix. Make a small hole in the center of the soil with your finger or a pencil. Gently insert the cut end of your Vellozia cutting into the hole, ensuring that at least one or two leaf nodes are buried. Firm the soil gently around the stem.
- Water Gently: Water the soil lightly to settle it around the cutting. You want it moist, not soggy. A spray bottle is great for this initial watering.
The “Secret Sauce” (Pro Tips)
Over the years, I’ve picked up a few tricks that make a big difference.
- Bottom Heat is Your Friend: If you can, place your potted cuttings on a heat mat. This gentle warmth from below really encourages root development. It simulates the warm soil conditions the plant loves.
- Humidity is Key, But Beware of Drowning: New cuttings need humidity to prevent drying out, but that doesn’t mean they want soggy feet. I like to place my pots inside a clear plastic bag or cover them with a propagator lid to create a mini greenhouse. Crucially, ensure the leaves do not touch the sides of the bag or the lid. If they do, they’re prone to fungal issues and rot.
- Patience with the Potting Mix: Don’t be tempted to pack the soil too tightly. Loose, airy soil is vital for allowing roots to establish and breathe.
Aftercare & Troubleshooting
Once your cuttings have been planted, the anxious waiting game begins! Keep the soil consistently moist but never waterlogged. Check it regularly, and water when the surface of the soil feels dry to the touch.
You’ll know you have success when you start to see new leaf growth or feel a gentle tug when you very carefully try to wiggle the cutting. This usually takes anywhere from 4-8 weeks, sometimes longer.
The most common problem you’ll encounter is rot. If your cutting turns mushy and dark, or if the leaves start to yellow and drop off rapidly, it’s likely that rot has set in. This is usually due to too much moisture and not enough air circulation. If you see this, sadly, it’s best to discard the cutting and start again.
A Encouraging Closing
Watching new roots form is a truly magical part of gardening. Don’t get discouraged if your first attempt isn’t perfect – we’ve all been there! Be patient, give your Vellozia cuttings the best environment you can, and enjoy the process of creating new life. Happy propagating!
Resource:
https://identify.plantnet.org/k-world-flora/species/Vellozia%20tubiflora%20(A.Rich.)%20Kunth/data