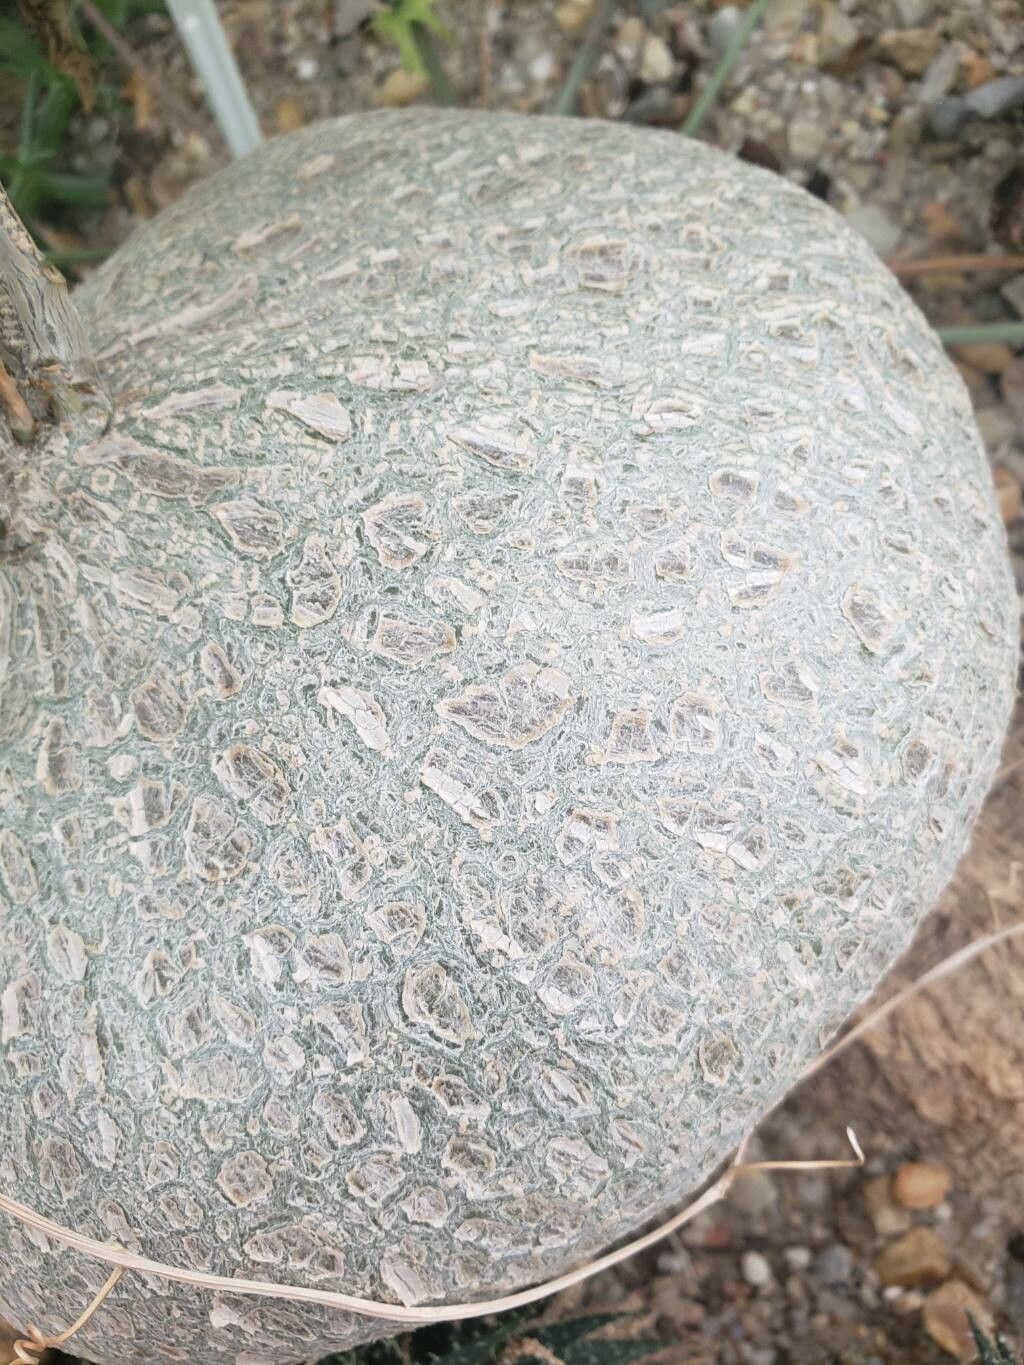
Oh, Gerrardanthus macrorhizus! What a wonderfully quirky and rewarding plant to get to know. Its massive, woody tuber is like a geological feature in miniature, and the delicate, almost vine-like leaves that emerge from it are just a delightful contrast. Watching a new one slowly unfurl from a tiny root is a truly special feeling. It’s not exactly a “stick it in the ground and forget it” kind of propagation, but I wouldn’t call it overly challenging either. With a little patience and a few key tricks, you’ll be well on your way to growing more of these beauties.
The Best Time to Start
For the happiest cuttings and the most robust growth, aim to propagate Gerrardanthus macrorhizus during its active growing season. This usually means late spring through summer. You want to work with pieces of the plant that are full of life and ready to put out roots. Avoid trying to propagate from plants that are dormant or stressed.
Supplies You’ll Need
Gathering your tools beforehand makes the whole process smoother. Here’s what I usually have on hand:
- Sharp pruning shears or a clean craft knife: For making clean cuts.
- Rooting hormone (optional but recommended): A powder or gel can give your cuttings a real boost.
- Well-draining potting mix: I like a blend of regular potting soil mixed with perlite or pumice. A cactus/succulent mix also works very well.
- Small pots or seedling trays: With drainage holes, of course!
- Watering can or spray bottle: For gentle watering.
- Clear plastic bags or a propagation dome: To create a humid environment for cuttings.
Propagation Methods
While Gerrardanthus macrorhizus can be grown from seed, taking cuttings from a mature plant is generally the most reliable and quickest way to get started.
Stem Cuttings:
- Find a healthy stem: Look for a stem that’s neither too young and flimsy nor too old and woody. A nice, firm, but not fully mature stem is your target.
- Make a clean cut: Using your sharp shears or knife, make a cut just below a leaf node (where a leaf attaches to the stem). Aim for a cutting that’s about 3-4 inches long.
- Prepare the cutting: Gently remove the lower leaves. You want a few leaves at the top to photosynthesize, but no leaves that will be buried in the soil.
- Apply rooting hormone (if using): Dip the cut end of the stem into the rooting hormone, tapping off any excess.
- Plant the cutting: Fill your small pot with your well-draining mix. Make a small hole in the center with a pencil or your finger and insert the cut end of the stem. Gently firm the soil around it.
- Water gently: Water the soil lightly to settle it around the cutting.
- Create humidity: Cover the pot with a clear plastic bag, securing it around the rim with a rubber band, or place it under a propagation dome. This will keep the humidity high, which is crucial for root development.
- Place in bright, indirect light: Find a spot that gets plenty of light but no direct, harsh sun.
The “Secret Sauce” (Pro Tips)
Here are a couple of little things I’ve learned over the years that really help your cuttings thrive:
- Don’t let the leaves touch the water (if water propagating): While I primarily recommend soil propagation for Gerrardanthus macrorhizus, if you do experiment with water, make sure the leaves are above the water line. Even a little bit of leaf submerged can lead to rot. Their stems are quite sensitive to prolonged moisture.
- Consider bottom heat: This is a game-changer, especially if your home is a bit cooler. Placing your pots on a seedling heat mat can significantly speed up root formation. That gentle warmth from below encourages the plant to send down roots.
- Take more cuttings than you think you need: Not every cutting will take. It’s just the nature of the beast! Propagating a few extra ensures you’ll have success with at least one or two.
Aftercare & Troubleshooting
Once your cutting has been in its humid environment for several weeks, you can start to check for roots. Gently tug on the cutting – if you feel resistance, you have roots!
- Transition slowly: Once roots are established, gradually remove the plastic bag or open the propagation dome over a few days to acclimate the new plant to your home’s humidity.
- Water sparingly: Continue to water when the top inch of soil feels dry. Overwatering is the biggest enemy here.
- Watch for rot: The most common sign of trouble is a mushy, blackened stem end. If you see this, it’s usually a sign of too much moisture or inadequate drainage. Unfortunately, rot is often fatal, so prevention by ensuring good airflow and proper watering is key. Yellowing leaves can also indicate issues, sometimes overwatering, sometimes not enough light.
A Encouraging Closing
Propagating Gerrardanthus macrorhizus is a wonderful way to multiply your collection or share these unique plants with friends. Be patient with your cuttings, and don’t get discouraged if not every single one makes it. Gardening is always a learning process, and each attempt teaches you something new. Enjoy the journey of nurturing these little green wonders!
Resource: