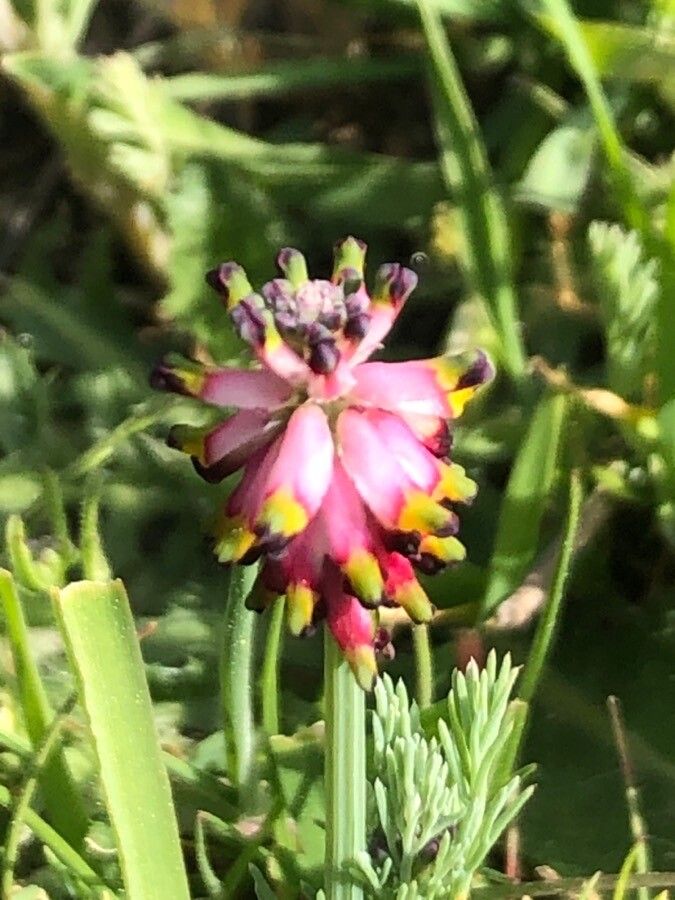
Oh, hello there! I’m so glad you stopped by. Today, we’re going to talk about a truly delightful little plant: Platycapnos spicata. You might know it by its common names, like the Winged Pea or sometimes simply as a charming spurge. Its delicate, pea-like flowers are a soft wash of color, and the lovely, feathery foliage adds such a unique texture to any garden bed or container.
Propagating Platycapnos spicata is an incredibly rewarding experience. It’s like coaxing a little bit of magic into being right in your own hands. And you know what? If you’re just starting out in the world of plant propagation, this one is a wonderfully welcoming subject. It’s not overly fussy, which is always a plus in my book!
The Best Time to Start
For the highest success rate, I find the spring is your absolute best friend. Think of it as giving your new little plants the longest possible growing season ahead of them. Starting in early spring, once the danger of frost has passed, allows them to establish themselves before the intense heat of summer or the chill of autumn. You can also try late summer, but spring just feels…optimistic, doesn’t it?
Supplies You’ll Need
Gathering your tools beforehand makes the whole process so much smoother. Here’s what I usually have on hand:
- Fresh, healthy cuttings: I’ll explain how to get these soon!
- Small pots or seed trays: Anything from 3-4 inch pots to a standard seed tray works well. Make sure they have drainage holes.
- A good quality potting mix: I prefer a light, well-draining mix, often a blend of peat moss, perlite, and a touch of compost. This prevents soggy roots, which are the enemy of baby plants.
- Sterilized pruning shears or a sharp knife: Cleanliness is key to preventing disease.
- Rooting hormone (optional but recommended): This can really give your cuttings a helpful boost.
- A spray bottle: For misting.
- Plastic bags or propagation domes: To create a humid environment.
- Labels and a marker: Trust me, you’ll thank yourself later!
Propagation Methods
Platycapnos spicata is quite amenable to a couple of propagation methods. I find stem cuttings to be the most reliable and rewarding.
Here’s how I do it:
-
Taking the Cuttings: On a bright, but not scorching hot, morning, select a healthy, non-flowering stem from a mature plant. With your sterilized pruning shears, take a cutting that is about 4-6 inches long. Make the cut just below a leaf node (where a leaf attaches to the stem). This is where the plant’s magic rooting hormones are most concentrated.
-
Preparing the Cuttings: Gently remove the lower leaves from the cutting, leaving just the top few leaves. If you’re using rooting hormone, dip the cut end of the stem into the powder, tapping off any excess.
-
Planting the Cuttings: Fill your small pots or seed trays with your prepared potting mix. Make a small hole in the center of the soil with your finger or a pencil. Carefully insert the cut end of your Platycapnos spicata cutting into the hole, making sure the leaf nodes are below the surface of the soil.
-
Watering and Covering: Water the soil gently but thoroughly. You want it moist, not waterlogged. Then, cover the pot or tray with a plastic bag or a propagation dome. This creates that all-important humid microclimate that encourages root formation.
The “Secret Sauce” (Pro Tips)
You know, after years of coaxing plants to grow, a few little tricks emerge.
- The first is that bottom heat can make a world of difference, especially if your propagation area is a bit on the cooler side. A gentle warmth from below, perhaps from a seedling heat mat, encourages root development much faster.
- Another tip I swear by: don’t let the leaves of your cuttings touch the water if you happen to be trying water propagation (though I find cuttings in soil are more successful with this plant). If leaves sit in standing water, they tend to rot before roots have a chance to form.
- And this might sound obvious, but choose your parent plant wisely. Select a vigorous, healthy specimen that’s free of pests and diseases. A strong start for your cutting means a strong start for your new plant.
Aftercare & Troubleshooting
Once your cuttings are potted, place them in a bright spot but out of direct sunlight. The humidity within the bag or dome is crucial, so keep it there.
You’ll know your cutting is rooting when you see new growth appearing from the top. This can take anywhere from 2 to 6 weeks, so patience is key! You can gently tug on the cutting; if there’s resistance, roots have formed.
Once you see good root development, you can start to gradually acclimate them to normal humidity. Open the bag or dome for an hour or two each day, slowly increasing the time until they’re fully out.
The most common issue you’ll encounter is rot. If your cutting turns black and mushy, it’s a sign of too much moisture and not enough air circulation. If you see this, sadly, it’s best to discard it and start again, making sure your soil is well-drained and you’re not overwatering.
A Encouraging Closing
So there you have it! Propagating Platycapnos spicata is a very accessible and delightful way to fill your garden (or your friend’s gardens!) with these charming blooms. Don’t be discouraged if your first few attempts aren’t perfect. Every gardener has a few casualties along the way! Keep experimenting, keep observing, and most importantly, enjoy the wonderful journey of watching new life emerge. Happy propagating!
Resource:
https://identify.plantnet.org/k-world-flora/species/Platycapnos%20spicata%20(L.)%20Bernh./data