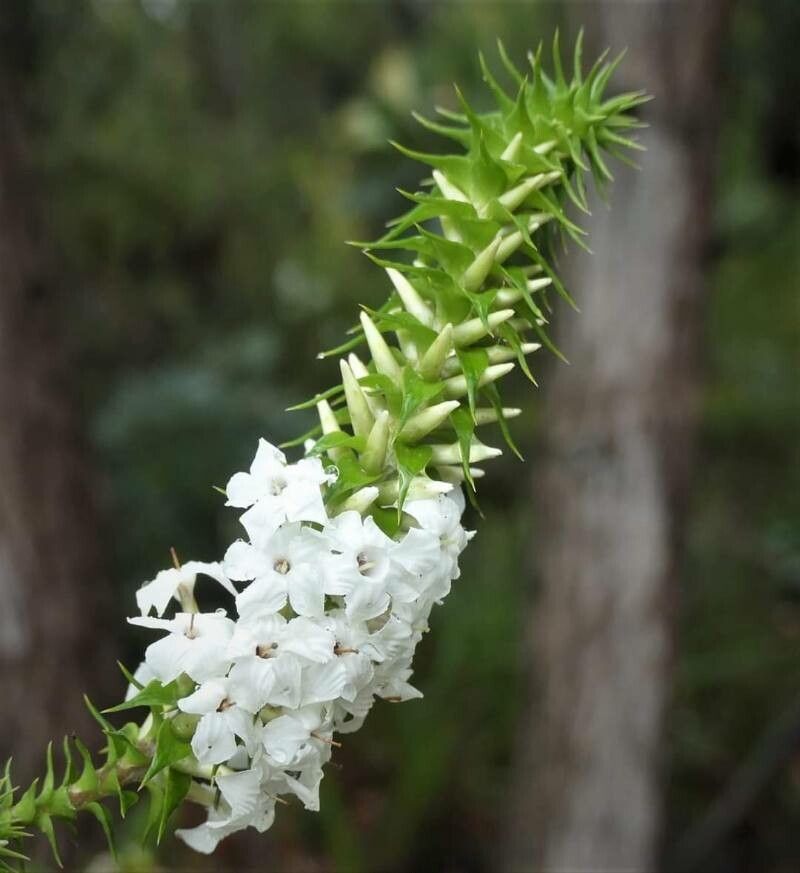
Hello, fellow garden enthusiasts! I’m so glad you’ve stopped by. Today, we’re going to delve into the wonderful world of propagating Epacris coriacea. This little beauty, often called a Native Heath, is an absolute gem in the garden. Its delicate, tubular flowers, usually in shades of pink and white, create a charming display, and I find it incredibly rewarding to see a new plant spring to life from a tiny cutting. If you’re new to propagation, Epacris coriacea can be a little on the fussy side, but with a few pointers, I’m confident you’ll be successful.
The Best Time to Start
The sweet spot for propagating Epacris coriacea is in late spring or early summer. This is when the plant is actively growing, and new shoots are plenty. You’ll be looking for semi-hardwood cuttings – that means stems that are not too soft and green, but not yet woody and mature. They should be firm enough to snap cleanly when bent gently.
Supplies You’ll Need
Gathering your tools beforehand makes the whole process so much smoother. Here’s what I always have on hand:
- Sharp, clean pruning shears or a sharp knife: For making clean cuts. This is crucial!
- Rooting hormone powder or gel: This is a real lifesaver for encouraging root development.
- Small pots or seed trays: Clean ones, please! Sterilized is best.
- Propagation mix: A good blend is key. I like a mix of equal parts coir or peat moss, perlite, and fine bark. It needs to be free-draining.
- A watering can with a fine rose: To water gently without disturbing the cuttings.
- Plastic bags or a propagator lid: To create a humid environment for your cuttings.
- Labels and a permanent marker: Don’t forget to label what you’ve planted!
Propagation Methods: Stem Cuttings
For Epacris coriacea, taking stem cuttings is generally the most successful and widely used method. Here’s how I do it:
- Select and take cuttings: Head out to your Epacris coriacea plant during the ideal window. Look for healthy, non-flowering shoots. Using your sharp pruning shears, take cuttings that are about 7-10 cm (3-4 inches) long. Make the cut just below a leaf node (where a leaf joins the stem).
- Prepare the cuttings: Gently remove the lower leaves from your cuttings, leaving just the top few leaves. If your leaves are quite large, you can even trim them in half to reduce water loss.
- Apply rooting hormone: Dip the cut end of each cutting into your rooting hormone, tapping off any excess.
- Plant the cuttings: Fill your clean pots or trays with your propagation mix. Make a small hole in the mix with a pencil or your finger. Gently insert the bottom of the cutting into the hole, ensuring it’s firm and upright. Press the mix lightly around the stem.
- Water and cover: Water the mix thoroughly but gently. Place the pots into a plastic bag or cover with a propagator lid. This creates a mini-greenhouse effect, keeping the humidity high, which is vital for cuttings to root.
The “Secret Sauce” (Pro Tips)
Now for a couple of little tricks I’ve learned over the years that can really boost your success:
- Think “airy feet”: Epacris coriacea hates soggy roots, and this applies to cuttings too. Ensure your propagation mix is exceptionally well-draining. A little extra perlite or fine bark in the mix makes a world of difference. Damp, not soaking wet, is the goal.
- Whisper of warmth: While not strictly essential, bottom heat can significantly speed up root formation. If you have a heated propagator mat, placing your pots on it will give your cuttings a gentle warmth from below, encouraging those roots to sprout more quickly. Just a gentle warmth, nothing too hot!
Aftercare & Troubleshooting
Once your cuttings are potted up, place them in a bright, but indirect light spot. Keep an eye on the moisture level – the propagation mix should feel consistently moist but never waterlogged. You’ll know your cuttings are rooting when you see new growth appearing, or if you gently tug on a cutting and feel resistance. This usually takes a few weeks to a couple of months.
The main culprit for failure with Epacris coriacea cuttings is rot. If you see your cuttings turning black and mushy, it’s usually a sign of too much moisture and/or poor drainage. Remove any affected cuttings immediately to prevent spreading. Sometimes, the humidity might be too high, leading to fungal issues – you might need to slightly vent the propagator for a short period each day.
A Little Patience Goes a Long Way
Growing new plants is such a rewarding journey. Don’t be discouraged if your first attempt isn’t perfect. With a little patience and practice, you’ll soon be enjoying your very own Epacris coriacea plants, all grown by you. Happy propagating!
Resource:
https://identify.plantnet.org/k-world-flora/species/Epacris%20coriacea%20A.Cunn.%20ex%20DC./data