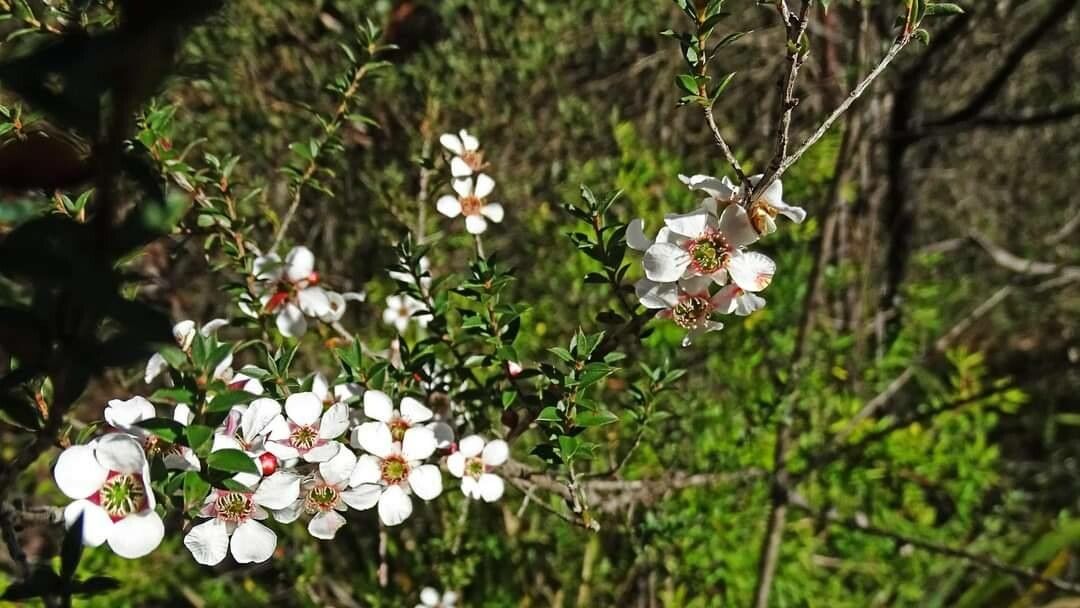
Oh, hello there! Come on in, pull up a chair. I’m so glad you’re interested in propagating Leptospermum squarrosum, also known as the Peach-Flowered Tea Tree. It’s such a delightful plant. Its delicate, papery pink flowers are just a dream, especially when they appear in abundance. And there’s a special kind of magic in watching a tiny cutting transform into a whole new, thriving plant. You know, I find it’s not the most straightforward plant for a complete beginner, but with a little patience and these steps, you’ll be well on your way to success.
When to Get Your Hands Dirty
For Leptospermum squarrosum, the sweet spot for propagation is late spring to mid-summer. This is when the plant is actively growing, and the new, semi-hardwood cuttings will have the best chance to root. You’re looking for stems that have grown but aren’t yet woody and stiff. Think of it as soft, but not floppy.
What You’ll Need for Success
Gathering your supplies beforehand makes the whole process smoother. Here’s a little list to get you started:
- Sharp Pruning Shears or a Craft Knife: Cleanliness is key here, so a sharp tool makes a clean cut, which is crucial for preventing disease.
- Rooting Hormone: This is a real game-changer. I usually go for a powder or gel.
- Well-Draining Potting Mix: A good blend for me is about equal parts perlite and peat moss or coco coir. You want air and drainage!
- Small Pots or Seed Trays: Terracotta pots are lovely because they breathe, but plastic ones work just fine too. Make sure they have drainage holes.
- Plastic Bags or a Humidity Dome: This helps keep the humidity high, which is vital for cuttings.
- Watering Can or Mister: Gentle watering is essential.
- Labels and a Marker: You’ll thank yourself later!
Making New Plants Happen: Stem Cuttings
This is my go-to method for Leptospermum squarrosum. It’s reliable and gives you the most ‘bang for your buck’.
- Take Your Cuttings: Find those semi-hardwood stems I mentioned. Gently bend a stem; if it snaps cleanly rather than just bending, it’s usually a good candidate. Using your clean shears or knife, take cuttings that are about 4-6 inches long.
- Prepare the Cuttings: Remove the lower leaves from the cutting, leaving just a few at the very tip. This prevents them from rotting in the soil. If the remaining leaves are very large, you can even cut them in half to reduce water loss.
- Dip in Rooting Hormone: Lightly moisten the cut end of the stem, then dip it into your rooting hormone. Tap off any excess.
- Plant Your Cuttings: Make a hole in your prepared potting mix with a pencil or your finger. Gently insert the cutting, making sure the hormone-coated end is covered. Firm the soil gently around it. I usually plant several cuttings in one pot or tray to increase my chances.
- Create a Humid Environment: Water the soil gently. Then, either cover the pot with a plastic bag (propped up with stakes so it doesn’t touch the leaves) or place it under a humidity dome.
The “Secret Sauce”: My Insider Tips
- Bottom Heat is Your Friend: While not strictly essential, placing your pots on a heated propagation mat can significantly speed up rooting. It mimics the warmth of spring soil and really gives those roots a nudge. Just ensure the mat doesn’t dry out your soil too much.
- Don’t Crowd Too Much: While it’s tempting to pack in lots of cuttings, give them a little breathing room. Overcrowding can lead to fungal issues and make it harder for air to circulate.
- Mist, Don’t Drown: Regularly check on your cuttings. If the soil looks dry, mist the surface lightly rather than drenching it. You want the soil to be consistently moist, but not waterlogged.
Aftercare and When Things Go Wrong
Once your cuttings have rooted – you might see new leaf growth, or feel a gentle tug when you carefully try to lift them – it’s time to give them a little more space.
- Acclimatize Gradually: If you’ve been using a plastic bag or dome, gradually introduce them to normal humidity over a week or so by opening it up for longer periods each day.
- Potting Up: Once they seem settled, you can carefully transplant them into individual small pots. Continue to use that well-draining mix.
- Watch for Rot: The most common sign of trouble is rot, where the cutting turns black and mushy. This usually happens from being too wet or having poor air circulation. If you see this, discard the affected cutting immediately to prevent it from spreading. Another sign of no rooting is if the cutting wilts and stays wilted even after watering, and the stem becomes soft.
Keep Growing!
Propagating plants is a journey, and Leptospermum squarrosum is a beautiful one to embark on. Don’t be discouraged if some don’t make it – that’s just part of the learning process. Patience is your most important tool. Celebrate every new root and every tiny leaf that unfurls. Happy gardening!
Resource:
https://identify.plantnet.org/k-world-flora/species/Leptospermum%20squarrosum%20Gaertn./data