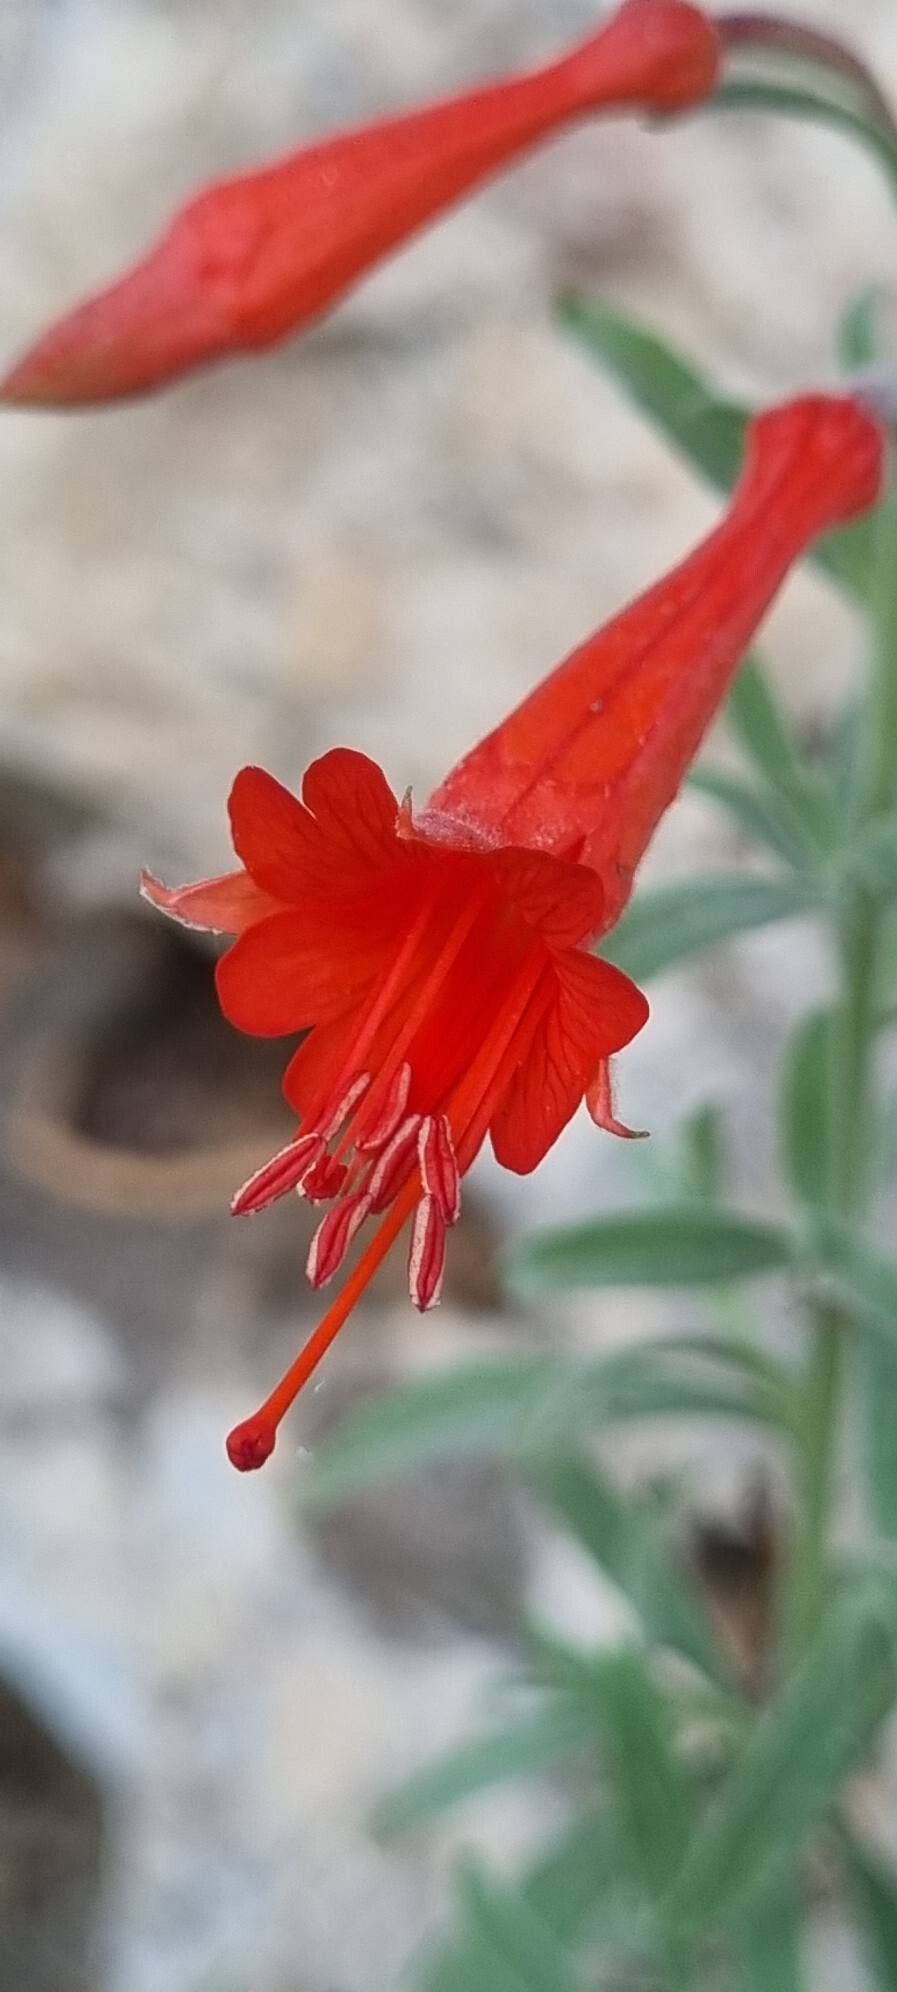
Oh, hello there! So glad you stopped by. Today, we’re diving into the wonderful world of California Fuchsia, or Epilobium canum as the botanists call it. If you’ve ever seen a hillside ablaze with its vibrant, tubular orange or red flowers attracting hummingbirds and bees, you know exactly why this plant is such a treasure. It’s like a little burst of sunshine in the late summer and fall garden.
And the best part? It’s surprisingly easy to share! Propagating California Fuchsia is a truly rewarding experience. You end up with more of this stunning beauty, and it’s a wonderful way to get to know your plants intimately. For beginners, I’d say it’s definitely on the easier side, which is always a good sign for us budding gardeners.
The Best Time to Start
My absolute favorite time to get my hands dirty with California Fuchsia propagation is in late spring or early summer. This is when the plant is actively growing and has plenty of fresh, healthy stems to work with. You want to catch it before it puts all its energy into flowering. It’s like grabbing that perfect, juicy tomato right off the vine – it’s at its peak!
Supplies You’ll Need
Before we get started, let’s gather our tools. Think of this as your gardening toolkit for success:
- Sharp Pruning Shears or a Clean Knife: For taking clean cuts. No dull tools allowed!
- Rooting Hormone (Optional but Recommended): A little helper for convincing the cuttings to sprout roots.
- Small Pots or a Seed Tray: Enough to hold your new little plants.
- Well-Draining Potting Mix: I like a mix of equal parts peat moss, perlite, and a bit of compost. This gives them the right airy environment.
- Gravel or Small Pebbles: For drainage at the bottom of pots, if you’re not using pots with drainage holes.
- Watering Can with a Fine Rose: For gentle watering.
- Plastic Bags or a Propagation Dome: To create a humid environment.
Propagation Methods
We’ll focus on the easiest and most reliable method for California Fuchsia: stem cuttings.
-
Select Your Cuttings: Look for young, healthy stems that are not yet woody. They should be pliable but firm. Aim for pieces about 4-6 inches long. Snip right below a leaf node (where a leaf grows out from the stem).
-
Prepare the Cuttings: Gently remove the lower leaves from the stem, leaving just a few at the top. This prevents them from rotting in the soil. If your cuttings are a bit long, you can cut them in half, making sure each piece has at least one leaf node.
-
Apply Rooting Hormone (If Using): Dip the cut end of the stem into your rooting hormone powder or gel. Tap off any excess.
-
Plant Your Cuttings: Fill your pots or tray with your prepared potting mix. Make a hole with your finger or a pencil, then gently insert the cutting, ensuring the leaf nodes are covered by the soil. Firm the soil gently around the stem.
-
Water Gently: Water thoroughly but gently. You want the soil to be moist, not soggy.
-
Create Humidity: This is crucial! Cover the pots with a plastic bag or place them under a propagation dome. This creates a tiny greenhouse effect, keeping the cuttings from drying out. Make sure the leaves don’t touch the plastic if at all possible.
-
Find a Suitable Spot: Place your potted cuttings in a bright location but out of direct, harsh sunlight. A warm spot is also beneficial.
The “Secret Sauce” (Pro Tips)
Here are a few little tricks I’ve picked up over the years that really make a difference:
- Don’t Let Leaves Touch the Water: If you’re using water propagation (which can work for some cuttings), make absolutely sure the leaves aren’t submerged. They’ll rot quickly. For stem cuttings in soil, this means keeping those top leaves high and dry.
- Bottom Heat is Your Friend: If you have a heat mat designed for propagation, placing your pots on top of it can significantly speed up root development. It mimics the warmth of spring soil.
- Cleanliness is Key: Always use clean tools and pots. This prevents the spread of diseases that can kill your precious cuttings before they even have a chance to root.
Aftercare & Troubleshooting
Once your cuttings have been in their cozy, humid environment for a few weeks, you’ll start to see signs of life. Gentle tugging on a cutting is a good indicator. If you feel resistance, congratulations! Roots are forming.
- Acclimatize Them: Once roots are established, it’s time to gradually remove the plastic cover over a few days. This helps them adjust to normal humidity.
- Continue Watering: Keep the soil consistently moist but not waterlogged. You’ll notice them growing more vigorously as they establish.
- Watch for Rot: The most common sign of failure is mushy, black stems. This usually means too much moisture or poor air circulation. If you see this, sadly, that cutting is likely lost. Overwatering is the prime culprit here, so be mindful.
A Little Patience Goes a Long Way
Propagating plants is a journey, not a race. There will be times when things don’t quite work out, and that’s perfectly normal. Don’t get discouraged! The joy of coaxing new life from a simple stem is immense. Enjoy the process, celebrate your successes, and before you know it, you’ll have a whole garden bursting with California Fuchsia. Happy gardening!
Resource:
https://identify.plantnet.org/k-world-flora/species/Epilobium%20canum%20(Greene)%20P.H.Raven/data