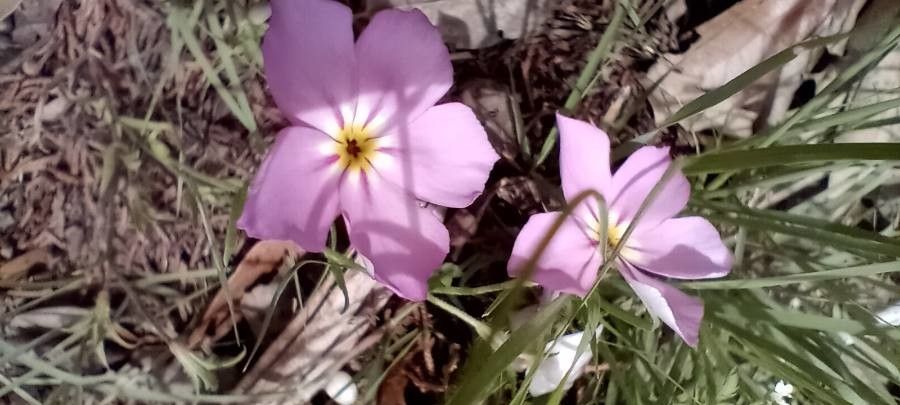
Hello fellow garden enthusiasts! Today, we’re diving into the wonderful world of Phlox roemeriana, also known as Texas Phlox or Rose Phlox. This native beauty is a real charmer, with its delicate pink to rose-colored flowers that bring such a sweet, soft touch to any garden. Growing it from seed is possible, but honestly, the most rewarding and successful way to get more of this lovely plant is through propagation. It’s a fantastic way to expand your collection or share these delightful blooms with friends. And for you beginners out there, I find Phlox roemeriana to be quite forgiving, making it an excellent plant to practice your propagation skills on!
The Best Time to Start
For the highest success rate, late spring to early summer is your golden window. This is when the plant is actively growing after its main bloom period and has plenty of energy to put into new roots. You’re looking for softwood or semi-hardwood cuttings, which are flexible enough to root easily.
Supplies You’ll Need
Gathering your supplies beforehand will make the whole process smoother. Here’s what I usually have on hand:
- Sharp, clean pruning shears or a sharp knife: Essential for making clean cuts.
- Rooting hormone: While not always strictly necessary for Phlox roemeriana, it can give your cuttings a helpful boost. A powder or gel will do.
- Potting mix: A light, well-draining mix is key. I like to use a blend of seed-starting mix and perlite or coarse sand. You can also use a commercially available succulent or cactus mix.
- Small pots or trays: Clean containers with drainage holes are a must. Yogurt cups with holes poked in the bottom can even work in a pinch!
- Plastic bags or a propagation dome: To create a humid environment for your cuttings.
- Water: For misting.
- Labels: To keep track of what you’ve propagated and when.
Propagation Methods
Let’s get our hands dirty with a couple of trusty methods.
Stem Cuttings (My Go-To!)
This is my favorite way to propagate Phlox roemeriana. It’s efficient and gives you a good chance of success.
- Take Cuttings: In late spring or early summer, select healthy, non-flowering stems. Using your clean shears, cut lengths of about 4-6 inches. Make your cuts just below a leaf node (where a leaf attaches to the stem).
- Prepare the Cuttings: Gently remove the leaves from the bottom half of each cutting. You want to expose the nodes, as this is where roots will form. Leave just a couple of leaves at the top to help the cutting photosynthesize. If the remaining leaves are very large, you can cut them in half horizontally to reduce water loss.
- Apply Rooting Hormone: Dip the cut end of each stem into your rooting hormone, tapping off any excess.
- Plant the Cuttings: Fill your small pots with your prepared potting mix. Make a small hole in the center of the soil with your finger or a pencil. Insert the cutting into the hole, ensuring that the nodes you prepared are in contact with the soil. Gently firm the soil around the stem.
- Water and Cover: Water gently to settle the soil. Then, cover the pot with a plastic bag or place it under a propagation dome. This creates a mini-greenhouse, keeping the humidity high, which is crucial for cuttings to root.
Division (For Established Plants)
If you have an older, established clump of Phlox roemeriana, dividing it is a great way to rejuvenate the parent plant and get new ones!
- Timing is Key: The best time to divide is usually in early spring as new growth begins, or in early fall after flowering has finished.
- Dig Up the Clump: Carefully dig up the entire plant. You might need a garden fork to gently loosen the soil around it.
- Separate the Roots: Gently shake off excess soil. You should be able to see natural divisions in the root ball. Using your hands or a clean trowel, carefully pull or cut the clump apart into smaller sections. Each section should have a good set of roots and some healthy shoots.
- Replant Immediately: Plant your new divisions in their new locations or into pots with fresh potting mix. Water them in well.
The “Secret Sauce” (Pro Tips)
Here are a few little tricks that have really helped me over the years:
- Don’t Let the Leaves Touch the Water: If you happen to try water propagation (which can work for phlox, but is trickier in my experience), make sure the leaves are above the waterline. Submerged leaves will rot, which will kill your cutting before it even has a chance to root.
- Bottom Heat is Your Friend: Cuttings root faster and more successfully when there’s a bit of warmth coming from below. A simple heat mat designed for seedlings can make a big difference, especially if your home is on the cooler side.
- Patience with Potting Mix: Resist the urge to waterlogged your cuttings! They need consistent moisture, but not soggy feet. Overwatering is one of the quickest ways to invite fungal diseases and rot.
Aftercare & Troubleshooting
Once you’ve got your cuttings potted and covered, the real waiting game begins!
Keep the pots in a bright spot, but out of direct, scorching sun. Check them every day or two. The soil should stay consistently moist but not waterlogged. If the leaves look a little droopy, it’s likely they need a light misting or a tiny bit more water.
After about 3-6 weeks, you should start to see signs of new growth. You can gently tug on a cutting; if you feel resistance, it means roots have formed. Once they’ve developed a good root system and are showing vigorous new growth, it’s time to harden them off. This means gradually introducing them to outdoor conditions by placing them outside in a sheltered spot for increasing periods over a week or two before planting them out permanently.
The most common issue you’ll encounter is rot. If you see stems turning black and mushy, it’s usually a sign of too much moisture and poor air circulation. If you catch it early, you might be able to salvage a healthy section if the rot hasn’t spread too far. Ensure your soil is well-draining and that you’re not overwatering.
A Little Encouragement
Propagating plants is such a rewarding part of gardening. It connects you more deeply with your plants and allows you to share their beauty. Be patient with your Phlox roemeriana cuttings. Not every single one might make it, and that’s perfectly okay! Celebrate the successes, learn from any setbacks, and most importantly, enjoy the process of nurturing new life. Happy propagating!
Resource:
https://identify.plantnet.org/k-world-flora/species/Phlox%20roemeriana%20Scheele/data