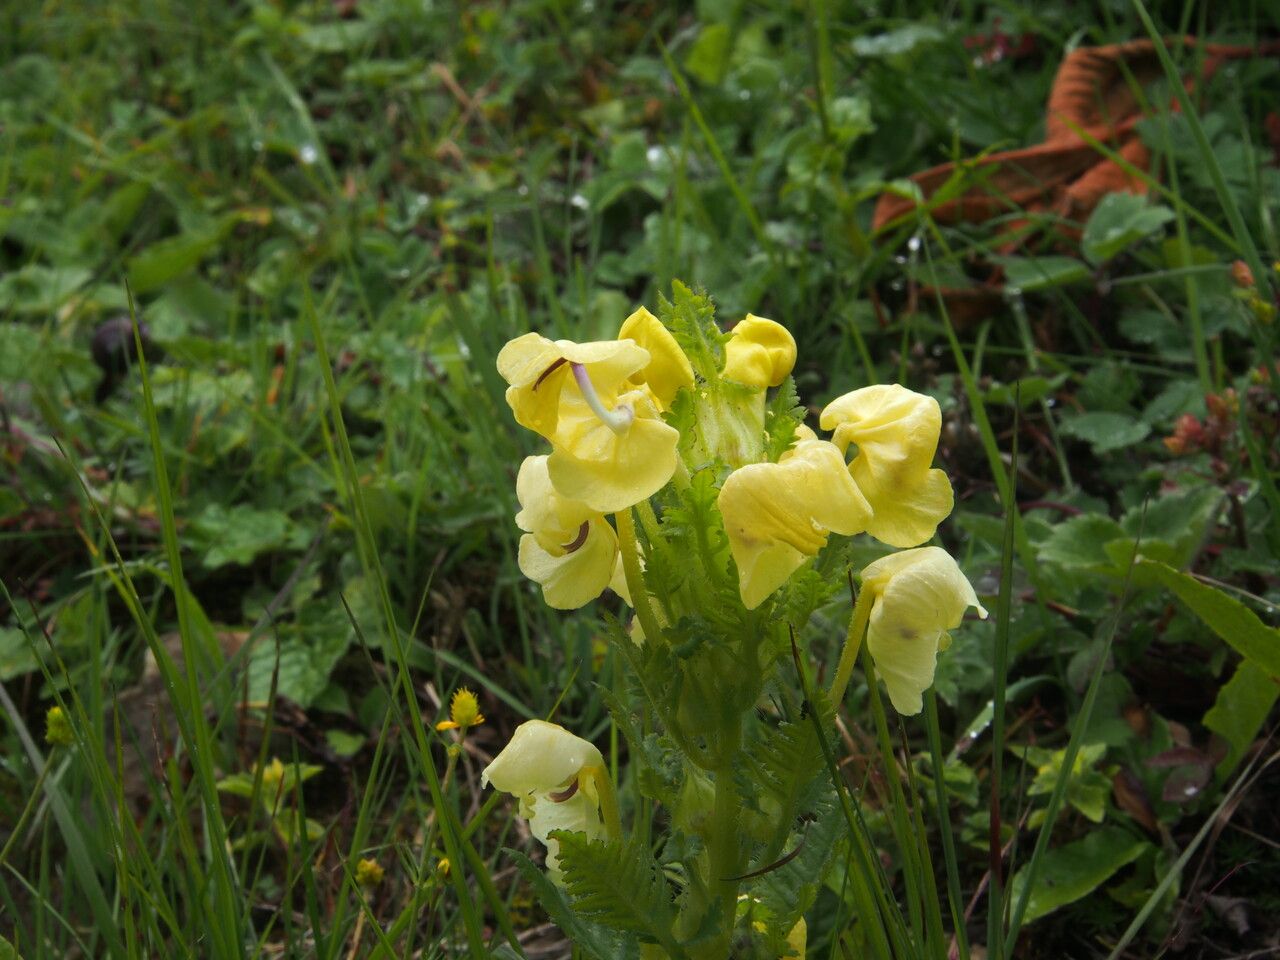
Hello there, fellow garden enthusiasts! Today, I want to share a little love for a plant that brings a unique charm to my garden: Pedicularis hoffmeisteri. You might know it by its common name, “Hoffmeister’s Lousewort,” and while the name might sound a bit peculiar, the plant itself is anything but. It sports these delightful, often vibrant, hooded flowers that dance in the breeze, adding a touch of wild beauty that’s truly captivating.
Propagating Pedicularis hoffmeisteri isn’t just about getting more plants; it’s about experiencing a bit of horticultural magic. Watching a tiny cutting transform into a thriving specimen is incredibly rewarding. Now, I won’t lie and say it’s as simple as sticking a weed in water, but it’s certainly achievable with a little know-how and patience. For those just dipping their toes into propagation, it might be a tad on the challenging side, but don’t let that deter you! We’ll walk through it together.
The Best Time to Start
Timing is everything, as we all know in gardening. For Pedicularis hoffmeisteri, your best bet is to take cuttings in late spring or early summer. This is when the plant is actively growing and has plenty of healthy, semi-hardened stems available. You’re looking for stems that are flexible but not brand new and floppy. They should have a bit of resilience to them.
Supplies You’ll Need
Before we dive in, let’s gather our troops. Having everything ready makes the process so much smoother.
- Sharp, clean pruning shears or a sharp knife: Essential for making clean cuts to prevent disease.
- Rooting hormone powder or gel: While not strictly mandatory for all plants, it can give your cuttings a significant boost.
- A well-draining seed starting mix or a blend of peat moss and perlite (about 50/50): This is crucial for preventing rot.
- Small pots or seed trays with drainage holes: Give your tiny new plants room to breathe.
- A clear plastic bag or propagator lid: To create a humid environment.
- A spray bottle filled with water: For gentle misting.
- (Optional, but highly recommended) A heat mat: Some plants just love a little warmth from below.
Propagation Methods: Stem Cuttings
This is generally the most successful route for Pedicularis hoffmeisteri.
- Select your cuttings: Look for healthy, vigorous stems that have started to harden off a bit. Avoid the very tips of new growth or old, woody stems. Aim for pieces about 4-6 inches long.
- Make the cut: Using your sterilized pruning shears or knife, make a clean cut just below a leaf node. A leaf node is where a leaf attaches to the stem. This is where the magic happens for rooting.
- Prepare the cutting: Gently remove the lower leaves from the cutting, leaving just a few at the top. This prevents them from rotting when planted.
- Apply rooting hormone: Dip the cut end of the stem into your rooting hormone powder or gel. Tap off any excess.
- Plant the cuttings: Fill your pots or trays with your chosen potting mix. Make a small hole with a pencil or your finger, and gently insert the cut end of the stem. Firm the soil around the base to ensure good contact.
- Water gently: Water the soil thoroughly but gently. You want it moist, not waterlogged.
- Create humidity: Place your potted cuttings into a propagator or cover them loosely with a clear plastic bag. This traps humidity, which is vital for cuttings that can’t yet absorb water through roots.
The “Secret Sauce” (Pro Tips)
Here are a few tricks I’ve learned over the years that might just make all the difference.
- Avoid leaf-to-water contact: If you’re doing any water propagation (though I lean towards soil for Pedicularis), make absolutely sure no leaves are touching the water. They’ll rot in a heartbeat.
- Bottom heat is your friend: For Pedicularis hoffmeisteri, a gentle bottom heat from a heated mat can significantly speed up root development. It mimics the warmth of spring soil. Just a mild warmth, not scorching hot!
- Don’t disturb them too soon: Resist the urge to tug on your cuttings to see if they’ve rooted. Wait until you see new leaf growth or feel a gentle tug when you very lightly try to pull them. Patience is truly key here.
Aftercare & Troubleshooting
Once you see those first signs of new growth or feel a bit of resistance, your cutting is likely rooting!
Caring for your new plants:
- Gradually introduce them to fresh air: If you’ve used a plastic bag or propagator, start by opening it for a few hours each day, then progressively longer, to acclimate them to lower humidity.
- Keep them consistently moist but not soggy: Continue to monitor the soil moisture.
- Provide bright, indirect light: Avoid direct sunlight, which can scorch delicate new leaves.
- Wait to transplant: Let them grow a bit bigger in their nursery pots before attempting to move them into larger containers or their final garden spot.
Troubleshooting:
- Yellowing leaves: This can be a sign of overwatering or not enough light. Check your watering habits and ensure they’re in a bright spot.
- Wilting and mushy stems: This is usually rot, a common enemy of cuttings. It often means your soil isn’t draining well enough, or you’re overwatering. If you catch it early, you might be able to save a section of the stem by taking a fresh cutting from an unaffected area.
- No signs of life after a long time: Don’t despair! Some plants just take their sweet time. Ensure they’re still getting good light and consistent moisture. Sometimes, a little extra patience is all that’s needed.
A Little Bit of Patience Goes a Long Way
So there you have it – a little guide to bringing more of these lovely Pedicularis hoffmeisteri into your world. Remember, propagation is a journey, not a race. There will likely be some failures along the way, and that’s perfectly normal. Each attempt teaches you something new. Enjoy the process, celebrate the small victories, and soon you’ll be sharing these beauties with friends! Happy gardening!
Resource:
https://identify.plantnet.org/k-world-flora/species/Pedicularis%20hoffmeisteri%20Klotzsch/data