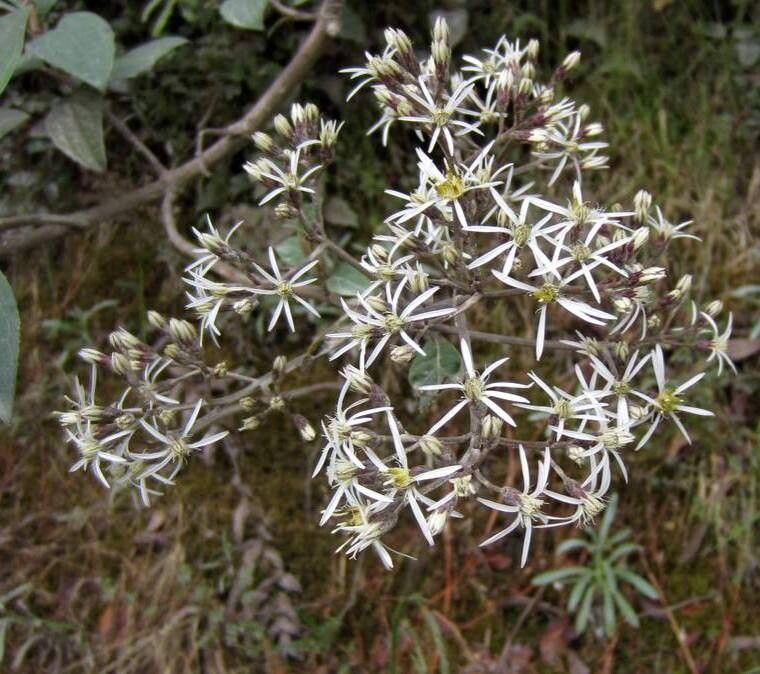
Hey there, fellow garden enthusiasts! I’m so excited to talk to you today about a gem in the late-summer garden: Doellingeria engelmannii, also known as Engelmann’s Aster. If you’re looking for a plant that brings a delightful burst of delicate white daisy-like flowers with cheerful yellow centers to your landscape when other blooms are fading, this is it. It’s a fantastic native for attracting pollinators and adding a touch of wild beauty. And guess what? Propagating it is surprisingly rewarding! For beginners, I’d say it’s moderately easy, especially if you follow a few key steps.
The Best Time to Start
When it comes to getting the best results with Doellingeria engelmannii, timing is everything. I find that late spring to early summer, just as the plant is really gearing up for its growth spurt, is the sweet spot for taking cuttings. If you’re thinking about division, fall, after the flowering season is over but before the ground freezes, is ideal.
Supplies You’ll Need
Gathering your tools beforehand makes the whole process much smoother. Here’s what I keep handy:
- Sharp Pruning Shears or a Clean Knife: For making clean cuts.
- Rooting Hormone (Optional but Recommended): A powder or liquid to give cuttings a boost.
- Well-Draining Potting Mix: A good blend of perlite, peat moss, and a bit of compost works wonders. You can also use a sandy loam if you’re dividing.
- Small Pots or Seed Starting Trays: With drainage holes, of course!
- Plastic Bags or a Clear Propagator Lid: To create a humid environment for cuttings.
- Watering Can with a Fine Rose: For gentle watering.
- Labels: To keep track of what you’ve propagated and when.
Propagation Methods
Let’s get our hands dirty! Here are the best ways I’ve found to multiply this lovely aster:
Stem Cuttings
This is my go-to method for Doellingeria engelmannii. It’s efficient and gives you a good number of new plants.
- Select Your Cuttings: Look for healthy, non-flowering stems. Aim for pieces about 4-6 inches long.
- Make the Cut: Using your clean shears, make a cut just below a leaf node (where a leaf attaches to the stem). These nodes are packed with the magic that encourages root growth.
- Prepare the Cutting: Gently remove the lower leaves, leaving just a few at the top. This prevents them from rotting in the soil and reduces water loss.
- Apply Rooting Hormone: Dip the cut end into your rooting hormone, tapping off any excess.
- Plant Your Cuttings: Fill your small pots with the well-draining mix. Make a small hole with a pencil or your finger and insert the cutting, firming the soil gently around it.
- Water Gently: Water thoroughly but avoid waterlogging.
- Create Humidity: Cover the pot with a plastic bag, propping it up with small sticks so it doesn’t touch the leaves. Alternatively, place the pots in a propagator with a lid.
Division
If you have an established clump, division is a straightforward way to expand your collection.
- Dig Up the Plant: In the fall, carefully dig up your Doellingeria engelmannii clump.
- Divide the Roots: Gently tease apart the root ball. You can use your hands or a clean trowel or knife. Aim for sections that have both roots and some healthy shoots.
- Replant: Replant the divisions immediately into your garden beds or larger pots, ensuring they have good soil drainage. Water well.
The “Secret Sauce” (Pro Tips)
Here are a few little tricks I’ve learned over the years that can really boost your success:
- Don’t Let the Leaves Touch the Water: If you’re doing a quick water propagation experiment (though I prefer soil for this plant), make sure the leaves are well above the water line. They’ll rot quickly if submerged.
- Bottom Heat is Your Friend: For cuttings, placing your pots on a gentle heat mat can significantly speed up root development. It mimics the warmth of spring pushing new growth from the soil.
- Be Patient with Cuttings: It can take anywhere from 3-6 weeks (sometimes longer!) for cuttings to root. Resist the urge to pull them up too early to check for roots. A gentle tug will tell you if they’ve taken.
Aftercare & Troubleshooting
Once you see signs of new growth on your cuttings, or your divisions have settled in, you’re on the right track!
- Gradual Acclimation: If you’ve used a plastic bag or propagator, gradually introduce your new plants to normal humidity levels by opening the bag or lid a little more each day over a week.
- Light: Keep them in bright, indirect light until they are well-established.
- Watering: Water when the top inch of soil feels dry. Avoid overwatering.
- Common Issues: The biggest culprit is rot. If your cuttings turn black and mushy, it’s usually due to too much moisture and poor air circulation. Ensure your soil drains well and don’t let them sit in soggy conditions. Wilting can mean they’re too dry or too hot.
A Encouraging Closing
Propagating Doellingeria engelmannii is such a wonderful way to connect with your garden and multiply these beautiful late-season bloomers. Don’t be discouraged if a few don’t make it; it’s all part of the learning process. Be patient, enjoy the journey of nurturing these little ones, and soon you’ll have more of their charming blooms to share! Happy gardening!
Resource: