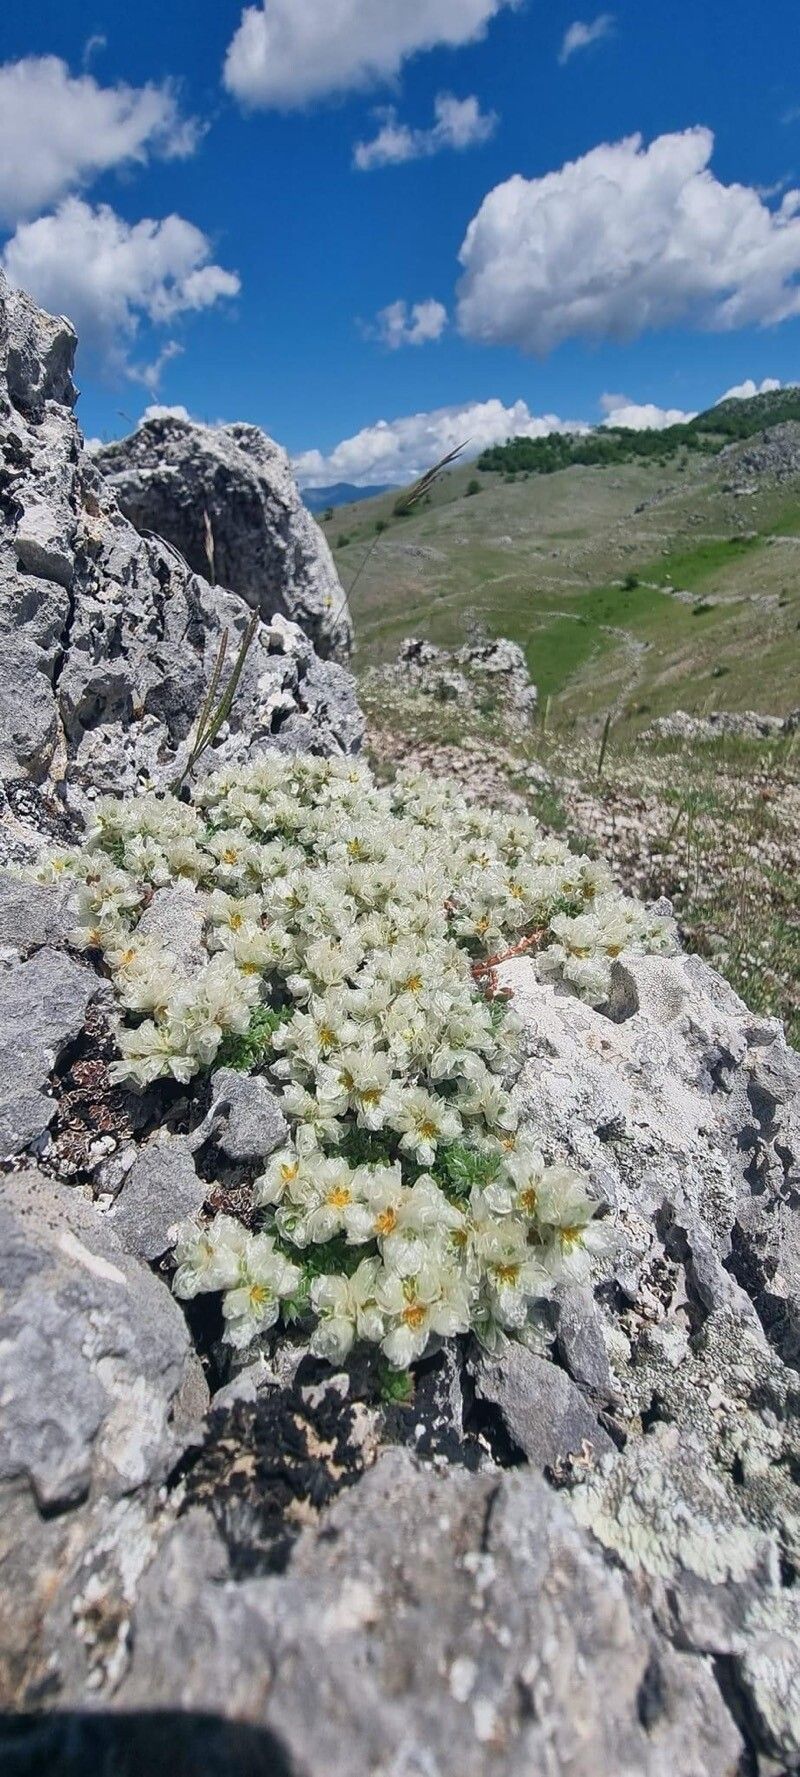
Hello fellow garden enthusiasts! Today, we’re diving into the charming world of Paronychia albanica, often known as silver nailwort. This little gem is a delightful low-growing perennial that carpets the ground with its silvery foliage and tiny, persistent white flowers. It brings a subtle shimmer to rock gardens, borders, or even a sunny patio container. Watching these unassuming little plants thrive and then successfully creating more of them from your own efforts? That’s truly a rewarding part of gardening, in my book. Now, is Paronychia albanica a beginner-friendly propagation project? I’d say it’s moderately easy. With a little attention to detail, you’ll be well on your way to success.
The Best Time to Start
For the highest success rate with Paronychia albanica, I always find the late spring to early summer to be the sweet spot. This is when the plant is actively growing, and the new stems have enough vigor to establish themselves quickly. Waiting until after the initial flush of spring growth has matured slightly, but before the intense heat of mid-summer, gives those new cuttings the best chance to root without being stressed.
Supplies You’ll Need
Before we get our hands dirty, let’s gather our trusty gardening companions:
- Clean, sharp pruning shears or a sharp knife: For making those precise cuts.
- A good quality, well-draining potting mix: I like a blend of equal parts peat or coco coir, perlite, and coarse sand. This ensures good aeration and prevents waterlogging.
- Small pots or seed trays: Clean ones are a must to prevent disease.
- Optional: Rooting hormone: While not strictly necessary for Paronychia albanica, a little bit can give your cuttings a boost. Look for a powder or gel formulation.
- A watering can with a fine rose or a spray bottle: For gentle watering.
- A pen and plant labels: So you don’t forget what you’ve planted where!
- For bottom heat (optional): A seedling heat mat.
Propagation Methods
Let’s explore how to create new Paronychia albanica plants. The most reliable method I’ve found is from stem cuttings.
Here’s how I do it:
- Taking the Cuttings: Select healthy, non-flowering shoots from your established plant. You’re looking for stems that are about 3-4 inches long. Using your clean shears, make a clean cut just below a leaf node. A leaf node is where a leaf or bud emerges from the stem.
- Preparing the Cuttings: Gently remove the lower leaves from the cutting, leaving just a few at the top. If your cuttings are a bit long, you can carefully pinch or cut them back slightly.
- Applying Rooting Hormone (Optional): If you’re using rooting hormone, dip the cut end of the stem into the hormone powder or gel, tapping off any excess.
- Panching: Fill your clean pots or seed trays with your well-draining potting mix. Lightly moisten the mix. Make small holes in the soil with a pencil or your finger.
- Planting the Cuttings: Insert the prepared cuttings into the holes, ensuring that at least one leaf node is buried in the soil. Gently firm the soil around the base of each cutting to ensure good contact.
- Watering: Water the cuttings gently but thoroughly. You want the soil to be consistently moist, but not soggy.
The “Secret Sauce” (Pro Tips)
Now, for a couple of little tricks that have made a big difference for me over the years:
- Don’t Overcrowd! When you’re planting your cuttings, give them a bit of breathing room. If they’re too close together, they can compete for light and air, and it also makes them more susceptible to fungal issues. I usually space them about an inch apart.
- The Magic of Bottom Heat: While Paronychia albanica will root without it, placing your pots on a seedling heat mat can significantly speed up the process. It mimics the warmth of spring soil and encourages root development from below, which is crucial for these little guys. Just keep the mat on a low setting – we’re aiming for gentle warmth, not a sauna!
Aftercare & Troubleshooting
Once your cuttings are planted, the real waiting and nurturing game begins. Keep them in a bright spot, but out of direct, scorching sunlight. A little bit of shade during the hottest part of the day is perfect. Water them regularly, allowing the top layer of soil to dry out slightly between waterings.
You’ll know your cuttings are rooting when you see new growth appearing at the tips, or if you gently tug on a cutting and feel a bit of resistance. This usually takes anywhere from 4 to 8 weeks.
What if things go wrong? The most common culprit for cuttings failing is rot. If you see wilting stems that turn mushy and brown, it’s a sign of too much moisture and not enough air circulation. If this happens, you may need to discard the affected cuttings and start again, ensuring your soil is well-draining and you’re not overwatering. Don’t be discouraged; it’s all part of the learning curve!
A Encouraging Closing
So there you have it! A straightforward way to multiply your beautiful Paronychia albanica. Remember, gardening is a journey, and propagation is one of its most exciting chapters. Be patient, enjoy the process, and soon you’ll have a whole collection of these silvery beauties to share or keep for yourself. Happy propagating!
Resource:
https://identify.plantnet.org/k-world-flora/species/Paronychia%20albanica%20Chaudhri/data