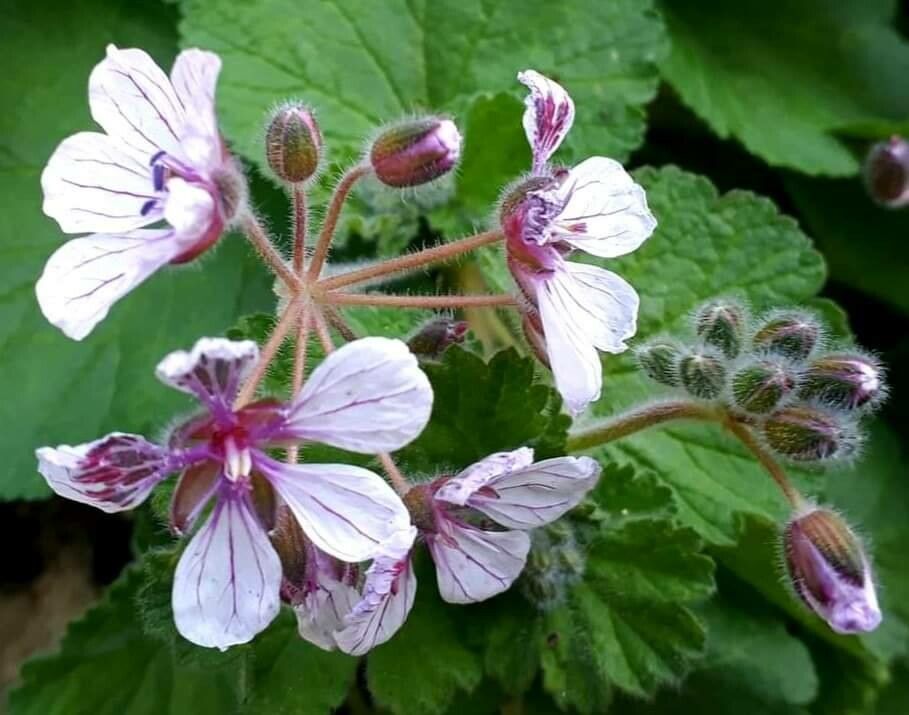
Oh, Erodium trifolium! What a darling plant. If you’ve ever admired those delicate, often pinkish-purple, trifoliate leaves and lovely little blossoms that look like tiny wild roses, you’re not alone. I’ve been growing these beauties for years, and honestly, they always bring a smile to my face. They bring this wonderful, grounded feel to a garden, like a little piece of the Mediterranean has settled in.
And the best part? Propagating them is surprisingly rewarding. While they aren’t quite as “stick it in the ground and it grows” easy as some plants, they’re definitely not scary. I’d say they fall into the “satisfyingly achievable” category, even for those of you who are just starting to dip your toes into the world of plant propagation. Getting a new little Erodium from an existing one feels like a real accomplishment.
The Best Time to Start
For Erodium trifolium, I find the springtime, just as new growth is really taking off after the cooler months, is the sweet spot. Aim for late spring to early summer. You want the plant to be actively growing and have plenty of energy to put into creating new roots. Avoid trying to propagate when it’s super hot and dry, or when the plant is stressed.
Supplies You’ll Need
Gathering your tools beforehand makes the whole process go so much smoother. Here’s what I always have on hand:
- Sharp pruning shears or a clean craft knife: For making nice, clean cuts.
- A well-draining potting mix: I often mix my own: 1 part peat moss, 1 part perlite, and 1 part coarse sand. You can also buy a good quality cactus or succulent mix.
- Small pots or trays: Clean ones are essential!
- Rooting hormone powder or gel (optional but recommended): This gives your cuttings a little boost.
- A mister or spray bottle: For keeping things humid.
- Clear plastic bags or a propagator lid: To create a mini-greenhouse effect.
- Gravel or small pebbles: For surface drainage if you prefer.
Propagation Methods
Erodium trifolium can be successfully propagated using a couple of methods, but my go-to is stem cuttings. It’s straightforward and usually yields great results.
Stem Cuttings:
- Take Your Cuttings: Head out to your Erodium plant on a pleasant, not-too-hot day. Look for healthy, non-flowering stems. You want sections that are about 3-4 inches long. With your clean shears or knife, make a clean cut just below a leaf node (that little bump where a leaf attaches to the stem). Remove any lower leaves, leaving just the top couple of leaves.
- Dip in Rooting Hormone (Optional): If you’re using rooting hormone, gently dip the cut end of the stem into the powder or gel. Tap off any excess.
- Plant the Cuttings: Fill your small pots or trays with your prepared well-draining mix. Moisten the mix thoroughly. Make a small hole in the soil with a pencil or your finger, and gently insert the cut end of the Erodium stem. Firm the soil gently around the base to ensure good contact.
- Create a Humid Environment: This is crucial! Water the soil lightly again. Then, tent a clear plastic bag over the pot, or place it inside a propagator with a lid. Make sure the leaves aren’t touching the plastic, as this can cause rot. If you don’t have a bag or lid, you can stick a few wooden skewers around the pot and drape the bag over them.
- Find a Warm Spot: Place your pots in a bright location that receives indirect light. Direct sun will cook your delicate cuttings. A warm windowsill is usually perfect.
The “Secret Sauce” (Pro Tips)
Now, for a couple of my little tricks that I’ve learned over the years. These can really make a difference!
- Don’t Drown Them: While humidity is key, you don’t want the soil to be soggy. Water sparingly – just enough to keep the soil consistently moist but not waterlogged. If you see water pooling, that’s too much.
- Bottom Heat is Your Friend: If you have a small propagator with a heating mat, or even a warm spot in your greenhouse, placing your pots on it can significantly speed up root development. Erodium likes a bit of warmth to get those roots going.
- Patience with the Leaves: If you’re water propagating (which is also an option for Erodium, though I find cuttings more reliable), make sure the leaves never touch the water. Only the stem should be submerged. Leaves in water are a quick ticket to rot city!
Aftercare & Troubleshooting
Once your Erodium trifolium cuttings have been happily residing in their humid environment for a few weeks, you’ll start to see signs of life.
- Rooting: You’ll know they’ve rooted when you see new leaf growth. You can also gently tug on the cutting; if there’s resistance, those roots are forming! This can take anywhere from 3-6 weeks, sometimes longer.
- Acclimatizing: Once they’re rooted, it’s time to start opening up that plastic tent. Do it gradually over a week or so, to let the new plants get used to the regular air.
- Potting Up: When they have a good root system and enough foliage to handle, you can pot them up into slightly larger pots with your regular well-draining mix.
- Troubleshooting: The most common issue you’ll encounter is rot. This is usually caused by overwatering or poor drainage. If a cutting turns black and mushy, unfortunately, it’s a goner. Just pull out the offending stem and check your watering habits. Another sign of failure is if the stem shrivels up and dries out completely – this might mean it’s too dry or getting too much direct sun.
A Encouraging Closing
So there you have it! It might sound like a lot, but honestly, once you do it once, it becomes second nature. The most important thing is to be patient and enjoy the process. Watching a tiny cutting transform into a thriving new plant is one of gardening’s quiet joys. Give it a try – I’m sure you’ll find success and be rewarded with even more of these delightful Erodium specimens to enjoy! Happy propagating!
Resource:
https://identify.plantnet.org/k-world-flora/species/Erodium%20trifolium%20(Cav.)%20Cav./data