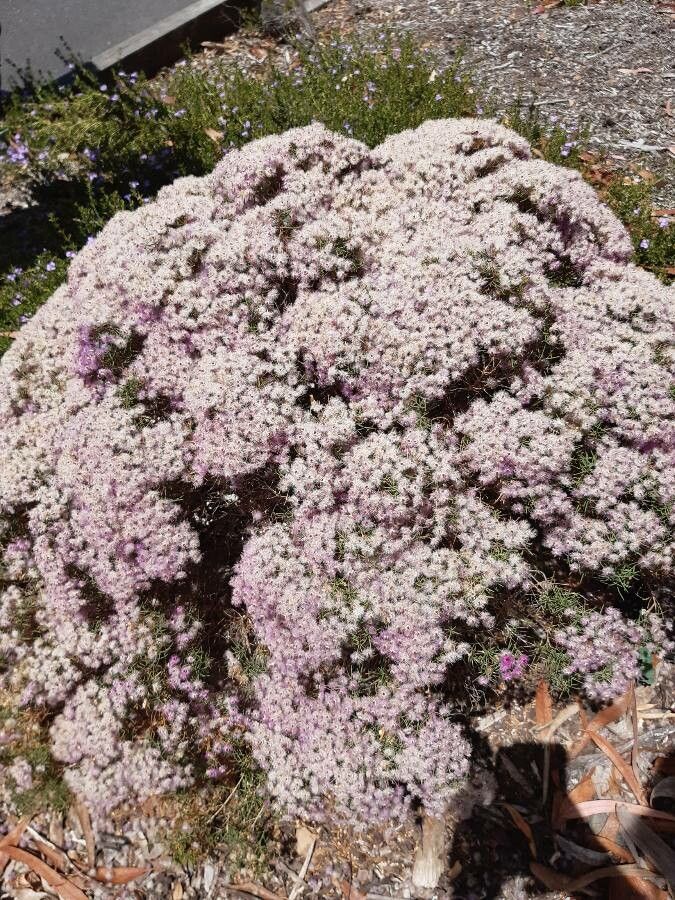
Oh, the charm of Verticordia verticordina! If you’ve ever seen these beauties, with their delicate, feather-like flowers cascading like a waterfall of color, you know why they capture our hearts. They’re just so ethereal, aren’t they? Propagating them can feel a little daunting at first, I admit. They’re not quite a “plug-and-play” beginner plant, so a touch of patience and careful attention will serve you well. But oh, the reward of seeing a tiny cutting transform into your own flourishing specimen is something truly special.
The Best Time to Start
For the highest success rates with Verticordia verticordina, I always lean towards late spring or early summer. This is when the plant is actively growing and has plenty of energy to put into making new roots. Look for stems that are new but have started to firm up slightly – they shouldn’t be too soft and floppy, but not old and woody either. Think of them as that perfect stage between a brand-new shoot and seasoned maturity.
Supplies You’ll Need
Here’s what you’ll want to have on hand before you begin:
- Sharp, clean pruning shears or a propagation knife: Cleanliness is key to preventing disease.
- Well-draining potting mix: A good blend of perlite, coarse sand, and peat moss works wonderfully. Some people like to add a bit of orchid bark for extra aeration.
- Rooting hormone: This is your best friend for encouraging strong root development. Look for one with a good concentration of IBA.
- Small pots or propagation trays: Make sure they have drainage holes!
- Clear plastic bags or a propagation dome: To create a humid environment for your cuttings.
- Watering can with a fine rose or a mister: Gentle watering is crucial.
- Labels and a permanent marker: So you don’t forget what you planted where!
Propagation Methods
While a few methods might be discussed for other plants, for Verticordia verticordina, stem cuttings are generally the most reliable and successful route I’ve found.
- Make Your Cuts: Choose a healthy stem that meets the criteria we discussed for timing. Using your sharp, clean shears, take a cutting about 4-6 inches long. Make the cut just below a leaf node (where a leaf attaches to the stem).
- Prepare the Cutting: Gently remove the leaves from the bottom half to two-thirds of the cutting. We want to avoid any foliage that will be submerged in the potting mix.
- Dip in Rooting Hormone: Lightly moisten the cut end of the stem and then dip it into your rooting hormone powder, tapping off any excess. This helps to seal the cut and encourages root growth.
- Plant Your Cuttings: Fill your small pots or trays with your well-draining potting mix. Make a small hole in the center with your finger or a pencil. Insert the prepared cutting into the hole, ensuring the nodes where you removed the leaves are below the soil surface. Gently firm the soil around the cutting.
- Water Gently: Water the potting mix lightly, just enough to settle it around the cutting. Avoid waterlogging.
- Create Humidity: Place a clear plastic bag loosely over the pot or cover your tray with a propagation dome. This traps moisture and creates a humid microclimate that cuttings love. Make sure the leaves aren’t touching the plastic if possible.
The “Secret Sauce” (Pro Tips)
Here are a few things I’ve learned over the years that can make a big difference:
- Bottom Heat is Your Friend: If you have a chance, placing your pots on a gentle heated propagation mat can really speed up root formation. It mimics the warmth of spring soil and gives those nascent roots a welcome boost.
- Don’t Drench, Just Dampen: When watering your cuttings, especially in the initial stages, err on the side of caution. Constantly saturated soil can lead to rot, which is the quickest way to lose a promising cutting. Aim for consistently moist, not wet.
- Air it Out: Even though humidity is key, it’s important to periodically give your cuttings some fresh air. Lift the plastic bag or open the dome for about 15-30 minutes each day. This helps prevent fungal issues and allows for better air circulation.
Aftercare & Troubleshooting
Once you start to see signs of new growth, like tiny leaves unfurling, it’s a good indicator that roots are forming. You can gently tug on the cutting; if there’s resistance, roots are likely present. At this point, you can gradually acclimate your new plant to slightly less humid conditions by slowly opening the bag further over a week or two.
The biggest culprit for failure with cuttings is rot. If your cutting turns mushy, dark, or smells unpleasant, it’s likely rotted. This is often due to overwatering or poor air circulation. You might also see the leaves yellowing and dropping, which can be a sign of stress or insufficient rooting. If you see signs of rot, malheureusement, it’s best to discard the cutting and try again, perhaps adjusting your watering or humidity levels.
A Warm Farewell
Propagating plants like Verticordia verticordina is a journey. There will be times when things don’t go as planned, and that’s perfectly okay. Each attempt is a learning experience. Be patient, observe your cuttings closely, and celebrate every tiny sign of success. You’ve got this, and the joy of nurturing new life will be well worth the effort! Happy gardening!
Resource: