Oh, hello there! Come on in, grab a mug. I’m so delighted you’re curious about propagating Elaphoglossum lanceiforme. This little fern, with its wonderfully lance-shaped leaves, has such a charming presence. Watching a new plant unfurl from a tiny piece of its parent is truly one of gardening’s greatest joys. For Elaphoglossum, I’d say it’s not the absolute easiest for a complete beginner, but with a little attention and a lot of patience, you’ll find success. It’s a delightful journey, and I’m happy to guide you.
The Best Time to Start
Timing is crucial with most plants, and for Elaphoglossum propagation, I find the spring and early summer to be your best bet. This is when the plant is actively growing and has the most energy to put into developing new roots. Look for new, vigorous growth on your established plant. That’s your signal that it’s ready to share!
Supplies You’ll Need
Here’s what you’ll want to have on hand:
- Sharp pruning shears or a clean knife: For making clean cuts that heal well.
- Well-draining potting mix: I like a blend of peat moss, perlite, and a bit of orchid bark. It needs to breathe!
- Small pots or trays: With drainage holes, of course.
- Clear plastic bag or dome: To create a mini-greenhouse effect.
- Watering can or mister: For gentle watering.
- Rooting hormone (optional but recommended): For an extra boost to encourage root development.
- Labeled stakes or tags: You’ll want to know what you’ve propagated and when!
Propagation Methods
Let’s get our hands dirty! The most reliable way I’ve found to propagate Elaphoglossum lanceiforme is through division. Ferns are wonderfully forgiving when it comes to this.
- Gently remove your plant from its pot. Turn it on its side and give the pot a few firm taps. Ease the plant out, trying not to disturb the root ball too much.
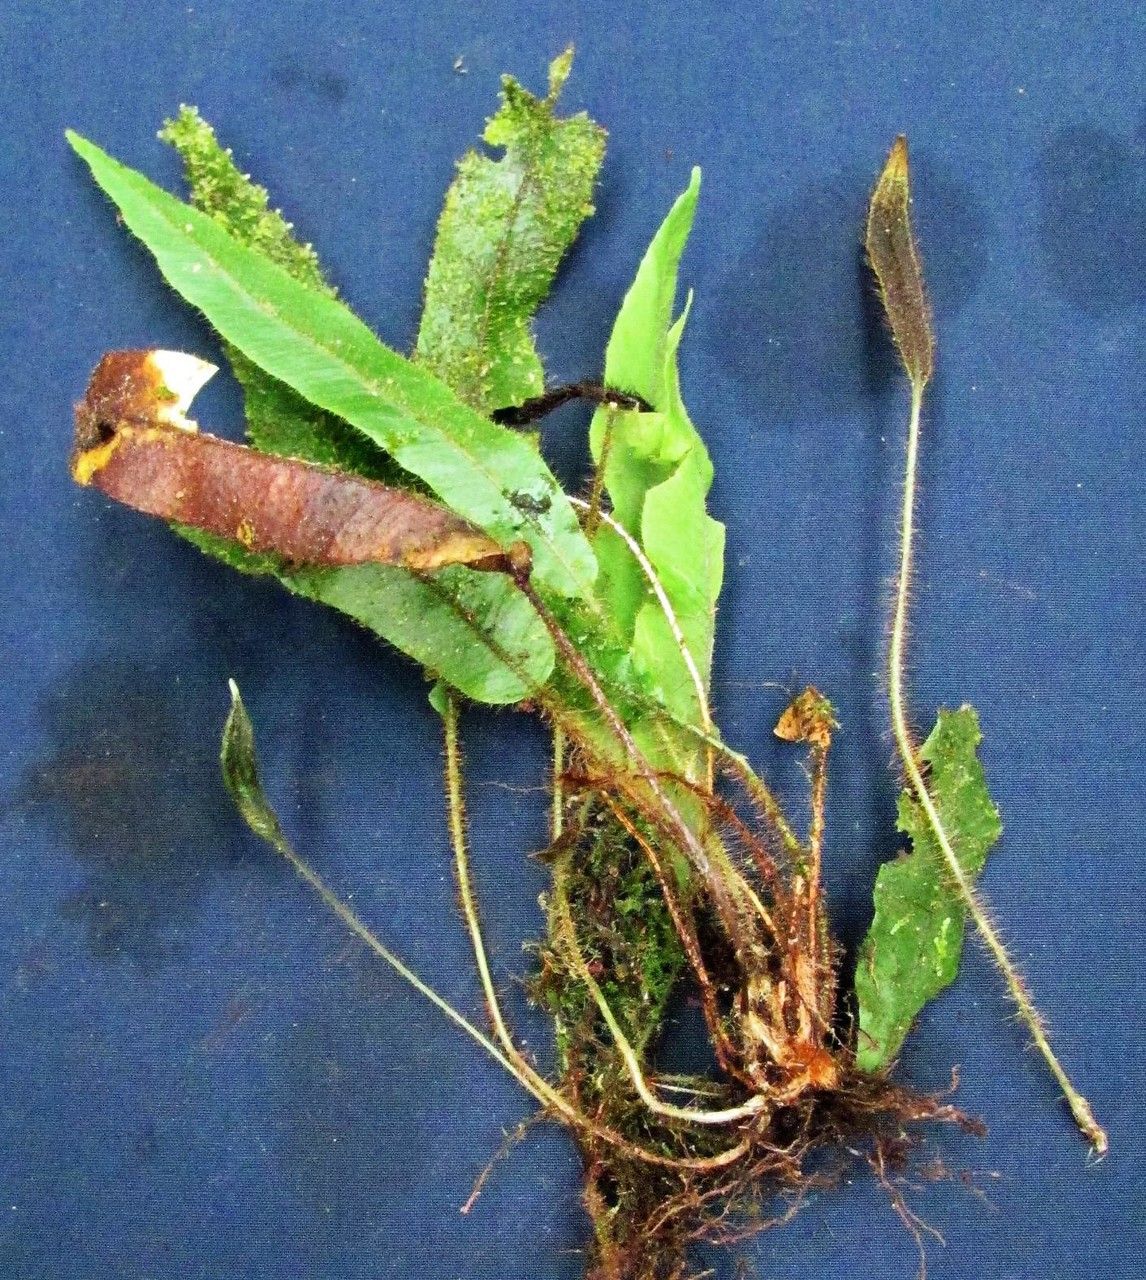
- Inspect the root ball. Look for natural divisions – places where the plant is clearly growing into multiple sections, each with its own rhizome (the thick, stem-like structure that runs along the soil surface or just below) and some roots.
- Carefully separate the divisions. You can often do this with your hands, gently pulling the sections apart. If it’s a bit stubborn, a clean knife can help you cut through the rhizome. Make sure each division has at least one leafy frond and a good chunk of roots.
- Pot up your new babies. Fill your small pots with your prepared potting mix. Make a little well in the center and place your division in, spreading the roots out.
- Tuck them in. Gently firm the soil around the roots. You want the rhizome to be just at or slightly below the soil surface.
- Water gently. Give them a good drink using your watering can or mister, ensuring the soil is evenly moist but not waterlogged.
- Create a humid environment. Place the pots into a clear plastic bag, sealing it loosely, or cover them with a clear dome. This is vital for ferns!
The “Secret Sauce” (Pro Tips)
Now for those little tricks that make a big difference:
- Don’t overwater! This is the number one killer of baby ferns. The soil should feel moist, like a wrung-out sponge, not soggy. Soggy soil is an invitation to rot.
- Bottom heat can be a game-changer. If you have a heating mat designed for seedlings, placing your pots on it can really speed up root development. Ferns love a bit of warmth rising through their roots.
- Be patient with the fronds. Sometimes, a division might look a bit sad for a week or two. The old fronds might droop or even turn yellow. Don’t despair! As long as the rhizome looks healthy and there’s no mushy rot, new growth will eventually emerge. It might take longer than you expect, so keep an eye on the soil and humidity.
Aftercare & Troubleshooting
Once you see signs of new growth – tiny fiddleheads unfurling or new fronds reaching for the light – you know your Elaphoglossum has established roots. This is fantastic!
- Gradually acclimate them. Over a week or two, start opening the plastic bag or dome for longer periods each day. This helps them adjust to the drier ambient air.
- Continue gentle watering. Keep the soil consistently moist, but still avoid drenching it.
- Keep them out of direct sun. Elaphoglossum prefers bright, indirect light. Too much direct sun can scorch their delicate new leaves.
What if things go wrong?
- Rot: If the rhizome or the base of the fronds turn mushy and black, it’s usually a sign of overwatering and poor air circulation. Sadly, this is often the end of the line. It’s a tough lesson, but it teaches us to be more mindful of moisture levels.
- No new growth: If after several weeks there’s absolutely no sign of life, it could be that the division didn’t take. Check the rhizome for any signs of rot. If it seems firm and healthy, it might just need more time or perhaps a bit more warmth.
A Encouraging Closing
So there you have it! Propagating Elaphoglossum lanceiforme is a rewarding endeavor. It might require a touch more patience than some other plants, but the satisfaction of nurturing a new fern from a proud parent is truly special. Don’t be discouraged if your first attempt isn’t a roaring success. Every gardener learns through trial and error. Enjoy the process, appreciate your plant, and happy propagating!
Resource:
https://identify.plantnet.org/k-world-flora/species/Elaphoglossum%20lanceiforme%20Mickel/data