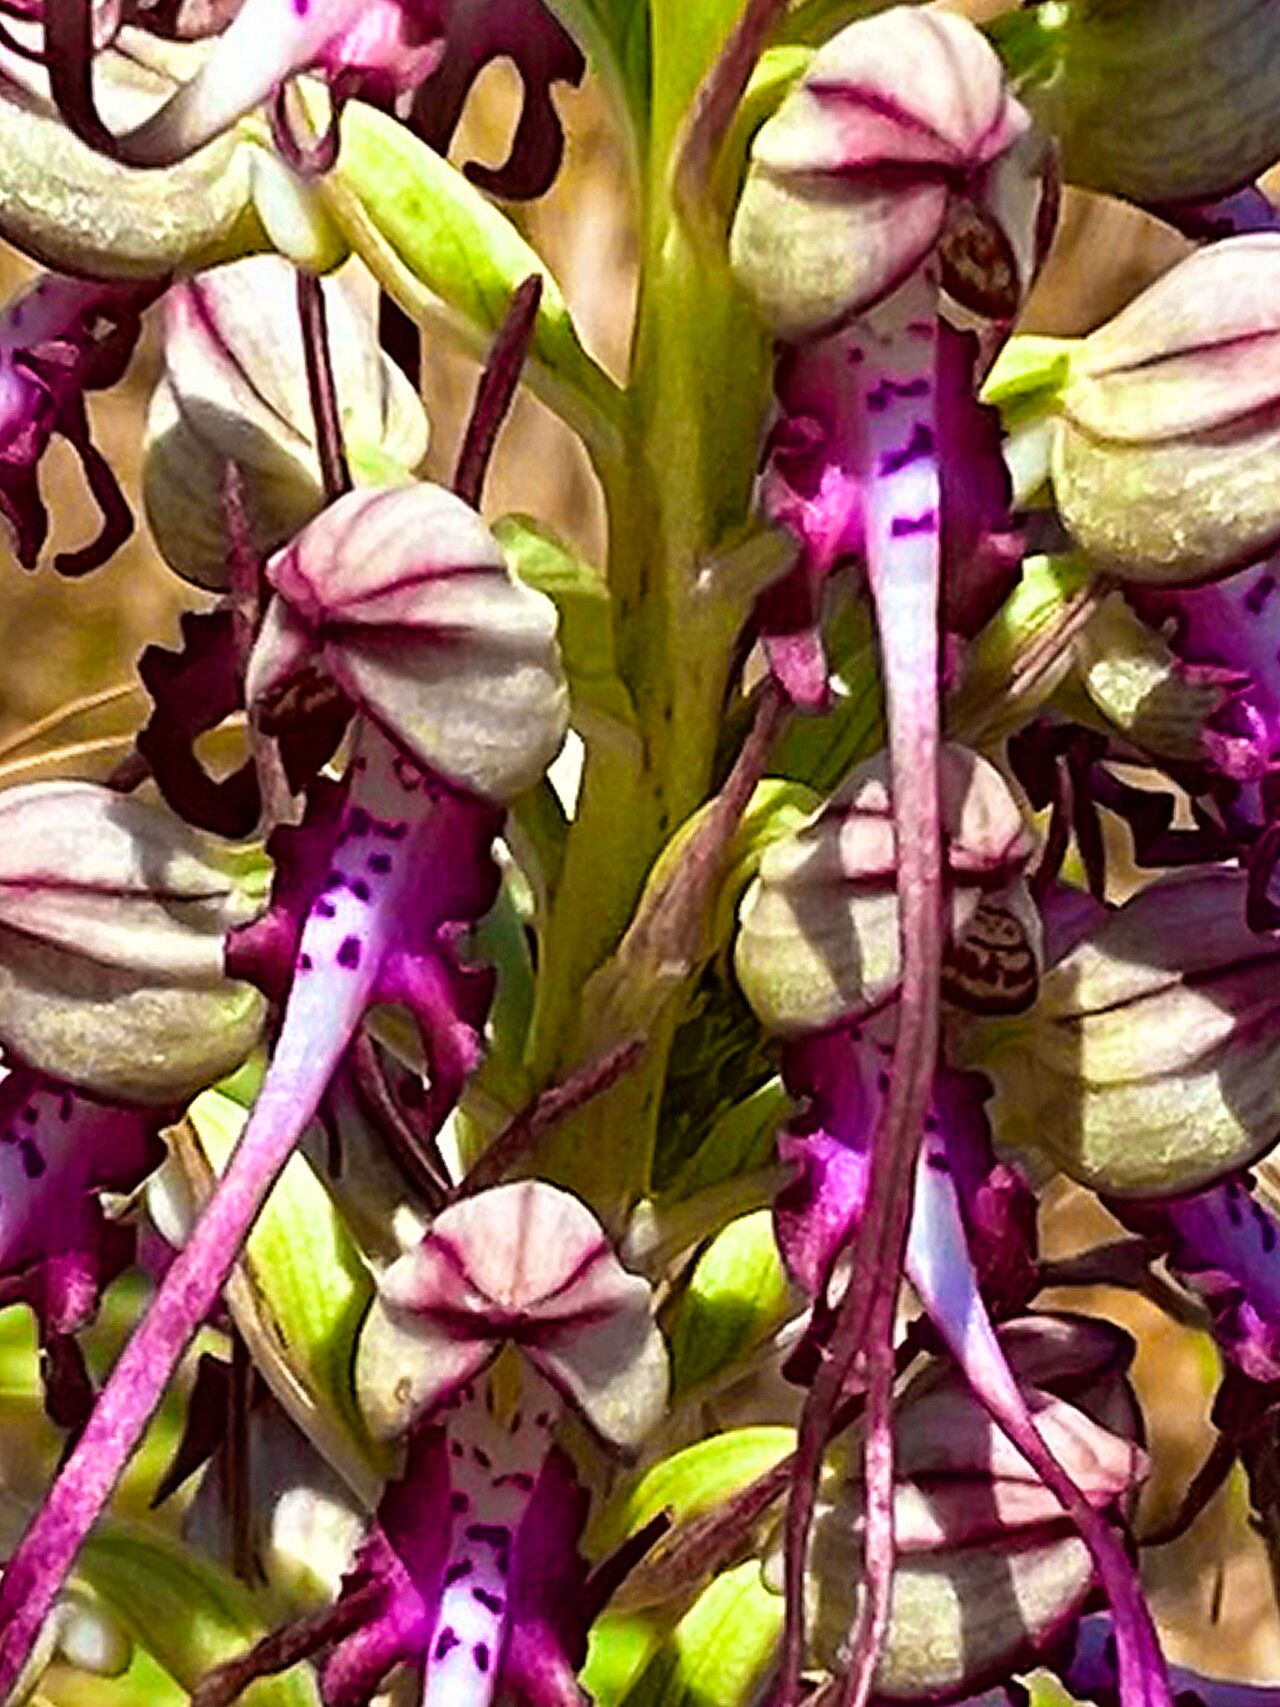
Hello fellow gardening enthusiasts! Today, we’re diving into the wonderful world of propagating Himantoglossum calcaratum. I’ve had the pleasure of growing these beauties for years, and let me tell you, their unique charm and subtle fragrance are something special. Seeing a new little ‘spur orchid’ emerge from a piece of a parent plant is incredibly rewarding. Now, I’ll be honest, Himantoglossum calcaratum isn’t quite a beginner’s ‘chuck it in the ground and forget’ type of plant. It requires a bit more attention and understanding, but that just makes the success even sweeter!
The Best Time to Start
For Himantoglossum calcaratum, the golden rule is to propagate during its dormant season. This typically falls in late autumn or early winter, after the plant has finished flowering and has begun to die back. This is when the energy is stored in the tubers, making them more robust for division or other propagation methods. Trying to propagate when it’s actively growing can stress the plant and significantly reduce your chances of success.
Supplies You’ll Need
Gathering your tools beforehand makes the whole process smoother. Here’s what I find indispensable:
- Sterile potting mix: A mix designed for orchids or a blend of perlite, fine bark, and sphagnum moss is ideal. I usually lean towards a very well-draining orchid mix.
- Sharp, sterile pruning shears or a clean knife: A clean cut is crucial to prevent disease.
- Rooting hormone (optional but recommended): A powder or gel specifically for cuttings can give a helpful boost.
- Small pots or containers: Orchid pots with good drainage are perfect.
- Watering can with a fine rose: Gentle watering is key.
- Labels: Don’t skip this! You’ll thank yourself later.
- A warm, consistently humid environment: A propagation mat or a small greenhouse can be a game-changer.
Propagation Methods
While Himantoglossum calcaratum can be a bit particular, division is generally the most successful and forgiving method for home gardeners.
Division:
- Gently excavate: Once the plant is dormant, carefully remove it from its pot. If it’s in the ground, dig around it very cautiously to avoid damaging the tubers.
- Brush away excess soil: Gently brush off as much of the old soil as you can from the root ball and tubers. You want to clearly see the tuber structures.
- Identify division points: Look for where new tubers have formed and are attached to the parent tuber system. Sometimes, you’ll see small, pencil-like sprouts already emerging.
- Make the cut: Using your sterile pruning shears or knife, carefully slice through the rhizome or tuber stem to separate the new growth. Ensure each division has at least one healthy tuber and a portion of root. If a division seems very small or weak, it might be best to leave it attached.
- Allow to callus (important!): Let the cut surfaces air dry for 24-48 hours in a well-ventilated area. This helps create a protective callus, significantly reducing the risk of rot.
- Potting up: Plant each division in its own small pot filled with your chosen well-draining mix. The top of the tuber should be just at or slightly below the surface of the soil.
- Initial watering: Water very lightly. You want the soil to be barely moist, not wet. Overwatering at this stage is the fastest way to a failed propagation.
The “Secret Sauce” (Pro Tips)
Here are a couple of things I’ve learned over the years that really seem to make a difference:
- Don’t rush the dormancy: It can be tempting to divide earlier, but waiting until the leaves have fully died back ensures the plant has stored maximum energy. Patience here pays off.
- Use gentle warmth: While not strictly necessary for division, if you ever experiment with leaf cuttings (which is much more advanced for this species), providing gentle bottom heat through a propagation mat can really encourage root development. Aim for around 70-75°F (21-24°C).
Aftercare & Troubleshooting
Once your divisions are potted up, place them in a cool, dry, and dimly lit location for a few weeks. Avoid direct sunlight. Water very sparingly – only when the potting mix feels almost dry to the touch.
The most common issue you’ll face is rot. This usually happens from overwatering or not allowing the cut surfaces to callus properly. If you notice a division looking mushy, dark, or smelling foul, unfortunately, it’s likely gone. Remove it immediately and try to salvage any healthy parts if possible. Another sign of trouble is if the tuber simply shrivels and never shows signs of new growth – this could be due to dehydration or a lack of stored energy.
A Encouraging Closing
Propagating Himantoglossum calcaratum is a journey that rewards your careful attention. Don’t get discouraged if not every attempt is a roaring success. Each season offers a new opportunity to learn and refine your technique. Enjoy the process, celebrate every tiny sprout, and soon you’ll have more of these captivating orchids to admire! Happy growing!
Resource: