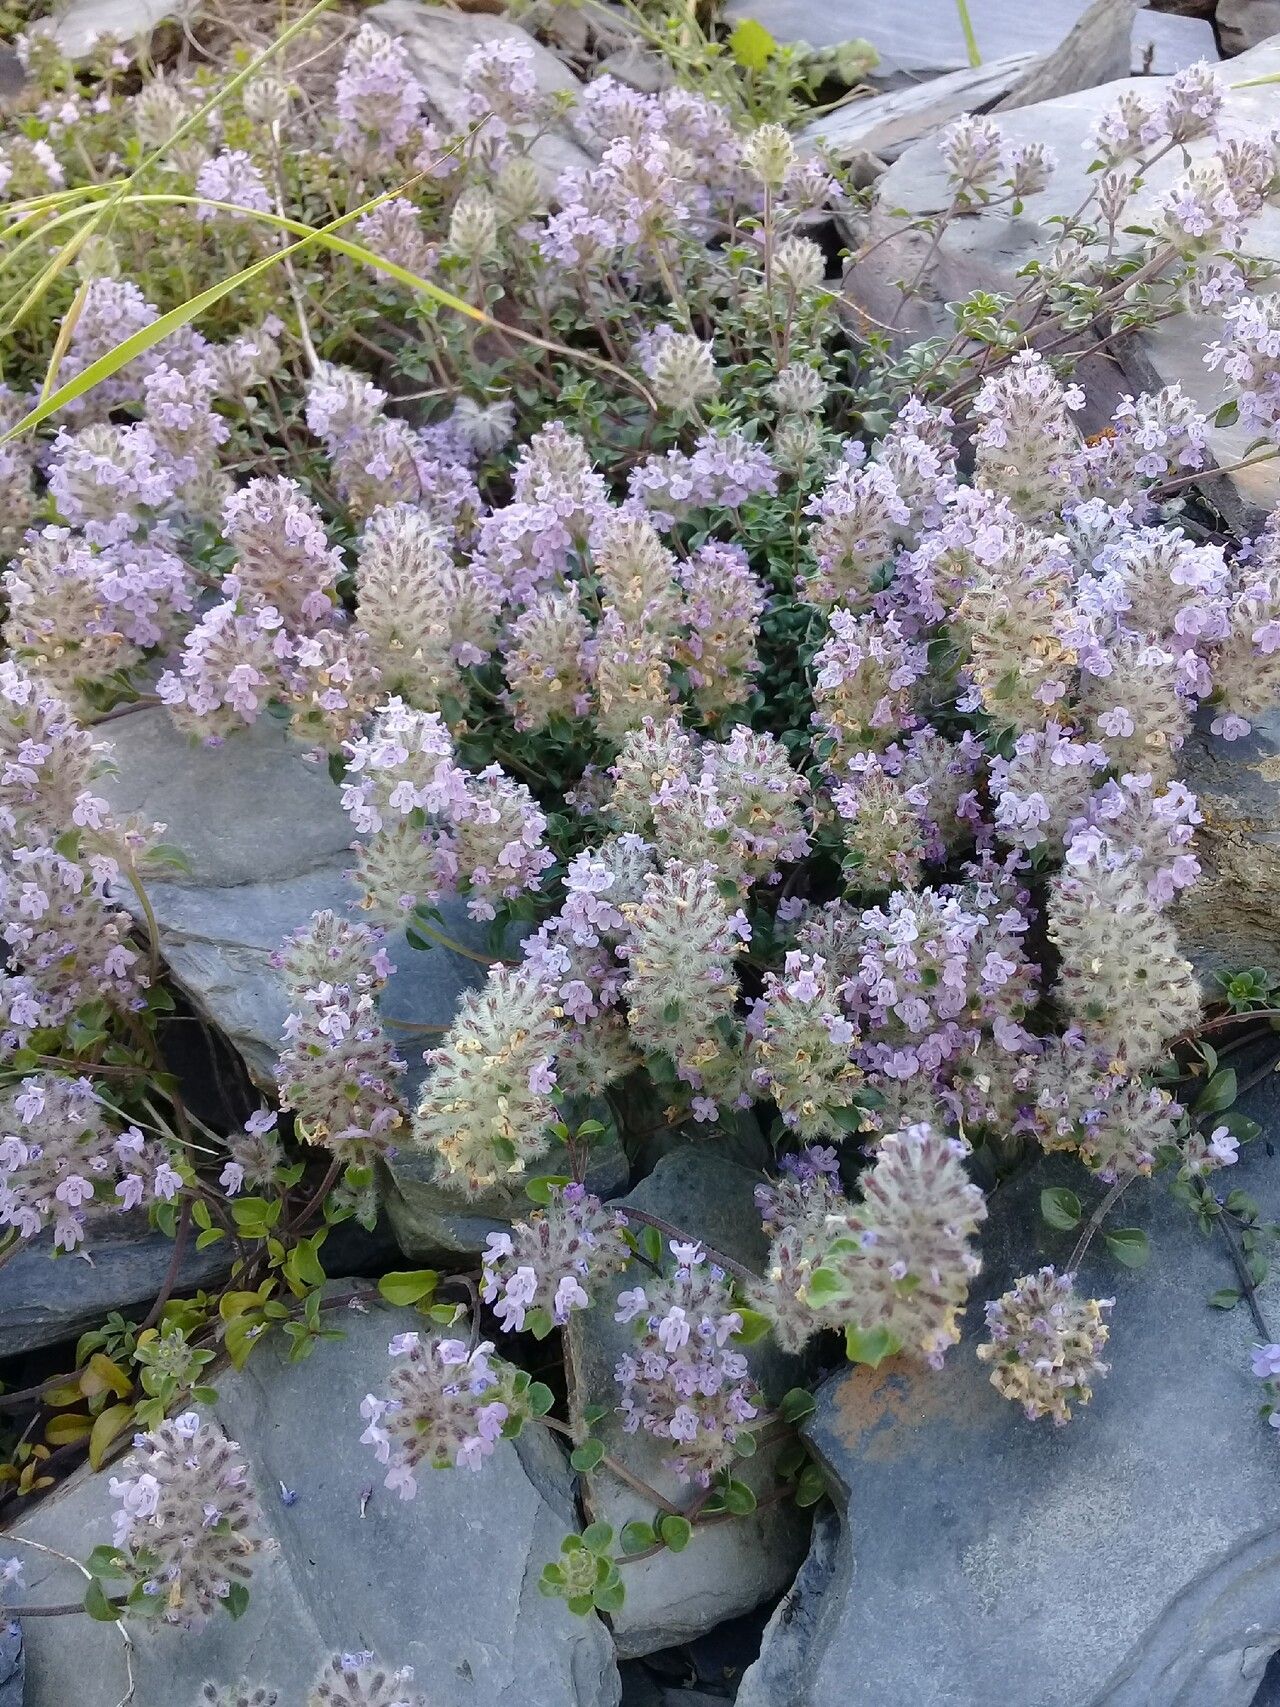
Hey there, green thumbs! If you’re anything like me, you’ve probably fallen head over heels for Ziziphora clinopodioides. It’s that delightful, fragrant little herb that brings such a cheerful splash of color and a wonderful aroma to any garden. Propagating it yourself is incredibly rewarding, and honestly, it’s a fantastic plant to get started with. You don’t need to be a seasoned pro to have success here!
The Best Time to Start
For Ziziphora, spring is your golden ticket. Aim for late spring or early summer, just as the plant is really hitting its stride in growth. You’re looking for new, non-flowering shoots – those are the ones that will root most readily. Starting then gives your new babies plenty of time to establish themselves before things get too hot or too cold.
Supplies You’ll Need
Gathering your tools helps the whole process go smoother:
- Sharp pruning shears or a clean knife: For making those crucial cuts.
- Rooting hormone (optional but recommended): Helps give cuttings a boost.
- Well-draining potting mix: A 50/50 blend of seed-starting mix and perlite works beautifully. You can also use a cacti/succulent mix.
- Small pots or trays: With drainage holes, of course!
- Clear plastic bag or propagator: To create a humid environment.
- Watering can with a fine rose: For gentle watering.
- Labels: So you remember what you planted where!
Propagation Methods
Let’s get our hands dirty! Ziziphora is wonderfully versatile.
1. Stem Cuttings (My Favorite)
This is usually the most reliable method for a good number of plants.
- Take the Cuttings: Select healthy, vibrant stems from your mature Ziziphora. You want pieces that are about 3-4 inches long. Make a clean cut just below a leaf node. This is where the magic happens for rooting. Pinch off any lower leaves that might get buried in the soil.
- Dip in Rooting Hormone: If you’re using rooting hormone, dip the cut end of the stem into the powder. Just a quick dip is all it needs. Tap off any excess.
- Plant Them: Fill your small pots with your well-draining mix. Use your finger or a pencil to make a small hole, then gently insert the cutting into the hole. Press the soil gently around the base to ensure good contact.
- Water and Cover: Water the pots thoroughly but gently. Then, cover the pots loosely with a clear plastic bag or pop them into a propagator. This traps humidity, which is key for cuttings.
2. Division (If Your Plant is Bushy)
If your Ziziphora has become a bit of a clump, division is a great way to get multiple plants.
- Dig Up the Plant: In early spring, carefully dig up the entire plant. Try to disturb the roots as little as possible.
- Gently Separate: Gently shake off excess soil. You should be able to see natural divisions in the root ball. Using your hands or a clean trowel, gently pull or cut the plant apart into sections. Each section should have roots and some leafy growth.
- Replant Immediately: Plant each division into its own pot or a suitable spot in the garden, treating it like a new plant. Water well.
The “Secret Sauce” (Pro Tips)
Here are a few things I’ve learned over the years that really make a difference:
- Avoid Leaf Rot: When you cover your cuttings with a bag, make sure no leaves are touching the plastic. If they do, they can start to rot, and that’s a fast track to disappointment. You can use small stakes to prop the bag up and away from the foliage.
- Warm Feet, Happy Roots: While not strictly necessary for Ziziphora, giving your cuttings a bit of gentle bottom heat can really speed up rooting. A simple seedling heat mat placed under the pots can work wonders. Just ensure it doesn’t dry out your soil too quickly.
- Patience with the “Dip Test”: Don’t be tempted to pull on your cuttings too soon to “check for roots.” Instead, wait until you see new leafy growth appearing on the top of the stem. This is a sure sign that roots have developed.
Aftercare & Troubleshooting
Once you see those first signs of new growth – tiny leaves unfolding – it’s time for the next phase.
- Humidity Reduction: Gradually remove the plastic bag or open vents on your propagator over a few days. You want to acclimate your new plants to normal room humidity.
- Watering Gently: Continue to keep the soil consistently moist but not waterlogged. Overwatering is the quickest way to invite trouble, particularly the dreaded root rot, which will manifest as a mushy, blackened stem base and wilting leaves. If you see this, it’s usually a goner, so prevention is key.
- Light is Good: Once roots are established, your Ziziphora babies will appreciate plenty of bright, indirect light. Avoid harsh, direct sun for the first few weeks.
Propagating Ziziphora is such a rewarding journey. It’s a chance to connect with your plants on a deeper level and to fill your garden – or a friend’s garden! – with these charming little beauties. Be patient with the process, enjoy the learning, and before you know it, you’ll have a whole patch of fragrant, happy Ziziphora! Happy gardening!
Resource:
https://identify.plantnet.org/k-world-flora/species/Ziziphora%20clinopodioides%20Lam./data