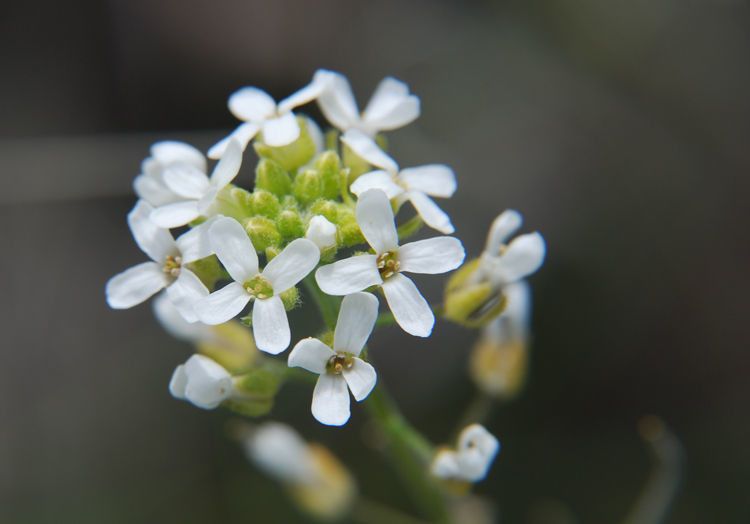
Hello, fellow plant enthusiasts! I’m so glad you’ve wandered over to my corner of the internet. Today, we’re diving into the wonderful world of propagating Sandbergia whitedii. If you’ve seen this beauty, you know its delicate, bell-shaped flowers are a true delight. Bringing more of these charmers into your life is not only incredibly rewarding, but it’s also a fantastic way to expand your garden without spending a dime. Now, I’ll be honest, Sandbergia whitedii can be a little finicky for absolute beginners, but with a bit of patience and these tried-and-true methods, you’ll be a propagation pro in no time!
The Best Time to Start
For the absolute best chance of success with Sandbergia whitedii, I like to start my propagation efforts in late spring or early summer. This is when the plant is actively growing and has plenty of energy to put into developing new roots. You’re looking for those nice, semi-hardwood stems – not the brand-new, soft, floppy growth, nor the old, woody branches. Think of it like a firm but flexible pencil; that’s the sweet spot.
Supplies You’ll Need
Before we get our hands dirty, let’s gather our tools. Having everything ready makes the process so much smoother.
- Sharp Pruning Shears or a Craft Knife: Cleanliness is key for preventing disease.
- Rooting Hormone (Optional but Highly Recommended): This gives your cuttings a real boost. Gel or powder works beautifully.
- Appropriate Potting Mix: I prefer a well-draining mix. A good blend is 50% perlite, 50% peat moss or coco coir. You can also buy specific succulent or cactus mixes that work well.
- Small Pots or Trays with Drainage Holes: Nothing fancy needed here, just something for your cuttings to call home.
- Plastic Bags or a Propagator: To create a humid environment.
- Watering Can with a Fine Rose: For gentle watering.
- Labels and a Pen: So you don’t forget what you’ve propagated and when!
Propagation Methods: Let’s Get Growing!
We have a couple of reliable ways to multiply your Sandbergia specimens.
1. Stem Cuttings: My Go-To Method
This is the most common and often the most successful way to propagate Sandbergia whitedii.
- Take Your Cuttings: Using your sharp pruning shears, snip off pieces of stem about 4-6 inches long. Make your cut just below a leaf node (where a leaf attaches to the stem).
- Prepare the Cuttings: Gently remove the lower leaves from your cuttings. You want to expose the nodes because that’s where the roots will emerge. Leave just a few leaves at the top to help the cutting photosynthesize. If the remaining leaves are very large, you can even cut them in half to reduce water loss.
- Apply Rooting Hormone: If you’re using rooting hormone, lightly dip the cut end into the powder or gel. Tap off any excess.
- Plant Your Cuttings: Fill your small pots with your well-draining potting mix. Make a small pilot hole with a pencil or your finger. Insert the cut end of the cutting into the hole, ensuring you’ve covered at least one node with soil. Gently firm the soil around the stem.
- Water Gently: Give your newly planted cuttings a light watering. You want the soil to be moist but not soggy.
- Create Humidity: Cover the pot with a clear plastic bag or place it in a propagator. This will trap moisture and prevent the cuttings from drying out. Make sure the bag doesn’t immediately touch the leaves; you might need to prop it up a bit.
2. Water Propagation: A Visual Treat
While I tend to favor soil for Sandbergia, water propagation can work, though it requires a bit more attention.
- Take Your Cuttings: Follow the same steps as above for selecting and preparing your cuttings.
- Place in Water: Find a clean glass or jar and fill it with clean water. Place 1-2 cuttings into the water, ensuring at least one leaf node is submerged.
- Change Water Regularly: This is crucial! Change the water every 2-3 days to keep it fresh and prevent rot.
- Watch for Roots: You’ll be able to see the roots developing, which is incredibly satisfying!
The “Secret Sauce” (Pro Tips)
Here are a few little tricks I’ve learned over the years that really make a difference:
- Don’t Let the Leaves Touch the Water: In water propagation, if the leaves are submerged, they are much more prone to rot. Keep those upper leaves high and dry! Even in soil, having leaves resting directly on wet soil is a recipe for trouble.
- Bottom Heat is Your Friend: Sandbergia whitedii loves a little warmth from below. If you have an old seedling heat mat, placing your propagation pots on it can significantly speed up root formation. It mimics the warmth of a parent plant’s soil.
- Patience is a Virtue (and a Necessity!): Don’t be discouraged if you don’t see roots immediately. For Sandbergia, it can take anywhere from 4-8 weeks, sometimes even longer, for roots to develop sufficiently. Trust the process!
Aftercare & Troubleshooting
Once you spot those precious new roots, it’s time for a little extra TLC.
- Transitioning to Soil (for water-propagated cuttings): Once your water roots are at least an inch long, you can gently transplant them into your well-draining potting mix. Treat them like you would newly planted cuttings, keeping the soil consistently moist but not waterlogged until they establish.
- Acclimatizing: Gradually remove the plastic bag over a week or two to help your new plants adjust to the ambient humidity.
- When to Fertilize: I wait until I see new growth before I even think about fertilizing. When I do, I use a diluted liquid fertilizer at half strength.
- Common Issues:
- Rot: This is the most common problem, usually caused by too much moisture and poor drainage. If a cutting feels mushy or turns black and slimy, it’s likely rotted. Discard any rotten material immediately.
- Wilting: If your cuttings are wilting, it could be that they are drying out too quickly or the soil is too wet and has caused root rot. Check the soil moisture and adjust as needed. Ensure you have good humidity.
A Little Encouraging Word
Propagating plants is a journey of observation and learning. Sometimes things don’t work out, and that’s perfectly okay! The beauty of propagation is that you get to try again. Don’t be afraid to experiment and, most importantly, enjoy the process of nurturing these little lives into flourishing new plants. Happy gardening!
Resource:
https://identify.plantnet.org/k-world-flora/species/Sandbergia%20whitedii%20(Piper)%20Greene/data