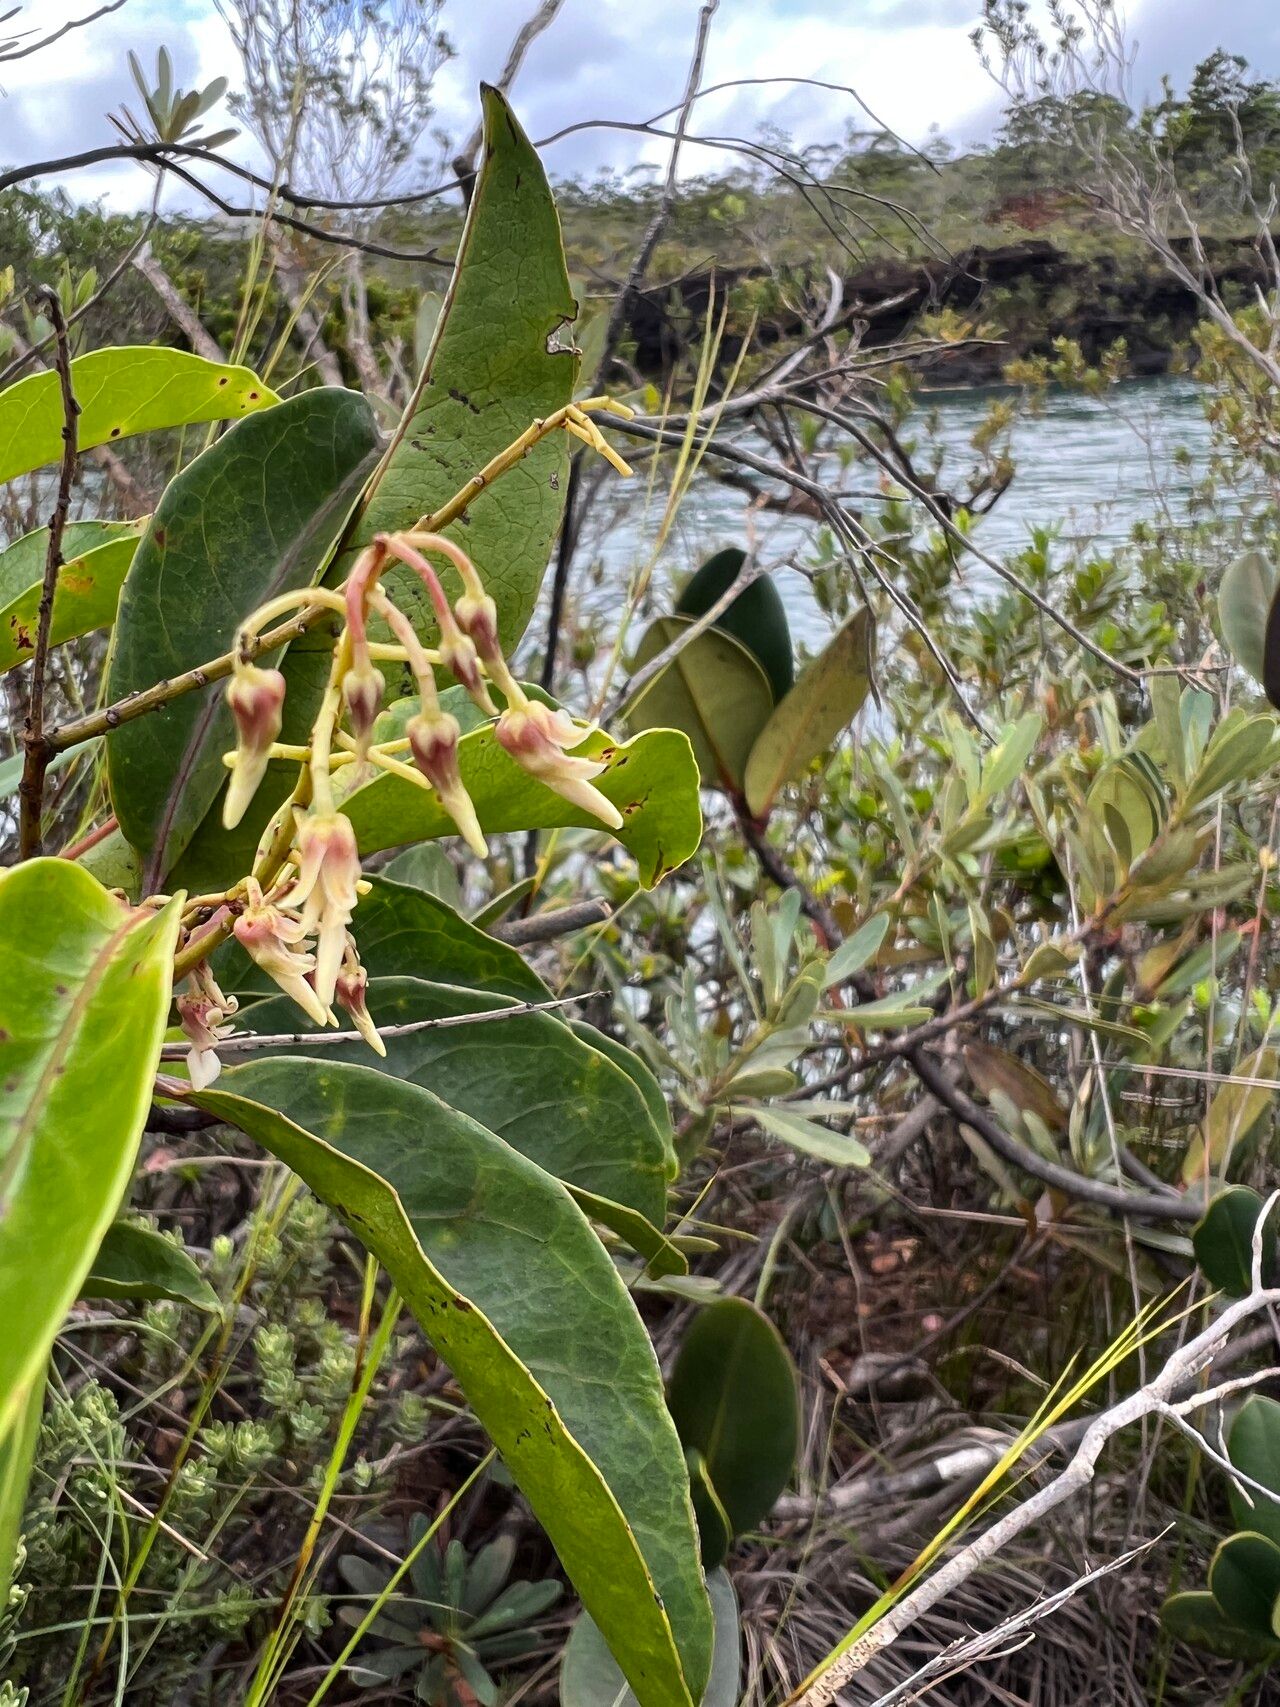
Hello fellow garden enthusiasts! Today, we’re diving into the wonderful world of propagating Agatea longipedicellata. If you’re charmed by its delicate, star-shaped blooms and lush foliage (and who wouldn’t be?), you’re in for a treat. Growing these beauties from scratch is incredibly rewarding. While I’d say Agatea longipedicellata is moderately easy to propagate, a little know-how goes a long way. With a bit of care and patience, you’ll be enjoying more of these lovely plants in no time.
The Best Time to Start
The sweet spot for propagating Agatea longipedicellata is spring or early summer. This is when the plant is actively growing and has plenty of energy to put into developing new roots. Waiting until after the plant has finished its main flush of flowering can also work well, as long as the weather is warm and consistent. You’re looking for healthy, new growth – not woody, old stems.
Supplies You’ll Need
To set yourself up for success, gather these essentials:
- Sharp Pruning Shears or Scissors: Clean tools are crucial for making clean cuts and preventing disease.
- Well-Draining Potting Mix: I like a blend of equal parts peat moss, perlite, and a touch of coarse sand. A good pre-made succulent or seed-starting mix also works wonders.
- Small Pots or Trays: Clean pots, at least 4 inches deep, are ideal.
- Rooting Hormone (Optional but Recommended): A good rooting powder or gel can significantly speed up the process.
- Clear Plastic Bag or Dome: To create a humid environment.
- Spray Bottle: For misting.
- Watering Can: For gentle watering.
Propagation Methods
Let’s get our hands dirty! The most reliable way to propagate Agatea longipedicellata is through stem cuttings.
- Select Your Cuttings: Choose healthy, non-flowering stems that are at least 4-6 inches long. Look for stems that have some new growth but aren’t too soft and floppy.
- Make the Cut: Using your clean pruning shears, make a clean cut just below a leaf node (where a leaf attaches to the stem). This is where roots are most likely to form.
- Prepare the Cuttings: Gently remove the leaves from the bottom half of the stem. If the remaining leaves are very large, you can trim them in half horizontally to reduce water loss.
- Apply Rooting Hormone (Optional): Dip the cut end of the stem into your rooting hormone powder or gel, tapping off any excess.
- Potting Up: Fill your clean pots with your prepared potting mix. Make a small hole in the center of the soil with your finger or a pencil.
- Insert the Cuttings: Place the prepared cutting into the hole, ensuring the leaf nodes that you removed the leaves from are covered by soil. Gently firm the soil around the stem.
- Water Gently: Water the soil thoroughly but gently. You don’t want to disturb the cuttings.
- Create Humidity: Place your pots into a clear plastic bag, sealing it loosely, or cover them with a clear plastic dome. This creates a miniature greenhouse effect.
- Find a Suitable Spot: Place the pots in a bright, indirect light location. Avoid direct sunlight, which can scorch the delicate cuttings.
The “Secret Sauce” (Pro Tips)
Here are a few tricks I’ve picked up over the years:
- Bottom Heat is Your Friend: If you have a seedling heat mat, placing your pots on it can make a huge difference. A little extra warmth from below enthusiastically encourages root development.
- Don’t Drown Them: While humidity is key, don’t let the leaves of the cuttings sit in standing water inside the bag. This can lead to rot. If you see condensation pooling excessively, open the bag for a few hours to let it air out.
- Patience is a Virtue (Especially with Water Propagation): While I primarily recommend soil for Agatea, if you are tempted to try water propagation, ensure no leaves are submerged. Only the stem should be in the water. Change the water every few days to keep it fresh. Honestly, though, soil propagation usually yields a stronger plant faster for this particular species.
Aftercare & Troubleshooting
Once you start to see signs of new growth – little leaves unfurling or a gentle tug on the stem feeling resistant – you know roots are forming!
- Gradual Acclimation: Gradually increase the ventilation by opening the plastic bag or dome for longer periods each day. This helps your new plant adjust to drier air.
- Watering: Once roots are established, water when the top inch of soil feels dry. Aim for consistently moist, but not soggy, soil.
- Fertilizing: Wait until you see significant new growth before feeding. Start with a diluted, balanced liquid fertilizer, perhaps half-strength, once a month.
The most common issue you might encounter is rot. If your cuttings turn black or mushy, it’s usually a sign of too much moisture and not enough air circulation. If this happens, unfortunately, the cutting is lost. Don’t be discouraged! Just clean your pot, start fresh with a new cutting, and adjust your watering and humidity levels. Another sign of trouble is wilting that doesn’t perk up after watering – this can also indicate root rot or a lack of root development.
A Gentle Encouragement
Propagating plants is a journey, not a race. Some cuttings will take off beautifully, while others might need a bit more time or might not make it. Every attempt is a learning opportunity. Be patient with your little Agateas, offer them consistent care, and most importantly, enjoy the process of coaxing new life from your existing plants. Happy propagating!
Resource: