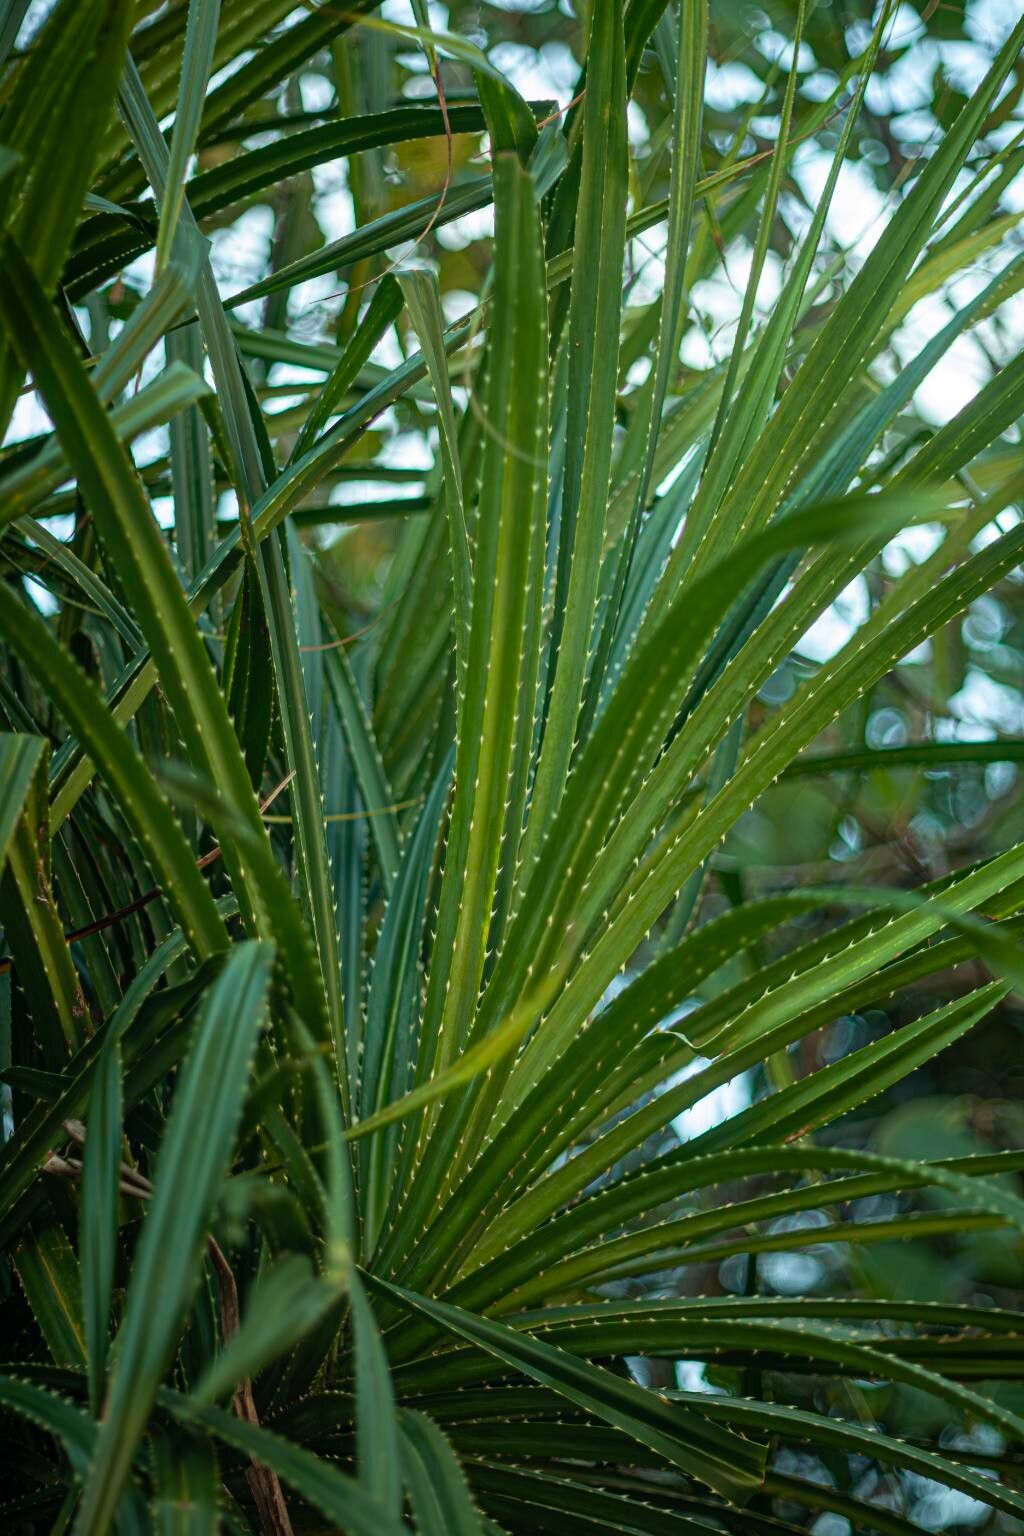
Oh, hello there! Come on in, grab a mug. I see you’re eyeing up that gorgeous Pandanus odorifer. Smart move! Those spiraling leaves, the intriguing scent… it’s truly a showstopper, isn’t it? And the best part? You can bring that beauty into your own home, or even gift it to friends, by propagating your own. It’s incredibly rewarding, watching a tiny piece of your beloved plant transform into something new and vibrant.
Now, about the “easy or challenging” part. For Pandanus odorifer, I’d say it’s more on the moderately easy side. It’s not quite as foolproof as a pothos, but with a little patience and these tips, you’ll be celebrating success before you know it. Don’t be intimidated; let’s get your hands dirty!
The Best Time to Start
My favorite time to get started with Pandanus propagation is in late spring or early summer. The days are getting longer, the temperatures are warming up, and the plant is usually in its most active growth phase. This means your cuttings will have a bit more energy to put into developing roots.
Supplies You’ll Need
Here’s what you’ll want to have on hand before you begin. It’s always good to be prepared!
- Healthy, established Pandanus odorifer plant: This is your mother plant, so choose one that’s looking robust and disease-free.
- Sharp, clean pruning shears or a sharp knife: A clean cut is crucial to prevent disease.
- Rooting hormone (optional but recommended): This can give your cuttings a real boost. Look for one with IBA.
- Potting medium: I like a well-draining mix. A good blend is 50% perlite and 50% peat moss or coco coir. You can also use a commercial seedling mix.
- Small pots or containers: Terracotta pots are great because they “breathe” and help prevent waterlogging.
- Water: For cleaning tools and for bottom watering later.
- Gloves (optional): Pandanus can have sharp leaf edges.
Propagation Methods
Let’s dive into the two main ways I find success with Pandanus odorifer.
Method 1: Offshoot Division
This is often the easiest and most successful method for Pandanus, as the plant naturally produces small plantlets, or “pups,” around its base.
- Inspect your mother plant: Gently clear away some of the soil around the base of your Pandanus. You’re looking for those little baby plants that have started to emerge from the rhizomes.
- Gently separate the offshoots: Use your sharp knife or shears to carefully cut the offshoot away from the parent plant, making sure to get a good portion of its roots attached if possible. If the offshoot is still very small, it might not have substantial roots yet, and that’s okay.
- Prepare the offshoot: If the offshoot has large leaves, you can trim them back by about half. This reduces water loss.
- Plant the offshoot: Fill your small pot with your prepared potting mix. Make a small well in the center and place the offshoot in the pot, ensuring the base is buried just enough to support it. Gently firm the soil around it.
- Water lightly: Give it a gentle watering to settle the soil.
Method 2: Stem Cuttings (for larger plants)
This method is great if your plant is quite large and has produced thicker stems arising from the base.
- Identify a suitable stem: Look for a mature stem that is at least 6-8 inches long and has a good number of leaves.
- Make the cut: Using your clean, sharp shears, make a cut just below a leaf node (where a leaf attaches to the stem). Try to make your cut as clean as possible.
- Prepare the cutting: Remove the lower leaves, leaving just a few at the top. If your cutting is very long, you can trim the top leaves by half, similar to the offshoots.
- Apply rooting hormone (optional): Dip the cut end of the stem into your rooting hormone powder, tapping off any excess.
- Plant the cutting: Fill your pot with your well-draining potting mix. Make a hole with your finger or a pencil and insert the cut end of the stem, ensuring that at least one or two leaf nodes are buried in the soil. Gently firm the soil around it.
- Water gently: Water to moisten the soil.
The “Secret Sauce” (Pro Tips)
Here are a couple of things I’ve learned over the years that really make a difference:
- Don’t drown them! This is probably the biggest mistake beginners make. For both offshoots and stem cuttings, the key is slightly moist, not soggy, soil. Let the top inch of soil dry out between waterings. For stem cuttings, especially, overwatering at this stage is a fast track to rot.
- A little warmth goes a long way. While you don’t need a full-blown greenhouse, these guys appreciate a bit of warmth from below. If you have a heat mat designed for seedlings, placing your pots on top of it can significantly speed up root development. If not, just try to keep them in a warm spot in your home, away from drafts.
Aftercare & Troubleshooting
Once your cuttings are planted, patience is your best friend.
- Rooting time: Offshoots usually start showing signs of establishment (new leaf growth) within 4-8 weeks. Stem cuttings can take longer, sometimes up to 12 weeks or more, before you see significant growth, which is a good indication of roots. You can gently tug on the cutting, and if there’s resistance, it’s likely rooting.
- Signs of failure: The most common problem is rot. If your cutting or offshoot starts to look mushy at the base, or if the leaves turn yellow and drop off rapidly, it’s a sign of too much moisture or a fungal issue. Unfortunately, at this point, it’s usually best to discard it and try again. Another sign of stress is wilting, which could be due to lack of roots or the soil being too dry.
A Encouraging Closing
So there you have it! Propagating Pandanus odorifer is a wonderful way to extend your love for this unique plant. Don’t get discouraged if your first attempt isn’t perfect; gardening is all about learning and experimenting. Just remember to be patient, create the right conditions, and enjoy the magical process of watching life spring forth. Happy propagating!
Resource:
https://identify.plantnet.org/k-world-flora/species/Pandanus%20odorifer%20(Forssk.)%20Kuntze/data